 Keep
Heat Pump Fan Not Spinning? Find the Cause Before the Compressor Overheats
 Daniel Mercer · Editor & Researcher·
Published November 16, 2026·
Updated November 16, 2026
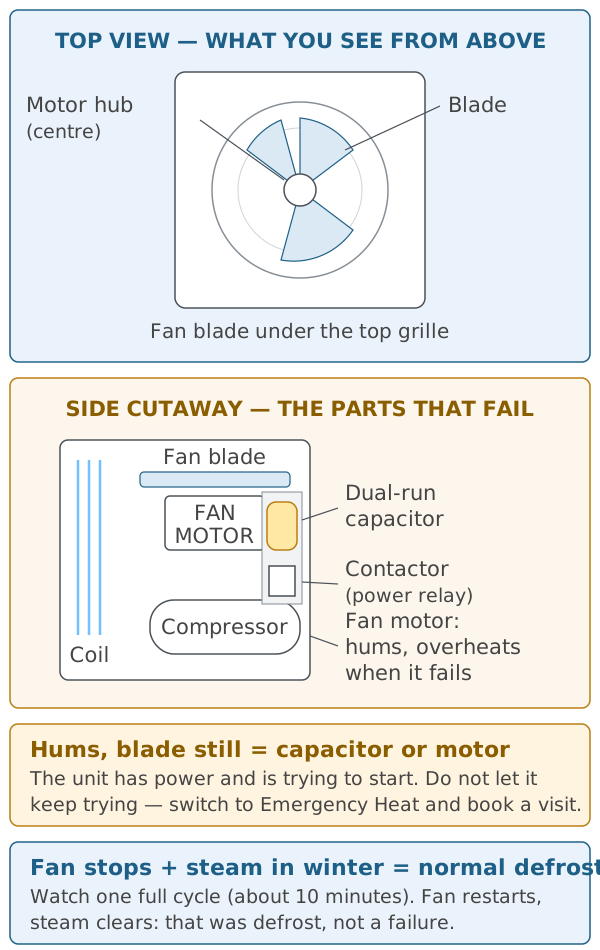
It is one of the most unsettling sights in a first year of home ownership. You step outside, maybe taking out the trash, maybe just enjoying the quiet, and you notice the heat pump sounds wrong. There is a hum, a low electrical drone, but the big fan on top of the unit, the one that is supposed to be a blur whenever the system runs, is completely still. Or you catch it from a window: the unit is running, you can hear it, and the blade is not turning. Your mind goes straight to the expensive place. A dead system. A five-figure replacement. A cold house by the weekend.
Take a breath, because the reality is usually much smaller than the fear. The outdoor fan is driven by a short list of parts, most of them are among the cheapest components in the entire system, and the single most common cause of this exact symptom is a part that costs less than a nice dinner out and takes a technician under an hour to replace. There is also a real chance, if it is winter, that nothing is wrong at all and you have caught the machine in the middle of a defrost cycle, doing something that looks broken and is actually maintenance.
This guide walks the whole problem in the order you should work it. First, the one rule that protects the expensive part of your system while you figure things out. Then the timed test that separates a normal defrost from a dead fan, so you do not pay a service fee to be told your heat pump was behaving. Then a triage table that reads the sounds and behaviour you can observe from outside the unit and points each pattern at its likely cause. Then the checks you can safely do yourself, the causes in real depth, what a technician will do about each one, how long it takes, what it costs, and what a proper written quote should say. By the end you will know what your fan is telling you, and roughly what the fix is worth before anyone opens a toolbox.
The stop rule: never keep running a compressor against a dead fan
Before any diagnosis, one rule, stated as plainly as it deserves: if the outdoor fan is not spinning and the unit is not in a brief defrost cycle, stop running the outdoor unit. Switch the thermostat to Emergency Heat if you need warmth, or switch the system off entirely in mild weather. Then diagnose.
Here is why the rule is not negotiable. The fan is not an accessory. It is the only thing moving outdoor air across the outdoor coil, and that airflow is how the refrigerant does its job. In cooling mode, the outdoor coil has to dump the heat pulled from your house into the outdoor air. With no fan, the heat has nowhere to go. Pressures inside the system climb, the compressor runs hotter and hotter, and it keeps doing so until a high-pressure switch or an internal thermal limit shuts it down, or until the heat starts cooking the compressor's oil and windings. Compressors are built tough, but they are built to reject heat, not to sit in it.
In heating mode the failure runs the other way but ends in the same place. The outdoor coil has to absorb heat from the outdoor air, and with no airflow it simply gets colder and colder. Frost builds fast and thick, the refrigerant cannot pick up enough heat, pressures sag, and the compressor labours under conditions it was never meant to sustain, while your house gets little or no heat for the electricity being burned. Owners sometimes discover this version as a unit entombed in ice with a silent fan on top, which is two problems wearing one coat.
The economic version of the same point is the one to remember. Every part that can stop your fan, the capacitor, the contactor, the motor itself, the control board, costs somewhere between about $120 and $900 to have replaced. A compressor replacement costs several thousand dollars, and on an older system it usually triggers a replace-the-whole-unit conversation instead. Running the system "just for tonight" on a dead fan is gambling the second number to avoid dealing with the first. The hum you hear when a fan will not start is the sound of that gamble being offered. Decline it. Emergency Heat, which runs the indoor electric strips with the outdoor unit completely idle, exists for exactly this situation, and using it for a few days while you wait for a repair is what it is for.
One refinement, because it matters in winter: a stopped fan during defrost is the exception, and it is brief. That is the next section, and it comes with a clock. Outside that narrow window, the rule stands without exceptions.
The safety note that decides what you may open
Everything you are asked to check in this guide happens outside the outdoor unit's electrical panel, with your eyes, your ears, and the power switches. That boundary is deliberate, and it comes down to one component: the dual-run capacitor.
A capacitor is, in effect, a small rechargeable battery for a jolt of power. It stores electrical energy and releases it in a kick to start the fan motor and the compressor. The part that matters for your safety is that it can hold its charge after the power is disconnected. Pulling the disconnect and flipping the breaker make the unit safe to touch in most respects, but a charged capacitor sitting in the panel can still deliver a nasty shock to someone who reaches in and bridges its terminals, which is why technicians discharge capacitors with a resistor as a routine step before handling them, every time, even on units that have been off for days.
So the division of labour in this guide is simple and firm. You will check the thermostat, the breakers, the disconnect, and the debris, all from outside. You will watch, listen, time, and observe, and those observations will genuinely narrow the cause down, sometimes to a single part. You will not remove the unit's access panel, touch the capacitor, or test anything with a meter inside that compartment. That is not false modesty about your abilities; it is the same line the manufacturers draw, and it is the line that keeps a $150 part from becoming an injury. When the guide reaches the parts inside the panel, it describes what the technician tests and why, so you can follow the diagnosis and judge the quote, which is the owner's real job in any repair.
First, rule out defrost: the 10-minute test
If it is winter and your heat pump is heating, a stopped fan may be the most normal thing your system does all day. In heating mode, the outdoor coil runs colder than the outdoor air, moisture freezes onto it, and the system periodically clears that frost with a defrost cycle: the reversing valve shifts with a whoosh, the fan stops on purpose so the coil can get hot, steam pours off as the frost melts, and a few minutes later the valve shifts back and the fan restarts. Owners routinely discover defrost before anyone explains it, and it frightens a good number of them into service calls for a healthy machine. Our companion guide, "Heat Pump Defrost Cycle: Steam, a Whoosh and a Blast of Cold Air — Explained," walks the full cycle minute by minute. This section is the shorter tool: a timed observation that tells you whether what you are looking at is defrost or a dead fan.
Do it exactly like this.
Step 1: Note the time and do not touch anything. When you first see the stopped fan, look at your phone and note the time. Do not switch modes, do not cycle the thermostat, do not reset breakers. Every interruption restarts the story and destroys the evidence.
Step 2: Look and listen for the defrost signature. During defrost you should see or hear some combination of: steam or white vapour rising off the unit (melted frost flashing into cold air), the compressor still running (a steady mechanical hum, deeper than the electrical drone of a stalled motor), frost visibly thinning on the coil, and water dripping or trickling underneath. If the house has auxiliary heat, the thermostat may show AUX during these minutes, which is the system tempering the indoor air while the heat pump is busy melting frost.
Step 3: Give it one full cycle: about 10 minutes. A normal defrost lasts roughly 2 to 15 minutes. Ten minutes of patient watching covers the great majority of cycles. Stay close enough to hear the ending.
Step 4: Read the result. The cycle ends with a whoosh as the valve shifts back, and the fan restarts. Steam stops. Warm air returns at the vents. That was defrost, full stop. Nothing is wrong, nothing needs booking, and you have just saved yourself a diagnostic fee. Note roughly how long it lasted; if you ever do need a technician, "defrosts run about six minutes and the fan always restarts" is genuinely useful information.
The failure result looks like this: 15 to 20 minutes pass with the fan still stopped. There is no steam, or the steam ended long ago and the fan never came back. The hum continues unchanged, or the unit has gone silent without ever restarting the blade. The coil is frosting thicker, not clearing. That is not a cycle; that is a fan that cannot run, and the rest of this guide is for you. Switch to Emergency Heat and keep reading.
Two edge cases worth naming. First, in summer there is no defrost in cooling mode, so a stopped fan on a running unit in July is a fault, immediately, with no test needed. Second, a fan that stops and restarts repeatedly every few minutes all day is not healthy defrost either; defrost intervals in frosty weather are usually 30 to 90 minutes of heating apart. Constant stopping is a symptom, and it appears in the triage table below.
Read the symptom: the sound-and-behaviour triage table
A fan that will not spin is one symptom with several causes, and the cheapest way to narrow them down is to pay close attention to what the unit is doing besides not spinning. Stand near it (outside the fence line of common sense: look and listen, touch nothing inside), run through the checks in the next section so the unit is genuinely being called to run, and match what you observe to a row.
| What you observe | What it most likely means |
|---|---|
| Steady hum, blade completely still, unit feels like it is straining | The fan motor has power but cannot start. The dual-run capacitor has weakened or failed, or the motor's bearings have seized. Capacitor is the more common and cheaper answer. |
| Total silence, no hum, nothing running at all | No power or no call. A tripped breaker, a pulled or failed disconnect, a contactor that is not closing, a thermostat that is not calling, or a board that has shut the unit down on a fault. Start with the power checks below. |
| Fan spins, but slowly and weakly, and the unit struggles | A capacitor dying by degrees, a motor with worn bearings dragging, or low voltage reaching the motor. Slow is a warning, not a reprieve: airflow is already short. |
| Fan starts, runs a few minutes, then stops while the compressor keeps going (outside defrost) | A motor overheating and cutting out on its internal thermal limit, or a board or sensor fault interrupting the fan call. The motor cools, resets, and repeats, which is why the pattern cycles. |
| Fan spins fine, but the compressor is silent and the air is not heating or cooling | The problem is not the fan at all. Power is reaching the unit and the fan circuit works; the compressor side (its half of the capacitor, the contactor's other pole, or the compressor itself) is where the diagnosis goes next. |
| Fan stops briefly with steam in winter, then restarts on its own | Normal defrost. See the 10-minute test above. No fault, no call. |
| Fan never starts and you also smell burning or see a breaker trip when the unit tries | An electrical fault with teeth: a shorted motor, a failed capacitor venting, or damaged wiring. Stop, switch off at the breaker, and put this at the top of the urgency list. |
Two habits make this table work better. First, observe for a full minute or two rather than glancing; several patterns (starts-then-stops, defrost ending) only declare themselves over time. Second, write down what you saw in plain words, with the outdoor temperature and the time. "Hums, blade still, 38 degrees, 7 p.m., no steam" is a sentence a technician can do something with before the panel even comes off, and it protects you, because a diagnosis that matches your written observation is a diagnosis you can trust.
The checks you can safely do yourself, in order
These five checks cost nothing, need no tools beyond a phone torch, and between them they clear away every cause that does not require a technician. Do them in this order, because the order is the logic: confirm the system is being asked to run, confirm it has power, then confirm nothing physical is stopping the blade.
Check 1: Confirm the thermostat is actually calling. A surprising share of "dead fan" scares are a system that is simply off duty. Look at the thermostat: it should show Heat or Cool (not Off, and not Emergency Heat, which idles the outdoor unit entirely), with a setpoint far enough from the room temperature that a call is definitely active, at least 3 degrees. If someone in the house switched to Emergency Heat during an earlier scare and forgot, your outdoor unit will sit silent and innocent indefinitely. While you are there, if the thermostat display is blank, the problem may be a tripped indoor breaker or a failed thermostat, and the outdoor unit is a bystander.
Check 2: Check both breakers, because a heat pump has two. This is the detail that trips up almost every first-time owner. Your system is really two machines: an outdoor unit and an indoor air handler, and each has its own breaker in your electrical panel, typically labeled separately (and sometimes not labeled at all, which is a small weekend project worth doing with a helper and a phone). A tripped outdoor-unit breaker silences the fan and compressor while the indoor blower keeps blowing air, which feels exactly like a system that is running but broken. A breaker that has tripped may sit halfway between on and off rather than fully off; the correct reset is to push it firmly to Off first, then back to On. If it trips again immediately or within minutes of the unit starting, stop resetting it. A breaker that keeps tripping is reporting an electrical fault, and that is a same-day call, not a persistence contest.
Check 3: Check the outdoor disconnect. Near the outdoor unit, usually on the wall of the house within sight of it, there is a disconnect box: a pull-out block, a lever, or a small breaker in a weatherproof enclosure. It exists so a technician can kill power at the unit, and it is also a thing that gets pulled during other work and forgotten, knocked, or failed by corrosion and weather. With the thermostat calling, confirm the disconnect is fully seated or switched on. If it is a pull-out type, it should be firmly home (and inserted the right way up; some blocks can be reinserted in an "off" orientation deliberately). Do not go beyond this: if the disconnect looks scorched, melted, or damaged, leave it alone and say so when you call.
Check 4: Clear the debris, outside and (gently) in. Turn the system off at the thermostat for this one. Leaves, grass clippings, cottonwood fluff, and wind-blown rubbish pack against the coil and collect inside the unit around the fan. A blade physically jammed by a fallen stick or a mat of debris is a rare cause of a stopped fan, but it is the only cause on the list you can fully fix yourself, so it earns its check. Clear everything within about two feet of the unit, keep shrubs trimmed back, and look down through the top grille: if you can see an obstruction resting on or through the blade, and you can lift it out with the power off and without reaching past the grille, do so. Then restore power and see whether the fan starts. Anything that requires removing the grille or the panel is where this check ends.
Check 5: Spin the blade by hand, power off, and feel it. With the system off at the thermostat and the disconnect pulled or the breaker off, use a long stick through the grille to nudge the blade, the same stick that appears in the next section. A healthy blade spins freely and coasts, smooth and quiet, for several seconds. A blade that feels gritty, stiff, notchy, or that stops dead the moment you stop pushing is telling you the motor's bearings are worn or seizing, which moves the motor to the top of the suspect list before anyone tests a single wire. A blade that spins beautifully by hand but will not start under power points the other way, toward the capacitor and the electrical supply. This ten-second test, reported accurately, is worth real money in diagnostic time.
If all five checks pass and the fan still will not run, you have done the owner's work completely and correctly. The cause is inside the electrical compartment, and the rest of this guide explains what it is and what fixing it involves, so you can have an informed conversation with the person who fixes it.
The stick question, answered honestly
Every forum thread about a stopped heat pump fan contains the same advice: poke the blade with a stick, and if it starts spinning, it is the capacitor. The advice survives because it is built on a true observation, and it deserves a more careful treatment than it usually gets.
The true part: a fan motor with a weak capacitor often cannot start itself but can run perfectly well once it is moving. The capacitor's job is the starting kick. Give the blade a push at the moment the motor is humming and trying, and the motor may catch and spin up to full speed, then run normally for the rest of the cycle. As a diagnostic, that is genuinely informative. It separates "motor cannot start" (capacitor, most likely) from "motor cannot run" (the motor itself, or no proper power), and those are different repairs at different prices.
The limits matter as much. First, it is a test you run once, to learn the answer, not a technique for getting through the week. A motor that needs a push needs one every single cycle, and between pushes it sits humming and heating, which is the stop-rule violation from the top of this guide, repeated on a schedule. Second, the method has rules: a long wooden or plastic stick, never metal, never your fingers, pushed through the grille from outside, with your face and hands well clear, because a blade that catches will be at full speed instantly. Third, interpret the failures correctly too. A blade that will not catch even with a push, or that catches and dies within minutes, is not exonerated or condemned by the stick; it simply means the answer is deeper in, and the diagnostic visit is next.
Used that way, once, carefully, and reported to the technician ("it starts with a push and then runs fine"), the stick test is legitimate owner work. Used as a lifestyle, it is how a cheap capacitor takes an expensive motor with it.
The causes in depth
With defrost ruled out and the free checks done, the cause is one of the following, listed roughly in order of how often they turn out to be the answer. Each one explains what the part does, how it fails, and how it produces the symptom you saw, because a repair quote makes a lot more sense when you know what the part was for.
The dual-run capacitor: the usual suspect
The capacitor is a metal can, roughly the size of a soda can, mounted in the outdoor unit's electrical compartment. "Dual-run" means it does two jobs from one can: one section serves the compressor and one serves the fan motor. Its job is to store a charge and release it as the extra push both motors need to start turning and to keep their rotation strong and efficient. Motors of this type are weak starters by design; the capacitor is the difference between a motor that spins up instantly and one that sits and hums.
Capacitors fail by degrees and then completely. Heat is their enemy, and they live in a hot box in the sun, so they age with every summer. As one weakens, its stored capacity (rated in microfarads, printed on the label) drifts downward, and the symptoms arrive in a recognisable order: the fan becomes slow or reluctant to start, then starts only with a push, then hums and cannot start at all. A capacitor that has failed hard may swell at the top, bulge, or leak, which a technician can see the moment the panel comes off. One subtlety worth knowing: because the can is dual, one side can fail while the other still works. A dead fan section with a healthy compressor section gives you a running compressor and a still blade; a dead compressor section with a healthy fan section gives you the mirror image from the triage table, a spinning fan and no heating or cooling. Same part, two different-looking breakdowns, one replacement fixes either.
The contactor: the gatekeeper that wears out
The contactor is an electrically operated switch, a relay, that connects mains power to the outdoor unit when the thermostat calls. When the call comes in on the low-voltage control wire, an electromagnet snaps the contacts shut and full power flows to the compressor and fan. When the call ends, the contacts open. It is a simple, hard-working part, and it fails in simple, hard-working ways: the contact surfaces pit and burn a little with every cycle, insects and debris get between them, the coil that drives it weakens, or it sticks, shut or open.
A contactor failing toward "open" or delivering power badly on one side produces a fan that never starts, starts weakly, or behaves as though power is intermittent, and it can starve the fan motor while the compressor side still runs, or the reverse. A contactor stuck shut produces the opposite complaint (a unit that will not turn off), which is a different guide's problem. The diagnostic tell a technician looks for is voltage: power arriving at the contactor but not leaving it cleanly convicts the contactor in minutes. It is a mid-priced part and a quick replacement, and because it sits in the same compartment and ages on the same schedule as the capacitor, a technician who finds one of the two failed will usually test the other while the panel is open, and may suggest replacing a tired-looking partner part rather than billing you a second visit in three months. That suggestion, when it comes with test readings, is good practice rather than upselling.
The fan motor: bearings first, windings second
The outdoor fan motor itself is the third suspect, and it fails in two main ways. The first is mechanical: the bearings that let the shaft spin wear, dry out, and seize by stages. This failure announces itself over weeks or months, a blade that feels gritty or stiff when spun by hand (your Check 5), a squeal or grind on startup, a motor that starts, overheats, and cuts out on its internal thermal limit, then tries again after it cools. By the time a bearing motor stops completely, it has usually been asking for attention audibly for a while.
The second failure is electrical: the motor's windings short or open, and the motor simply cannot run, or trips the breaker when it tries. Winding failures are more abrupt and less forgiving. A technician separates the two with resistance and amp-draw tests, and separates both from a capacitor problem by testing the capacitor first, because a weak capacitor imitates a dying motor almost perfectly (hum, no start) at a third of the replacement cost. The order of testing matters to your wallet, and it is fair to ask, of any motor quote, "what did the capacitor read?" A motor replacement also involves matching the replacement correctly: horsepower, rotation direction, speed, and shaft size all have to suit the unit and its blade, and on newer variable-speed systems the motor is an ECM unit with its own control module, which is why those replacements sit at the top of the cost range.
The control board: the part that decides
Modern heat pumps route the fan's orders through a control board (on many systems the defrost board doubles as the fan's manager in heating season). The board takes the thermostat's call and the sensors' reports and switches the fan and compressor accordingly. Boards fail from heat, moisture, corrosion, power surges, and simple age, and a failed board or a failed relay on it can mean the fan is never told to start even though the fan, its capacitor, and its power supply are all healthy. Board faults are the great mimics of this diagnosis: they can produce a fan that never starts, a fan that stops at odd intervals, or defrost behaviour that makes no sense, all with every mechanical part in perfect order.
That mimicry is exactly why the board is tested last and quoted last. It is one of the pricier parts on the list, and replacing it on a guess, when the real fault was a $150 contactor, is the classic bad repair. A careful technician works the chain in order: confirm the call, confirm power in and out of the contactor, test the capacitor, test the motor, and only then, with everything else proven good and the board demonstrably failing to send the signal, condemn the board. If a quote for a board arrives within five minutes of the panel coming off, you are entitled to ask what was tested before it.
Power and the thermostat: the unglamorous remainder
Finally, the causes that are not really the fan's fault at all. A thermostat that is not sending a call, a broken low-voltage wire (garden tools and rodents account for a steady share), a float switch in the indoor drain line that has locked the system out over a clogged condensate drain, or a unit sitting in a protective lockout after repeated faults: all of these present as an outdoor unit that will not run, fan included. These are worth naming because they explain the cases where every fan part tests perfect. They are also why a good diagnostic starts at the thermostat and works outward rather than starting at the part you happened to notice. Your Check 1 gives the technician a head start on this entire category.
The fix, part by part: what the technician does, how long it takes, and what the quote must include
You have done the observing. Here is what happens on the other side of the service call, cause by cause, so you can follow the visit as it unfolds and recognise a thorough job.
Capacitor. The technician kills power at the disconnect, discharges the capacitor (the step that makes the part safe to handle), and tests its microfarad reading against the rating printed on its label; a reading more than about 10 percent low is a failed part, whatever it looks like. Replacement is a like-for-like swap, matched on both microfarad ratings and voltage, terminals transferred one at a time so nothing crosses. The unit is then run and the fan and compressor start behaviour observed. Total bench time is typically 30 to 60 minutes including the testing, and most of that is diagnosis, not the swap. The quote must include: the part and its rating, labour, and confirmation that the reading was tested rather than guessed. If the old capacitor is swollen, ask to see it; honest shops show failed parts without being asked.
Contactor. The technician confirms the control call is arriving, checks voltage in and out of the contactor under load, and inspects the contact faces for pitting and burning. Replacement matches the pole configuration and coil voltage, and a good technician checks the wire terminals for heat damage while it is apart, because a contactor that has been arcing often cooks its nearest connections. Also a 30 to 60 minute job once diagnosed. The quote must include: part and labour, and ideally a note on the condition of the capacitor, which should have been tested while the compartment was open.
Fan motor. The technician confirms the motor is receiving correct voltage with a good capacitor behind it, tests the windings, and checks the shaft and bearings by hand. Replacement involves removing the fan blade from the old shaft (occasionally the blade itself is damaged or seized on and needs replacing too), fitting the matched motor, setting the blade height correctly in its shroud, which matters more than it sounds, since a blade sitting too high or low in the opening moves noticeably less air, and running the unit to confirm amp draw and airflow. Allow 1 to 2 hours. The quote must include: the motor specification being fitted (horsepower, speed, rotation, and whether it is a standard or ECM unit), whether the blade is reused or replaced, labour, and the warranty on the part, which on motors is worth asking about specifically.
Control board. This quote should arrive with evidence: the tests that cleared the capacitor, contactor, and motor, and the missing signal the board is responsible for. Replacement is a careful transfer of many low-voltage connections, usually photographed before disassembly, followed by configuration (many boards have settings, jumpers, or dip switches that must match your system, including the defrost interval) and a full run test in both modes, plus a defrost initiation test where the board controls defrost. Allow 1 to 2 hours. The quote must include: the board part number, labour, and a line confirming post-replacement testing in heating and cooling. A board quote without the preceding test results is the one quote in this guide you should slow down and question.
The diagnostic itself. Every path above starts with the same visit: a technician confirming the call, the power chain, and the component tests, usually for a flat fee in the $75 to $300 range, very often credited toward the repair if you proceed with the same company. That fee is not a toll for opening the panel; the testing sequence is what stands between you and parts being replaced on hunches, and as the sections above show, the difference between the cheapest and the most expensive wrong guess on this list is several hundred dollars.
What it costs, and how to read the numbers
The cost table on this page collects the ranges in one place; this is how to read them like an owner rather than a spectator. All figures are parts and labour for a typical residential unit, in 2026 dollars, and your local rates will move them, but the shape of the table is stable everywhere: the parts most likely to have failed are the cheapest ones on it.
The capacitor, at roughly $120 to $400 installed, is both the most common cause and the cheapest fix, which is a fortunate alignment and the reason this symptom should never trigger replacement panic. The contactor sits just above it at about $150 to $450. The fan motor is the middle of the table, $250 to $900, with the honest middle for a standard motor around $400 to $700 and variable-speed ECM motors pushing the top. The control board, $250 to $900, is the part you should expect to see justified with test results, per the section above. Underneath everything sits the diagnostic fee, $75 to $300, frequently credited forward.
Three reading rules. First, sequence is savings: any quote that jumps to the motor or the board without a capacitor test in it is a quote to interrogate, because the cheap part imitates both. Second, pairs are legitimate: capacitor and contactor age together in the same hot box, and replacing a tested-weak second part during the same visit is cheaper than a second visit; what you want is the test reading for each part, not a bundle justified by vibes. Third, age changes the maths, not the diagnosis: on a unit past 12 to 15 years, a motor or board repair in the upper half of the range deserves one repair-versus-replace conversation before you approve it, because the same money is a meaningful down payment on a new system with a fresh warranty. That conversation should still start from the tested diagnosis. A system replaced to avoid a $200 capacitor is the most expensive outcome on this page, and it happens to owners who were scared at the humming stage. You are past that stage now.
DIY or pro: where the line actually falls
Everything up to the panel door is yours, and it is not busywork: the defrost test, the triage observation, the thermostat and breaker checks, the disconnect, the debris clearance, and the by-hand blade feel will, between them, resolve a fair share of stopped fans outright (defrost, a forgotten Emergency Heat setting, a tripped breaker, a jammed blade) and will shorten and cheapen the diagnosis of every fan they do not resolve. Going into a service call able to say "hums, blade still, starts with a push, capacitor suspected" changes the visit you get.
Everything past the panel door is professional work, and the reason is specific rather than general: the capacitor in that compartment can hold a dangerous charge with the power off, the contactor and board work happens around mains voltage, and the tests that separate these parts from each other need a meter, a discharge procedure, and the knowledge of what the readings mean. This is also, not coincidentally, the cheap end of HVAC repair: the parts are small, the jobs are an hour or two, and the professional premium over the raw part cost buys you the diagnosis being right. The owner's leverage in this repair is not a wrench. It is observation, sequence, and questions, and this guide has tried to hand you all three.
When it is urgent, and when it can wait for a weekday
Sort your situation into one of three piles.
Switch off now and call the same day: a burning or acrid electrical smell at the unit; visible scorching or a melted disconnect; a breaker that trips when the unit tries to start; a fan motor that is smoking or too hot to stand near. These are electrical faults with a path to getting worse, and the system stays off at the breaker until a technician has seen it.
Stop the unit, use Emergency Heat, book promptly: the classic hum-but-no-spin outside defrost, a fan that starts and stops, a fan turning slowly and weakly. Nothing here is likely to burn the house down, but every hour of running is hard on the compressor, so the outdoor unit rests from the moment you notice, and the repair happens this week rather than this month. In a heatwave or a hard freeze, tell the company you are on backup heat with a dead outdoor fan; most triage queues move that call up on their own.
No call at all: the fan that stopped with steam on a frosty morning and restarted inside 15 minutes, repeatedly, all winter, while the house holds its temperature. That is defrost, and the correct response is the one you have already had: finish your coffee. Keep half an eye on the pattern over the season, because a defrost that stretches longer and longer, or frost that stops clearing, is the early draft of a different fault, and the defrost guide linked earlier in this article covers exactly that drift.
The short version to remember
A stopped heat pump fan feels like a catastrophe and is usually a component. Rule out defrost with 10 patient minutes. Read the hum, the silence, or the slow spin against the triage table. Run the five free checks, two breakers included. Then let the unit rest on Emergency Heat while a technician works the chain in the right order: capacitor, contactor, motor, board, testing each before condemning any. Protect the compressor, which is the only truly expensive thing in the story, by refusing to run the system against a dead fan, and the repair that follows will almost always land in the low hundreds, finished within a visit or two, with your heat pump back to the unglamorous business of spinning whenever it is asked.
Cost at a glance
| Item | Typical cost | Notes |
|---|---|---|
| HVAC diagnostic / service call | $75–$300 | Often credited toward the repair if you go ahead with the same company |
| Dual-run capacitor replacement | $120–$400 | A 30–60 minute job once diagnosed; the single most common cause of hum-but-no-spin |
| Contactor replacement | $150–$450 | A 30–60 minute job; pitted or stuck contacts starve the fan and compressor of power |
| Outdoor fan motor replacement | $250–$900 | A 1–2 hour job; most standard motors land at $400–$700, variable-speed ECM motors cost more |
| Control board replacement | $250–$900 | A 1–2 hour job; quoted only after the cheaper parts have tested good |
Frequently asked questions
Why is my heat pump humming but the fan isn't spinning?
The hum is the sound of motors receiving power and trying to start. The usual reason they can't is a failed dual-run capacitor: it stores the extra electrical push the fan motor and compressor need to get turning, and when it weakens, the fan motor sits there humming instead of spinning. The same hum can come from a contactor that delivers low or uneven voltage, or from a fan motor whose bearings have seized. Treat the hum as a stop signal, not a curiosity: switch the thermostat to Emergency Heat so the outdoor unit rests, and book a diagnostic. Letting it hum for hours overheats the motor and stresses the compressor.
Is it normal for the outdoor fan to stop in winter?
Yes, briefly. In heating mode the outdoor coil frosts over, and the heat pump clears it with a defrost cycle: the fan stops on purpose, the unit briefly runs in cooling mode to heat the coil, and steam rises as the frost melts. A normal defrost lasts roughly 2 to 15 minutes, ends with a whoosh and the fan restarting, and happens at intervals through frosty weather. The test is time: watch one full cycle for about 10 minutes. Fan restarts and the steam clears means it was defrost. A fan that is still stopped 20 minutes later, with no steam and no restart, is a failure, not a cycle.
Can I push the fan blades with a stick to get it started?
It can work as a one-time diagnostic, and it tells you something real: a blade that catches and spins up after a push points hard at a weak capacitor, because the motor could run but could not start itself. It is not a fix and not a way to keep the unit running. Use a long wooden stick, never your hand, only through the grille, and only once, to learn the answer. A motor that needs a push every cycle is overheating a little more each time, and a blade that won't catch even with a push points at the motor or its power supply instead. Either way, the next step is a repair, not a routine with a stick.
How much does it cost to replace a heat pump fan motor?
Most homeowners pay $250 to $900 with parts and labor, and standard single-speed motors usually land between $400 and $700. The job itself takes a technician about 1 to 2 hours. Variable-speed ECM motors sit at the top of the range or above it because the motor and its control module cost more. Before approving a motor quote, confirm the capacitor was tested first: a weak capacitor is a $120 to $400 part that imitates a dead motor, and no honest quote should skip the cheaper test.
Will my heat pump still heat the house if the fan isn't spinning?
Not safely, and not for long. The outdoor fan is what moves air across the outdoor coil so the refrigerant can pick up or dump heat. Without it, in heating mode the coil gets colder and colder and frosts solid; in cooling mode the heat has nowhere to go and pressures climb. The compressor keeps working against worsening conditions until a safety limit shuts it down or the heat damages it. Your backup heat is the correct bridge: switch the thermostat to Emergency Heat, which heats with the indoor strips alone, and let the outdoor unit sit idle until it is repaired.
How do I tell a bad capacitor from a bad fan motor?
By behaviour, up to a point. A weak capacitor usually announces itself as hum-but-no-spin, or a fan that starts when pushed with a stick and then runs normally: the motor is healthy, its starting push is gone. A failing motor more often spins slowly, starts and stops, grinds or squeals, feels seized or gritty when you turn the blade by hand with the power off, or stops again minutes after starting as it overheats. The honest limit is that behaviour narrows it down but does not prove it: a technician tests the capacitor's microfarad rating against its label and checks the motor's windings and amp draw, which is why the diagnostic visit exists.
How long can I run my heat pump with the fan not spinning?
Outside a defrost cycle, the answer is: don't. There is no safe number of hours. Every minute the compressor runs without airflow across the outdoor coil, it works against rising pressure in summer or a frosting, starved coil in winter, and it runs hotter than it was built to. Short accidental runs while you notice the problem are normal and rarely fatal; deliberately heating or cooling through a day or a night on a dead fan is how a $200 part turns into a compressor replacement that costs several thousand. Emergency Heat exists for exactly this gap.
Checked November 16, 2026. This guide is general information, not a substitute for a licensed professional.
Related guides
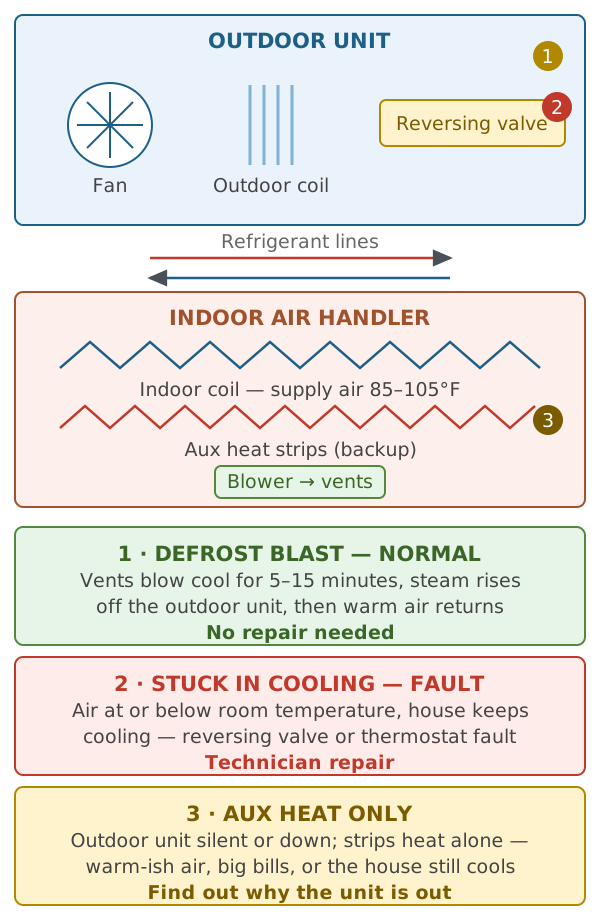
Heat Pump Blowing Cold Air in Heat Mode? What's Normal, What's a Fault
Cool air from the vents in heating season is the most common heat pump scare — and often not a fault at all. The 2-minute thermometer test, the three real scenarios behind cold air, owner checks, and what the repairs cost.
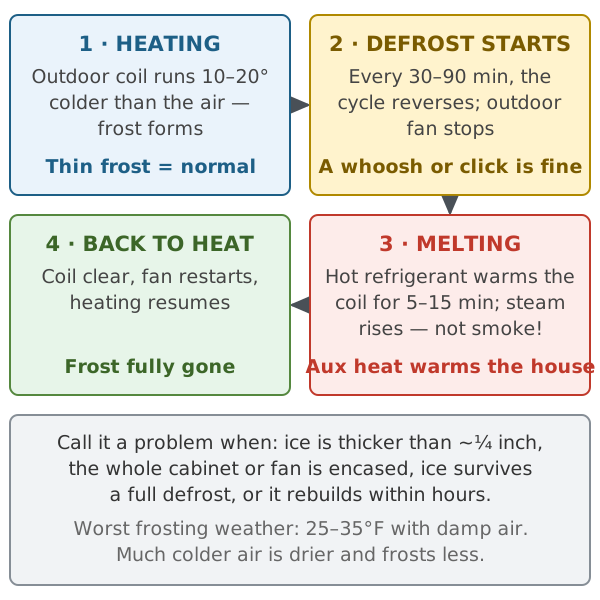
Heat Pump Icing Up? What's Normal Frost, What's a Problem, and What to Do
A frosty heat pump in winter is usually doing its job. Solid ice that never melts is not. How the defrost cycle works, the causes when it can't keep up, safe steps, and repair costs.
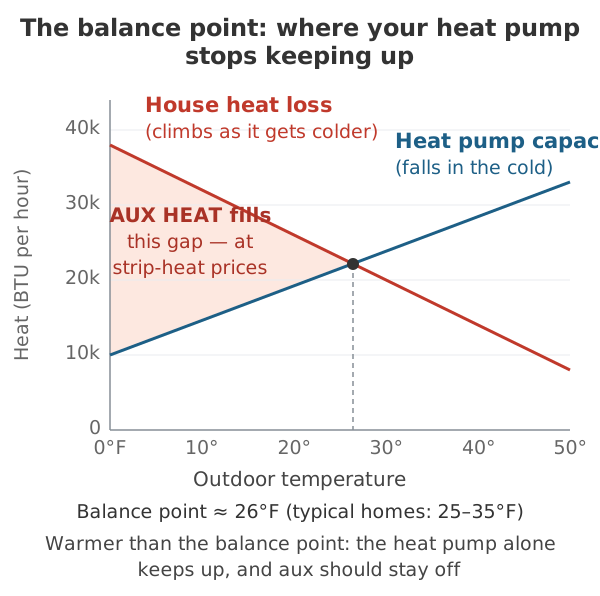
Heat Pump Can't Keep Up in Cold Weather? Balance Point, Backup Heat, and When It's Actually Broken
Set to 70, sitting at 64, and the heat pump hasn't stopped all night. Below your system's balance point that's physics, not a breakdown. Here's the worked example, the two-hour test that tells normal from broken, and what each real fault costs.