 Keep
Basement Water After Rain? Read Where It Comes In, Then Fix It in the Right Order
 Daniel Mercer · Editor & Researcher·
Published November 16, 2026·
Updated November 16, 2026
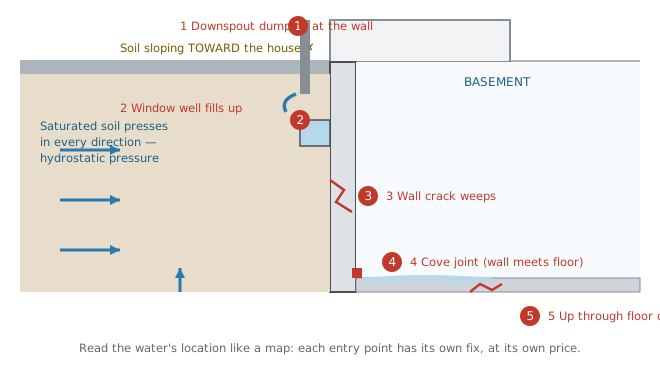
Almost every basement gets wet eventually — figures cited by FEMA suggest the overwhelming majority of basements experience some water intrusion in their lifetime — and almost every owner responds the same way: by pricing "waterproofing," as if it were one product. It isn't. A wet basement is a symptom with at least five distinct causes, priced from fifty dollars to thirty thousand, and the waterproofing industry is structured so that the person who diagnoses your basement often profits most from the most expensive interpretation of it.
So this guide is built backwards from the sales pitch. First you diagnose — free, with your own eyes, while the water is still there to read. Then you fix in ascending order of cost, stopping the moment the water stops. A large share of basements dry out permanently somewhere in the cheap half of that ladder. The ones that don't will at least meet the expensive fixes with proof of what they actually need.
Rule one: read the water while it's wet
Water in a basement is evidence that evaporates. Before you mop, before you move a single box: go down during or just after the rain, and photograph everything. Where it is, how much, what path it took. Then match the location to the diagnosis:
A line of water along the base of the walls — the wall-floor joint, often around much of the perimeter. This is the cove joint: your foundation walls and floor slab were poured separately, and the seam between them was never a seal. When the soil around and under the house saturates, hydrostatic pressure pushes water up through that seam — the path of least resistance. Cove-joint water around the whole perimeter means the soil around the whole house is saturated; around one wall, look above that wall outside.
Water seeping up through cracks in the middle of the floor. The water table is rising under the slab and using the cracks as vents. This is groundwater in its purest form — grading will not fix it, and it has the longest delay: it often arrives hours after the rain stops, or peaks the next day.
A wet streak running down one wall from a crack. A wall crack leaking under pressure. Localised, traceable, and the one pattern where crack repair is the actual answer. Vertical cracks are the common kind; note the crack's width and mark its ends with a pencil and date — a crack that's growing is a different conversation (see the structural FAQ).
Water at one corner, or under one wall section. Almost always a surface story with an address: the downspout that discharges at that corner, the gutter that overflows above it, the soil that has settled into a dip against that wall, the window well there. Go outside and stand in that corner; the cause is usually visible from it.
Water pooling under a basement window. The window well has filled faster than it can drain (many wells have a drain tied to the footing drainage; when it clogs or was never connected, the well is a bucket against your window) and water is pressing through the frame. Well covers, gravel, and a working well drain are the fix list.
Damp patches on a wall with no liquid water and no rain pattern. Suspect the impersonator — condensation — and run the test below before spending anything.
The same diagnosis, at a glance:
| Where the water appears | First check | Likely fix |
|---|---|---|
| A line along the wall–floor joint | Downspouts and grading outside that wall | Surface fixes first; interior drain and sump if it persists |
| Up through cracks in the middle of the floor | Does it peak hours after the rain stops? | Drain system and sump pump (this is groundwater) |
| A streak down one wall crack | The crack itself; mark its ends and date them | Crack injection, $250–$800 |
| One corner only | The downspout, gutter and soil dip directly above it | Extend the downspout, regrade the corner |
| Pooling under a basement window | Is the window well full of water and debris? | Clean the well, verify its drain, add a cover |
| A damp wall with no liquid water | The foil test, below | Dehumidifier and insulation — not waterproofing |
The storm watch: gather the evidence while it rains
The most valuable hour in this whole process is the wet one. When a hard rain is coming, work this circuit. Outside first: watch each downspout — discharging clear of the wall, or leaking at a joint? Watch for gutter overflow curtains and window wells filling. Then inside, every twenty minutes: check each entry point and note which one gets wet first — the first wet spot is the primary route; later ones may just be water travelling along the floor. Photograph each spot (your phone timestamps it) and take ten seconds of video at any active seep — contractors read flow from video in a way no description matches. Note when the water stops advancing after the rain ends.
The foil test: is it even a leak?
Basement walls are cold. Humid summer air touching them condenses, and a wall can look exactly like it's seeping when it's actually sweating. The EPA treats these as separate problems with separate fixes, and ten minutes separates them: tape a square of aluminium foil or plastic sheeting tightly to the damp area, sealing all four edges, and leave it 24–48 hours. Peel it back and read both sides. Moisture on the wall side (behind the foil) means water is migrating through the concrete — genuine seepage; this guide applies. Moisture on the room side means your air is condensing on a cold wall — a humidity and insulation problem, answered with a dehumidifier, air sealing and insulation, at a tenth of waterproofing money. Owners waterproof sweating walls every year. Don't join them.
Reading the walls between storms
The water leaves; the wall keeps the minutes. Even in a dry week, a basement wall records its history for anyone who looks. Efflorescence — the white, crusty mineral deposit on concrete and block — is the signature of water migrating through the wall and evaporating on the inside face, leaving its dissolved minerals behind. It doesn't damage the wall by itself, but it maps the water's routes with surveyor's precision, and a wall painted fresh by a seller with efflorescence already ghosting through is a wall telling on its owner. Tide lines — a horizontal stain at a consistent height — mark how deep water once stood. Rust weeps below small round patches identify leaking form-tie holes. A musty smell that concentrates in one corner usually sits downhill of the entry point, in every sense. And fresh paint on basement walls generally deserves suspicion rather than gratitude: legitimate waterproofing doesn't begin with cosmetics, and a newly painted basement in a house for sale is a question, not a feature. Photograph all of it alongside your wet-weather evidence; together they give any honest contractor a diagnosis before he's sold you anything.
The bathtub your house sits in
One piece of underground architecture explains most basement water, and almost no homeowner has heard of it. When your foundation was built, the excavation was dug wider than the house, the walls were poured, and the gap was refilled with the same soil — now loose, broken and uncompacted. That ring of disturbed soil around your foundation is dramatically more permeable than the undisturbed ground beyond it. Rain that lands near the house sinks into this loose backfill like water into a trench of gravel, collects against the wall, and sits there — a bathtub the house permanently sits in, refilled by every storm and emptied only slowly into the surrounding soil. This is why downspout discharge at the wall is so destructive (you're filling the bathtub at its rim), why clay-soil regions suffer most (the native clay beyond the backfill barely drains, so the tub empties at a crawl), and why the soil immediately against your house is the most important drainage territory you own. Every fix on the ladder is, in the end, about keeping the bathtub empty or giving its water a drain.
Surface water or groundwater? The timing tells
The second diagnostic is a clock. Water that appears during the storm or within an hour or two is dominated by surface water — roof runoff and yard drainage arriving faster than the soil can take it. Water that arrives hours later, peaks overnight, or shows up in a dry week after a wet one is groundwater: the water table itself rising into your foundation's depth. Most real basements are a blend, but the dominant partner decides the strategy. Surface-dominant basements are usually cured outside, cheaply. Groundwater-dominant basements are the ones that legitimately end at drain systems and sump pumps. A waterproofing quote written before anyone asked you when the water arrives is a quote written without a diagnosis.
The fix ladder, rung one: the roof's water (cheap, first, always)
However the water gets in, the amount of water arriving at your foundation is the variable you control most cheaply. Pros who assess these problems for a living estimate that exterior water behaviour determines the great majority of basement moisture outcomes — and the top of the system is the roof.
Start with the gutters: a clogged gutter overflows in a curtain exactly at the foundation line (our gutter guide covers the full system). Then the downspouts, which is where basements are won and lost: every downspout should discharge well away from the house — extensions of at least 4–6 feet as a minimum, and further (some county soil guides say ten feet, ideally through solid pipe) where soil is clay or the basement is already wet. A downspout that ends at the wall is not a drainage system; it's a delivery system, pouring hundreds of gallons per storm into the loose backfill soil that surrounds your foundation — the most permeable soil on your lot, helpfully pre-dug by the builder. Extending downspouts is a $15–$40-per-corner, one-hour job, and it permanently cures a startling number of "waterproofing problems."
Rung two: grading — the six-inch rule
Stand outside after rain and look at the ground against your walls. The building code's standard (IRC R401.3) is that soil should fall at least 6 inches within the first 10 feet away from the foundation. Houses settle, beds get built up with mulch against the wall, patios get poured level — and over twenty years, many houses quietly develop negative grading that funnels the yard's water to the foundation. The check needs only a long board and a level; the fix is unglamorous — add and compact soil (keeping it below the siding and framing, never piled against them), re-establish the fall, and seed it. Where a patio, driveway or walkway has been poured sloping toward the house, that's a bigger conversation (mudjacking or replacement), but soil regrading around the rest of the perimeter is weekend work that moves more water than a $5,000 membrane in the cases where surface water dominates.
A word on yard drains, the rung between grading and concrete: where water ponds in the yard itself — a low area that saturates and then feeds the foundation for days — a French drain (a gravel trench with perforated pipe, carrying water to a lower discharge point or dry well) intercepts it before it arrives. They're the right tool for yard water with somewhere legal to send it, and the wrong tool when there's no fall to a discharge point; a French drain with nowhere to drain to is a buried bathtub extension. Cost runs from a few hundred dollars DIY for a short run to $1,500–$4,000 installed for a serious one — real money, which is why it sits after gutters and grading and before anyone cuts your basement floor.
Rung three: the specific hole
With the surface system corrected, the remaining leaks tend to have names. A single leaking wall crack in poured concrete is what crack injection exists for: polyurethane (flexible, expands, the usual choice for active leaks) or epoxy (rigid, structural) injected through the crack's full depth, at $250–$800 per crack professionally, with DIY kits cheaper and fussier. It is an excellent fix for that crack — and worthless for cove-joint water, which simply arrives at the next weakest point; the injection sales pitch that promises to dry a whole basement one crack at a time deserves your scepticism. Window wells get cleaned out, re-gravelled, their drains verified or added, and covered. Tie-rod holes and pipe penetrations in poured walls — small, round, specific leaks — get sealed individually. Rung three is where a basement with a localised problem ends: dry, for hundreds rather than thousands.
Rung four: interior drainage and the sump pump
If water still arrives at the cove joint or through the floor after the outside is honest — the groundwater-dominant pattern — the industry's workhorse is the interior drain system: a channel cut along the inside perimeter of the floor, perforated drain tile bedded in gravel at the footing, collecting the water that reaches the joint and routing it to a sump basin, where a pump discharges it outside, away from the house. Understand what it does philosophically: it doesn't stop water reaching your foundation; it relieves the pressure by giving the water an easier destination than your floor, and it does that job extremely well — it's the standard answer for high water tables and cove-joint seepage, at roughly $40–$120 per linear foot, or $4,000–$17,000 for a full perimeter, with most homeowners landing in the $2,500–$8,200 band for partial-to-full systems.
The sump pump itself ($600–$2,500 installed with basin and discharge) is a small machine with an outsized job, and its details decide storms: a check valve so discharged water can't fall back into the pit; a discharge route that exits far from the foundation and won't freeze shut in winter; a sealed cover (it also keeps radon and humidity out of the basement air); and a battery backup pump, because the storm that fills the pit fastest is the storm most likely to cut your power — a primary pump without backup is a fair-weather friend. Test it quarterly: a bucket of water into the pit should start it, empty, and stop it, in under a minute.
The sump pump, tested properly — and backed up
That test deserves a real procedure, because a pump that runs can still be failing:
- Open the pit and look. Clear of silt and debris, pump sitting level, discharge pipe sound.
- Test the float. Raise it gently by hand: the pump should start before the float tops out and stop after it drops. A float that sticks or hangs on the pit wall is the commonest sump failure there is.
- Pour and time it. Add water a bucket at a time. The pump should start, empty the pit in well under a minute, and shut off cleanly — no short-cycling, no grinding run-on. Running without lowering the level means a worn impeller, a clog, or a frozen discharge.
- Follow the water outside. It should exit freely, away from the foundation, and the check valve should hold it there.
Then decide the backup, because the primary is one outage from useless and storms cut power. A battery backup ($200–$600 plus battery) is a second pump on a deep-cycle battery — size it to your pit's inflow, not by grabbing the smallest kit on the shelf: a fast-filling pit needs the capacity and battery hours to match. A water-powered backup never needs charging but spends roughly a gallon of city water per gallon or two pumped, does nothing on well water and is restricted in some places. Whichever you fit, test-run it with the primary: an untested backup is a hope, not a system.
Rung five: exterior waterproofing — the full excavation
The last rung is the first one in most advertisements: dig down the outside of the foundation to the footing, repair and seal the wall, apply a membrane, install new footing drainage, and backfill. Done properly, it's the most complete answer — it stops water at the wall, protects the concrete itself, and lets a finished basement live against a dry wall. It's also $10,000–$18,000 and up, with the majority of the price in excavation, access and putting your landscaping, deck and driveway back — which is why it earns its place at the end of the ladder, reserved for water coming through the wall itself (not just the joint), walls that need structural repair anyway, or houses where the interior approach genuinely can't work. The diagnosis from rung one is what tells you whether you're a rung-two house or a rung-five house. Anyone who quotes rung five without reading the water is selling the ladder's top because it's the top.
Two things that travel with basement water: radon and finishing plans
Radon enters a house through the same openings water does — the cove joint, floor cracks, the sump pit — because both are soil gases and soil water following the pressure paths into your basement. A sealed sump cover and a properly detailed interior drain system help both problems, and if your region is radon country (much of the Midwest and Northeast is), a wet basement you're about to fix is the perfect moment to test: kits are cheap, and mitigation, if you need it, shares trenches and penetrations with the drainage work. Test before you finish a basement, not after.
And finishing is the decision that raises the stakes of everything above. An unfinished basement forgives a rare seep; a finished one converts it into ruined drywall, flooring and furniture, and mould behind walls you can't see. The standing rule among people who fix the failures: do not finish a basement until it has stayed dry through a full wet season — ideally a full year — after its water fix. When you do finish, build like a sceptic: insulation and wall systems that tolerate humidity rather than feeding mould, no carpet laid directly on slab, no irreplaceable storage at floor level, and access panels that let you see the cove joint and the sump in future years. The most expensive basement is the one finished twice.
If you're buying: interrogating a "dry basement"
Sellers' disclosures aside, a house shows its water history to a buyer who looks during the showing. Run the between-storms checks above — efflorescence, tide lines, rust weeps, fresh wall paint, a suspiciously new sump pump in an old house, water stains on the bottom of stored boxes and furniture legs. Ask directly when the basement last took water and what was done; ask whether any waterproofing work carries a transferable warranty (the good systems do, and it's a genuine asset worth real money — get the paperwork). If you can, schedule a viewing after rain; if the offer process allows, a home inspector who brings a moisture meter and actually descends into the corners earns his fee on this one line item. None of this kills a deal by itself — half the housing stock has a water story — but it prices the story correctly, and it tells you which rung of the ladder you're buying your way into.
During and after: the first 48 hours
When water does get in, the clock that matters is mould's: colonies establish on wet drywall, wood and carpet within 24–48 hours, so drying is a race you can actually win. Get belongings up and out first; kill power to outlets and appliances in the water if there's any doubt; remove standing water with a wet/dry vac or the sump; then run fans and a dehumidifier until surfaces read dry, not until they feel dry. Porous materials that stayed soaked — carpet pad, cardboard, upholstered anything stored on the floor — are usually losses; hard surfaces and solid wood recover. Photograph everything for the insurance file before the cleanup, and keep the receipts: sudden water events are often covered even when the underlying fix is maintenance. And going forward, store the basement like a person who has read this far: nothing irreplaceable sits on the floor; boxes live on shelves and pallets; the water alarm ($15–$25) sits by the sump and the water heater, and it gets the last word.
Poured wall or block wall? The diagnosis changes
Everything above reads slightly differently depending on what your foundation is made of, because the two common wall types fail in different geometries. A poured concrete wall is a single solid mass: water comes through identifiable defects — a crack, a tie hole, a penetration — which is why poured-wall leaks can often be mapped to a point and fixed at that point. A concrete block wall is a stack of hollow units with mortar joints: water enters the hollow cores anywhere along the wall's wet length, travels inside the wall, and emerges at the floor line or a joint possibly metres from where it got in. Block-wall seepage therefore lies about its location — the wet spot is the exit, not the entrance — and it's also why block walls respond well to interior channel systems that collect water at the base from weep holes drilled into the cores, and poorly to point repairs like crack injection aimed at the visible stain. Know which wall you own before you let anyone price its cure: look at an unfinished stretch — smooth and monolithic is poured; visible block courses and mortar joints is block. It takes ten seconds and it changes which bids make sense.
What a good waterproofing bid looks like
When you do reach the contractor rungs, buy the diagnosis as carefully as the work. A good bid is written, specific and boring: it names the entry pattern it is treating (cove joint, wall, floor), the exact scope in linear feet, where the sump basin will sit and where its discharge will exit and terminate, what happens to your floor and landscaping, and a warranty that says what it covers (water through the treated system? the whole basement? labour and materials?) and whether it transfers to the next owner — a transferable lifetime warranty from an established firm is worth money at resale; a non-transferable one from a company founded last spring is a pamphlet. Itemised means numbers, not adjectives: linear feet of channel, trench depth, the volume of stone, the pump's make and model, and a named discharge point — "outside" is not a discharge point. Change orders belong in writing, priced and signed before the extra work starts, never as a surprise on the final invoice; and the bid should say who pulls the permit and how long permit or easement approval may delay the start. Get at least three bids, expect them to differ in method (interior camp vs exterior camp), and treat spread as information: the bidder who found something the others missed is either the best diagnostician or the best storyteller, and your rainy-afternoon photographs are how you tell which. The red flags are theatrical: prices that expire today, mould horror stories deployed before a moisture reading, a quote produced without entering the basement or asking when the water arrives, and any system whose name is a trademark rather than a description. The work itself is concrete, pipe and pumps — buy it like concrete, pipe and pumps.
Insurance, honestly
Know what your policy thinks of all this before the wet weekend, because the answers surprise everyone exactly once. A standard homeowners policy generally excludes groundwater seepage and flood — the slow cove-joint leak and the rising water table are considered maintenance and earth movement, not covered perils, and the fix is essentially never covered. What often is available, cheaply, is a water backup / sump overflow endorsement (commonly in the $40–$100-a-year range) covering damage when a sewer backs up or a sump system fails and overflows — the two sudden, destructive versions of basement water. It typically carries its own limit ($5,000–$25,000 is common), so read it rather than assuming. Sudden plumbing failures — a burst pipe, a water heater letting go — are a different and usually covered category again. The practical moves: add the backup endorsement if you have a sump or a floor drain, photograph your basement's normal state once a year, keep serial-number photos of anything valuable stored down there, and remember that insurers distinguish sharply between "it leaked for months" (excluded, and possibly a maintenance black mark) and "it happened Tuesday" (a claim). Your fix ladder above is also, read coldly, an insurance strategy: a dry basement with a documented drainage system is an insurable basement.
The order is the savings
Notice what the ladder does to the money. The rungs are ordered so that each one is attempted only if the cheaper ones failed — and in practice, gutters, downspouts and grading retire a large share of wet basements for under a few hundred dollars, crack repairs retire most of the localised rest, and the five-figure systems are left for the genuinely pressure-driven minority they were designed for. The diagnosis costs a rainy afternoon and a roll of foil. In a market where the diagnosis is usually free because the treatment is the profit, that afternoon is the best-paid one of your homeowning year.
Cost at a glance
| Item | Typical cost | Notes |
|---|---|---|
| Downspout extensions + grading corrections | $50–$600 | The fix that solves a large share of cases; extensions $15–$40 each, soil and seed for regrading |
| Crack injection (polyurethane or epoxy) | $250–$800 per crack | Only when the crack is truly the entry point — useless against cove-joint water |
| Sump pump installed (pit, pump, discharge) | $600–$2,500 | Add a battery backup ($200–$600): storms that flood basements also cut power |
| Interior drain tile system (full perimeter) | $4,000–$17,000 | Roughly $40–$120 per linear foot; manages water at the cove joint rather than stopping it outside |
| Exterior waterproofing (excavate, membrane, drain) | $10,000–$18,000+ | The stop-it-at-the-wall method; price driven by digging, access and restoring landscaping/decks |
Frequently asked questions
Why does my basement only leak after heavy rain?
Because the system that fails you is a volume system. Light rain soaks into soil and drains away without saturating the ground against your foundation. Heavy rain — or moderate rain on already-wet ground — saturates that soil, and saturated soil does two things: it lets surface water pond against the wall instead of absorbing it, and it builds hydrostatic pressure that pushes water through the cove joint, cracks and pores. A basement that leaks only in downpours is telling you its defences handle ordinary water and lose to volume — which usually points first at the surface system (gutters, downspouts, grading) being overwhelmed or misdirected, not at a failed foundation.
What is hydrostatic pressure, in plain terms?
Water is heavy, and waterlogged soil behaves like a shallow lake standing against your foundation. The weight of that water presses in every direction — sideways against the walls and upward under the floor — and it keeps pressing until it finds a way through: the unsealed joint where wall meets floor, a shrinkage crack, the pores of the concrete itself. That's hydrostatic pressure. Two consequences follow. First, you can't paint your way out of it: interior coatings are on the dry side, and pressure pushes them off the wall (the 'negative side' problem). Second, the durable answers are to reduce the water (surface management), relieve the pressure (a drain system that gives the water somewhere easier to go), or seal the wall from outside where the pressure helps hold the membrane on rather than pushing it off.
Is a wet basement a structural emergency?
Usually it's a water problem, not a structure problem — but learn the exceptions, because they're the ones that matter. Call a structural engineer (not a waterproofing salesperson) first if you see: horizontal cracks in a block or poured wall, a wall visibly bowing or leaning inward, a crack that's wider at one end and growing, or doors and floors above suddenly out of level. Those are signs the soil pressure is moving the wall itself, and waterproofing a moving wall is money into a hole. Vertical hairline cracks, by contrast, are near-universal in poured concrete, usually from curing and minor settlement, and are waterproofing problems only if they leak.
Interior drain system or exterior waterproofing — which is right?
They solve the problem from opposite sides, and the honest comparison is this. An interior system ($4,000–$17,000) accepts that water will reach the wall, collects it at the cove joint through a channel and drain tile inside the floor's edge, and pumps it out — it manages water superbly and relieves pressure, but the wall itself still gets wet. Exterior waterproofing ($10,000–$18,000+) excavates to the footing, seals the wall with a membrane, and installs new drainage — it stops water at the wall, protects the concrete, and costs two to three times more, mostly in digging and in restoring whatever was above the dig. For cove-joint and water-table problems, interior systems are the industry's workhorse and usually the right buy. For water coming through the wall itself, a wall you intend to finish and keep museum-dry, or a foundation being excavated anyway for other work, exterior earns its price. Anyone who sells only one of them will recommend that one; get a bid from each camp.
Do I need a sump pump if I don't have one?
If your water arrives at the cove joint or up through the floor — the pressure-driven patterns — a drain-and-sump system is the standard durable answer, because it gives groundwater an easier path than your floor. If your water is one crack or one corner (a surface problem), fix the surface and skip the pump. If you do install one, the non-negotiables are: a sealed basin, a check valve so pumped water can't fall back, a discharge line that exits well away from the foundation and can't freeze shut, and — the item that separates systems that work in storms from systems that work in brochures — a battery backup, because the weather that fills your pit is the weather that kills your power. Test the pump quarterly by pouring a bucket of water into the pit and watching it cycle.
Will sealing the inside walls with waterproof paint fix it?
For genuine seepage, almost never — and the failure is instructive. Water driven by hydrostatic pressure arrives from behind the wall; a coating on the inside face is being pushed off by that pressure, and it typically blisters and peels within a season or two, meanwhile trapping moisture inside the concrete. Where interior coatings do belong: mild dampness that's actually condensation (run the foil test in this guide first), and as a finishing layer over a wall whose water problem has been solved by other means. Sold as a cure for an actively leaking basement, waterproof paint is the cheapest line in the waterproofing industry and the one with the shortest life. Spend the same money on downspout extensions and you'll usually come out ahead.
The water came up through the floor drain. Is that the same problem?
No — that's sewer backup, and it's a different system with different rules. Rain-driven groundwater enters through joints and cracks and is relatively clean; water rising through a floor drain, toilet or shower in a storm usually means the municipal sewer (or your septic) is surcharged and flowing backward into the lowest fixtures in your house. The fix is a backwater valve on your sewer line (sometimes subsidised by municipalities — often with a pre-approval requirement), and the cleanup is a health issue, not just a drying issue, because that water is contaminated. If it has happened once, treat the backwater valve as urgent: sewer backups repeat, and insurers often exclude or cap them unless you carry a specific rider — check your policy this week, not after the second event.
Checked November 16, 2026. This guide is general information, not a substitute for a licensed professional.
Related guides
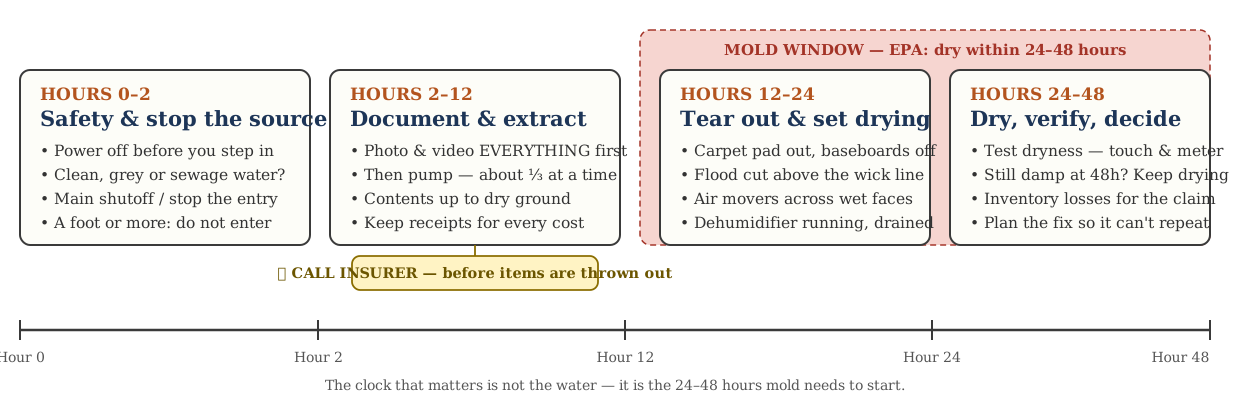
Basement Flooded? The First-48-Hours Playbook: Safety, Pumping, Drying, and Insurance
Standing water in the basement is an order-of-operations problem. The safety rules for hour one, how to document for insurance before you move anything, why you pump in stages, what to tear out, how to dry against the EPA's 24–48-hour mold window, and when the pros are mandatory.
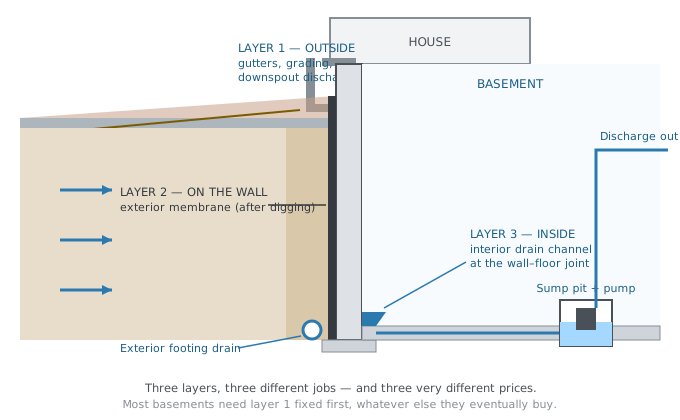
Basement Waterproofing Cost: What Each Method Really Costs
Waterproofing quotes run from $300 to $25,000 because the word covers five different jobs. 2026 costs per method and per linear foot, the order to buy them in, how to read an itemised quote, and what a lifetime warranty actually promises.
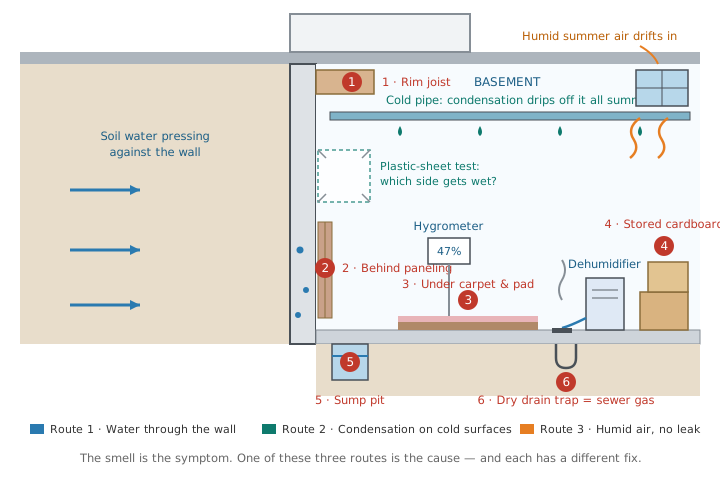
Musty Basement Smell: Find the Moisture Source First, Then Kill the Smell for Good
A musty basement smell is mould and mildew exhaling — and it always points at moisture somewhere. The room-by-room hunt, the dry drain-trap mimic that fools everyone, the humidity band the EPA wants, dehumidifier sizing, and when a pro is worth it.