 Keep
Musty Basement Smell: Find the Moisture Source First, Then Kill the Smell for Good
 Daniel Mercer · Editor & Researcher·
Published November 16, 2026·
Updated November 16, 2026
You notice it the way everyone does: halfway down the basement stairs, in the first month in the house, carrying a box you meant to store. The air changes. It's not exactly a bad smell — it's older than that, like a library basement or a cabin opened after winter — and it clings. You come back up and the living room smells fine, but later a guest says it, politely, from the top of the stairs: "Your basement smells a bit… earthy." The air fresheners go in. The smell wins anyway, because the air fresheners were never the point.
Here's the good news buried in the bad: that smell is not a mystery and it is not permanent. It is a signal with a specific source, a short list of hiding places, and a fix that ends it for good once you treat the cause instead of the odour. This guide works in the only order that works: understand what you're smelling, measure the room, hunt the source down room by room, fix the moisture, then clean what's left. Skip to the cleaning first, the way most people do, and you'll be doing it again in a month.
What that smell actually is
Mustiness is not the smell of damp itself. Damp concrete barely smells of anything. What your nose is reading is a family of gases called microbial volatile organic compounds — MVOCs — released by mould and mildew colonies as they grow and feed. Different colonies release different blends, which is why one basement smells like old books and another like a swamp, but the message is identical: somewhere down here, something organic is staying wet enough, long enough, for mould to live on it.
That single fact reorganises the whole problem. The smell is not the disease; it is the symptom — the diagnosis your house is handing you for free. A colony only feeds where moisture keeps arriving: on drywall paper against a damp wall, in carpet pad that wicked up a spill in spring, in the dust and wood of a rim joist that sweats every summer. Kill the smell without killing the moisture supply — sprays, candles, ozone gadgets, scented paint — and the colony keeps eating and keeps exhaling. Cut the moisture, and the colony starves, goes dormant, and stops producing the gases. The smell dies of hunger.
It also explains the feature that frustrates owners most: you often can't see the thing you can smell. MVOC gases pass through paneling seams, drywall joints, electrical outlets and floor gaps. The growth can be entirely hidden — on the back face of a finished wall, under a floor — while its exhaust fills the room. So "I can't see any mould" rules out almost nothing. The hunt below is built for that: it goes by location and moisture logic, not by eyesight.
Measure before you hunt: the hygrometer comes first
Before you tear into anything, spend under $25 on the instrument that splits this problem in two: a hygrometer, which reads relative humidity. Put it mid-room, away from walls and the dehumidifier if you already own one, and read it across a few days — morning and evening, ideally through one humid spell.
The numbers you're judging against come from the US EPA: keep indoor humidity below 60% relative humidity, and ideally between 30% and 50%. The reading sorts your basement into one of two cases:
- The room air itself is wet. Readings parked above 60%, walls dry to the touch, smell spread evenly through the whole space and worse in summer. Your problem is humidity and condensation, and it's the cheaper problem: no single hidden colony, just air feeding a thin film of growth on every cold surface it can find. The fix is humidity control, below.
- The room air is fine but the smell persists. Readings in the 30–50% band, yet one corner or one wall still smells. Now the moisture is arriving as liquid, at a specific material — a leak, a seep, a pad that never dried — and no dehumidifier setting will touch it. This is a hunt, and it's the next section.
One more hygrometer lesson, because it surprises every first-time owner: a basement can run humid with perfectly dry walls. The foundation sits in cool soil year-round, so basement surfaces are the coldest in the house. Warm summer air drifts in — through a window, down the stairs, through the rim joist — hits those cold surfaces, and its relative humidity spikes at the surface even when the middle of the room reads acceptable. That surface film is all mould needs. It's why the smell is a summer smell in most houses, and why "the walls feel dry" is not the all-clear it sounds like.
The hunt: six places the smell hides
Work this list in order, nose first, flashlight second. You're looking for moisture and its food — paper, wood, fabric, dust, cardboard — in combination. Get close; the smell concentrates near its source in a way it never does across the room.
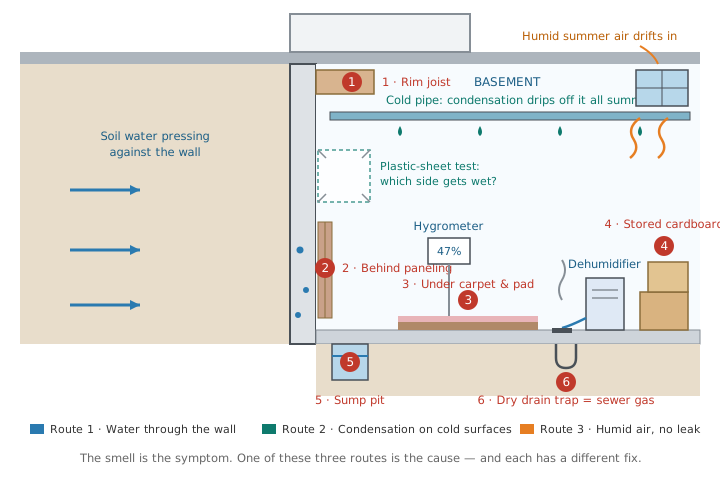
1. Behind paneling and finished walls. The classic. A finished basement wall is a sandwich: cold foundation, framing and drywall or paneling, and a hidden cavity where condensation and small seeps keep the paper backing of drywall permanently damp. You can't see the growth because it's on the cavity side. Clues: smell strongest along one wall, baseboard paint bubbling or separating, a wall that feels cool-damp low down, mustiness that pours out of an electrical outlet on that wall when the furnace fan runs. If the evidence stacks up on one wall, the honest test is opening a small inspection hole low on it — a hand-sized square behind the baseboard line, patchable in an hour — and looking with a flashlight and your nose.
2. Under carpet and its pad. Carpet on a basement floor is a sponge with a view. The pad underneath wicks up condensation, small seeps and every spill the room has ever had, then dries so slowly that mould moves in permanently. The carpet surface can look and feel clean while the pad is a colony. Test: press your palm flat on the carpet in the smelliest area and smell your palm; pull up one corner — most basement carpet corners lift — and look and smell underneath. Grey-black mottling on the pad or the slab, and a smell that knocks you back, is the verdict. Pad that has grown mould is not cleanable; it comes out.
3. The rim joist. At the top of your foundation wall, where the house's wood framing sits on the concrete, is the coldest wood in the building — and in many houses it was never insulated or sealed. Summer air condenses on it; winter cold radiates through it. The result is mould on the joist and the sill plate, high up where nobody looks. Bring a step stool and a flashlight, and check the whole perimeter, especially corners and the bays behind stored clutter. Black or green-grey film on the wood, plus a smell that's stronger at the ceiling line than the floor, is the signature.
4. The sump pit. An open or loosely covered sump pit is a well of damp air: standing water, wet gravel, and a biofilm on the pit walls, exhaling into the room around the clock. If the smell sharpens near the pit, you've found at least a contributor. A gasketed, sealed pit cover — the same cover that also blocks soil gas — plus keeping the pit's water line where the pump sets it, quiets most of it. Our sump pump guide covers the pit hardware in full if yours needs work.
5. Stored cardboard and fabric. Sometimes the colony isn't in the house at all — it's in your stuff. Cardboard boxes sitting directly on a slab wick moisture from the concrete and grow mould on their bottom faces; so do fabric storage, old rugs, upholstered furniture and the particleboard backs of cheap shelving. This is the cheapest possible version of the problem: the fix is a bin, a shelf and a bin bag. Check the underside of everything stored on the floor before you blame the building.
6. The HVAC condensate line — and the great mimic. Two plumbing-flavoured sources finish the list. First, the real one: your furnace or air handler's condensate drain can clog, letting a pan of water sit and grow slime that the blower then perfumes the house with — check the drain line and pan if the smell pulses with the heating or cooling cycle. Second, the impostor, responsible for more false mould panics than any other cause: a dried-out floor-drain trap. Every floor drain has a U-shaped trap meant to hold water as a seal against sewer gas. In a basement where nobody pours water down that drain, the trap evaporates dry over months — and sewer gas, earthy and foul, rolls in freely. The fix costs one cup: pour water down the drain, then add a spoonful of mineral oil, which floats on the trap water and slows evaporation for months. If your "mould" smell vanishes by evening, you never had mould. You had plumbing asking for a drink.
Three smells that get called "musty" — and only one is mould
Owners use "musty" for three different problems, and the fixes share nothing. Sort yours before you spend anything.
Musty-earthy: mould and mildew. Old books, damp soil, a closed cabin. Present all the time, stronger in warmth and humidity, spread through the room or concentrated at one wall or corner. This is the MVOC smell, and it's what the rest of this guide treats.
Sewer: a drain or vent problem. Sharper, gassy, unmistakably drains once you name it. Worse after the house sits unused, or when a lot of water drains at once. First suspect is the dry floor-drain trap above; second is a cracked or disconnected vent pipe inside a wall. Neither involves mould, and neither is fixed by cleaning. The trap you fix with a cup of water today; a smell that survives a refilled trap earns a plumber.
Chemical or exhausty: stop and think. A smell like fuel, solvent or exhaust in a basement is not a mould problem at all — it's stored products off-gassing at best, and at worst a fuel-burning appliance spilling exhaust into the room (backdrafting), which can carry carbon monoxide. If the smell arrives when the furnace or water heater runs, if anyone feels headachy or dizzy down there, or if you have any doubt: leave, ventilate from outside if you safely can, and call the fire department's non-emergency line or your gas utility. CO alarms belong on every floor regardless — this is the one basement smell that is a same-day emergency.
Where the moisture is actually coming from: the three routes
Every musty basement is being fed by one of three routes — the three drawn in the diagram — and the route decides the fix.
Route 1: liquid water arriving. Through the wall after rain, up through the floor, in at the cove joint, or out of a pipe. This is the territory of our guide "Basement Water After Rain? Read Where It Comes In, Then Fix It in the Right Order" — entry point first, outside fixes before inside systems. If your smell follows wet weather, start there; this post picks up once the liquid is stopped.
Route 2: vapour moving through the wall. Groundwater wicks through concrete as vapour and evaporates at the inside face — the process our efflorescence guide, "White Powder on the Basement Walls: Efflorescence, and the Water Behind It", reads from the salt it leaves behind. If you have the white crust, you have this route documented already. Vapour alone rarely soaks a room, but it keeps wall cavities and anything stored against the wall just damp enough.
Route 3: humid air, no leak at all. The summer special: airborne moisture condensing on soil-cooled surfaces — the cold water pipe sweating, the floor going clammy, the rim joist filming over. Walls dry, no entry point, smell everywhere and worse every July. This route belongs entirely to this post, and its fix is air: sealing and humidity control.
One test separates route 1 and 2 from route 3, and it's the one drawn on the diagram: the plastic-sheet test (the simplified version of ASTM D4263, the standard test for moisture in concrete). Tape a two-foot square of clear plastic sheeting to the wall, sealing all four edges with tape, and leave it 24 hours. Moisture appearing under the sheet, against the wall, means water is travelling through the concrete — routes 1 or 2. Moisture appearing on the room side of the plastic means room air is condensing on a cold wall — route 3, and your problem is humidity, not the foundation. Run it before anyone quotes you a waterproofing system; it costs a square of plastic and it has ended a lot of expensive guessing.
So the routing rule for this whole corner of the house: white crust on the wall → the efflorescence guide; water arriving with rain → the after-rain guide; dry walls, damp air, smell everywhere → stay here. The three problems share a basement but not a cure.
The smell log: let the timing name the route
If the hunt and the plastic sheet leave you unsure, give the smell a week of observation and let its schedule testify. Note, once or twice a day, how strong it is and what the weather and the house have been doing. Four patterns cover nearly every basement:
- Worse a day or two after rain, fading in dry spells → route 1. Liquid water is arriving somewhere, and the colony eats after each delivery. The lag is the giveaway — growth responds to the wetting, not the weather itself.
- Worse on humid afternoons, mildest on cool dry days, worst in July and August → route 3. Condensation is feeding a broad, thin film of growth on cold surfaces. Your hygrometer will agree, climbing as the smell does.
- Constant, in all weathers, concentrated in one place → a specific wet material: the pad, the wall cavity, the rim joist, the stuff on the floor. Weather-independent smell means the moisture supply is too — a slow plumbing drip is the suspect nobody wants and everybody should check.
- Pulsing with the furnace or air-conditioning cycle → the condensate system, or growth inside the ductwork near the air handler. The blower is distributing the smell on a schedule, which is why it seems to come and go with the heating.
And the log settles the most common piece of bad advice in this whole subject: should you open the basement windows to air it out? Only when the outdoor air is genuinely drier than the air downstairs — a cool, dry day, roughly when the outdoor dew point sits below the temperature of your coldest basement surface. On a humid summer day, an open basement window is a moisture import business: warm wet air flows in, finds the cold floor and pipes, and condenses. Owners air out their basements all July and wonder why the smell peaks in August. Ventilate on dry days; dehumidify on humid ones; the log tells you which day is which.
The fix, DIY stage: starve it, dry it, clean what's small
Work in this order. Each step assumes the one before it.
Step 1 — Stop the source you found. Refill the dry trap. Seal the sump cover. Clear the condensate line. Get the cardboard off the floor and the mouldy pad out of the house. Fix the dripping pipe joint. If your source is route 1 liquid entry, work the after-rain guide's outside-in ladder — gutters, downspouts, grading — before anything cosmetic in here. Cleaning before this step is theatre.
Step 2 — Dry what's wet, inside 24–48 hours. The EPA's window is firm: water-damaged areas and materials dried within 24–48 hours usually don't grow mould at all. Fans moving air across wet surfaces, a dehumidifier pulling it out of the air, heat if the season allows. Materials already colonised and porous — pad, soaked drywall paper, swollen particleboard — don't get a drying reprieve; they get removed, because the growth is inside them, not on them.
Step 3 — Set up humidity control that runs itself. This is where most owners underbuy or give up, so be specific. Sizing: match the unit's pint rating (the water it removes per day) to the space and its dampness. A small, merely cool basement may hold the line with a 30-pint unit; the size most full basements land on is the 50-pint class, which covers a very damp basement of up to roughly 2,500 square feet; a large, wet, finished basement wants 70 pints or an installed whole-basement unit. When in doubt, size up — an undersized unit runs forever and loses, an oversized one cycles and wins. One wrinkle: pint ratings were re-tested at cooler temperatures under the newer DOE standard, so a current 50-pint unit is honestly rated for basement conditions in a way older boxes weren't — compare like with like when shopping. Placement and draining matter more than brand: put it centrally with air space around it, and above all run the drain hose to the floor drain, sump or a condensate pump. A bucket unit that fills at 2 a.m. and switches off is a humidity-control system that works two-thirds of the day. Running cost: do the arithmetic once for your own unit — watts × hours ÷ 1,000 × your electricity rate. A typical 50-pint unit drawing around 600 watts, running 12 hours a day at 17 cents a kilowatt-hour, costs roughly $1.20 a day, call it $35 a month through the humid season. That's the honest price of a dry basement; compare it with one remediation bill and it stops looking like a luxury.
Step 4 — Clean the growth that's yours to clean. Under the EPA's roughly 10-square-foot line, on surfaces you can reach, this is a homeowner job. Gear up first: gloves, eye protection, and a well-fitting respirator — an N95 at minimum — because the point of the exercise is not to breathe the colony while you evict it. Scrub hard surfaces (tile, sealed concrete, metal, solid wood) with detergent and water; the detergent and the scrubbing do the work, and the surface must then dry completely. Bag mouldy porous material in heavy bags, sealed before they travel through the house. Work with the basement door closed and a fan exhausting out a window if you can rig one, so the dust you raise leaves instead of settling upstairs.
Step 5 — Fix the two cold spots permanently. Two of the hunt locations deserve construction, not just cleaning, because they will re-condense every summer until they're insulated. The cold water pipe: slip foam insulation sleeves over every accessible run, especially where it passes over stored goods or finished ceiling — a sweating pipe that can't touch humid air can't drip, and the sleeves cost a few dollars a length. The rim joist: seal each joist bay with rigid foam board cut to fit and caulked at the edges, or a spray-foam kit for the whole perimeter. That one job warms the coldest wood in the house above the dew point, cuts the draught that imports summer humidity in the first place, and pays a small heating-bill dividend forever. Do it after the wood has dried and any growth on it has been cleaned — insulation over a live colony just gives it privacy.
Step 6 — Know the four things that never work. Ozone generators are sold as smell killers; the EPA's indoor-air guidance warns against them, ozone at concentrations that touch mould is a lung hazard, and dead mould still smells and still feeds allergies. Foggers and mould bombs mist biocide into air while the colony sits protected inside a pad or a wall — perfume with a warning label. Mould-killing paint over live growth seals the colony under a film it eventually eats through or grows around; paint is a finish for a cleaned, dried surface, never a treatment. And bleach on porous material is the classic wasted afternoon: bleach's water soaks into wood and drywall while its active ingredient largely stays at the surface, so you can end up feeding the deeper growth you meant to kill. On hard, non-porous surfaces it's a legitimate cleaner; in a wall cavity it's a rumour.
The fix, pro stage: what remediation actually is
Above the EPA's 10-square-foot line — or behind a finished wall, or under a floor — the job changes species. Professional remediation is not stronger scrubbing; it is controlled demolition with containment, and understanding its shape is how you judge a quote.
A proper crew starts by sealing the work area off from the rest of the house with plastic sheeting and putting it under negative air pressure, so dust and spores generated by the work are pulled into filtered exhaust rather than drifting upstairs. Then the ruined material comes out: mouldy drywall cut back to clean margins, pad and carpet disposed of, insulation removed where it's colonised — all of it bagged inside the containment. Exposed framing and hard surfaces are cleaned and treated, the area is dried and verified dry, and only then is rebuilding even discussed. For a single affected room corner this is typically a day or two of work; a finished basement with growth inside multiple walls runs longer and is priced accordingly.
What the quote must include — get it in writing, itemised: the areas and square footage covered; the containment and negative-air setup; exactly what material is being removed and disposed of; whether the moisture source itself is fixed in the price or merely noted (it is very often noted, not fixed — the remediation crew kills the colony, and the leak that fed it may be another trade's invoice); drying verification; and what, if anything, is guaranteed, and for how long. A quote that skips containment, or that bundles an expensive air test as the centrepiece, is telling you how the job will go.
And the testing question, one last time, because pros will offer it: EPA and CDC guidance is that mould testing is usually unnecessary. If you can see or smell the growth, you already know everything a test would change — which is nothing, because the treatment is identical for every common household mould: fix the moisture, remove the growth, keep it dry. There are no federal exposure limits for a result to be compared against. Pay for testing when a doctor asks for it, or when a landlord, seller or insurer dispute needs a paper trail — not as a step toward fixing your own basement.
What it costs, and where the money actually goes
The cost table at the top of this guide is arranged in the order you should spend. The first line — a hygrometer and an afternoon's hunt — resolves a surprising share of musty basements outright: a dry trap, a sweating pipe, a sump pit breathing into the room. The dehumidifier lines are the standing cost of the humidity route: $200–$350 for the portable most basements need, $1,100–$2,800 installed for a whole-basement unit in a large or finished space. Professional remediation is the line everyone fears, and it's real money — typically $15–$30 per square foot of affected area, $1,500–$6,000 for a partial basement, more for a full one — but notice what it buys: removal of a colony, not a cure for its cause. The owner who pays it before fixing the moisture has bought the same job twice, a season apart. Spend in order and the last line is the one most readers never reach.
DIY or pro?
Stay DIY while the hunt finds a fixable source (trap, sump, condensate, stored goods, a sweating pipe), the growth you can find totals under roughly 10 square feet on surfaces you can reach, and your hygrometer says humidity control can hold the room in the 30–50% band. That describes the majority of musty basements, including most of the frightening ones.
Call a pro when the growth is larger than that line or keeps returning after the source is fixed; when the evidence points inside a finished wall or under flooring; when the water behind it is a plumbing or foundation problem beyond your tools — route those through the after-rain guide's contractor guidance; when the flooding involved sewage; or when anyone in the house has a weakened immune system, in which case they shouldn't be the one cleaning, and the margin for error narrows. And call the utility or fire service, not a remediation company, for the chemical and exhaust smell described above.
How urgent is it, really?
File this under this month, not this minute — with two exceptions that move it to today. The smell itself is a slow problem: colonies grow over weeks, and a basement that has smelled musty since spring will not be meaningfully worse next Tuesday. But the moisture behind it is patiently damaging things you own — framing, drywall, stored belongings — and every wet season enlarges the colony and the eventual bill, so "slow" is an argument for scheduling the work, not for forgetting it. Move immediately if the smell is the chemical/exhaust kind, or if it's sewer gas that survives the trap refill; move this week if someone in the house has asthma or immune problems, or if the smell is strengthening fast alongside visible water. For everyone else: hygrometer this week, hunt this weekend, source fixed this month — and by the time the humid weather arrives, your basement should smell like nothing at all, which is exactly what a basement is supposed to smell like.
Sources
- US EPA — Mold Course Chapter 9: Prevention
- US EPA — Tribal IAQ Resource Directory: Mold and Moisture
- HomeGuide — Mold Removal Cost
Cost at a glance
| Item | Typical cost | Notes |
|---|---|---|
| Hygrometer + the room-by-room hunt | Under $25 | The instrument that separates a humidity problem from a hidden wet material — buy it before any product |
| DIY cleanup of a small area (under ~10 sq ft) | Under $50 | Detergent, scrub brushes, gloves, eye protection, a respirator and heavy bags — the EPA's DIY-sized job |
| Portable dehumidifier, 50-pint class | $200–$350 | The size most basements actually need; set it up with a drain hose so it never stops at a full bucket |
| Whole-basement dehumidifier, installed | $1,100–$2,800 | Hard-plumbed and ducted; for large, finished or chronically humid basements where a portable can't keep up |
| Professional remediation, basement (partial) | $1,500–$6,000 | Typically priced around $15–$30 per square foot of affected area; a single small corner can start near $500 — and it does not include fixing the moisture source |
Frequently asked questions
Why does my basement smell musty when I can't see any mould?
Because the colony doesn't need to be visible to be smellable. The musty odour is made of gases (microbial volatile organic compounds) that mould and mildew release as they feed, and those gases travel through paneling, drywall joints and floor gaps from growth you cannot see — behind a finished wall, under carpet pad, inside a damp rim joist. Hidden growth is the rule in basements, not the exception, which is why this guide hunts by location rather than by sight. If the room's humidity reads in the EPA's 30–50% band and the smell persists, a specific wet material is feeding it, and the hunt section will usually find it.
Will a dehumidifier get rid of a musty basement smell?
Only when the moisture source is the air itself. If your basement's problem is humid air condensing on cold surfaces — the classic summer pattern — then yes, holding relative humidity in the 30–50% band starves the growth and the smell fades over a few weeks. But a dehumidifier does nothing for a colony fed by water arriving through the wall, a leaking pipe or a wet carpet pad; it will dry the room while the material stays wet and the smell stays. That is why the order in this guide is measure, hunt, fix the source — then buy the dehumidifier sized to hold the result.
What humidity level should a basement be kept at?
The US EPA's guidance is to keep indoor humidity below 60% relative humidity, ideally between 30% and 50%. Basements run wetter than the rest of the house because their walls and floor sit against cool soil, so a basement that matches the upstairs reading in winter can climb past 60% in summer when warm, humid outdoor air meets those cold surfaces. Measure with a hygrometer at mid-room, away from walls, and check it across a few days rather than trusting one reading — and if it sits above 60% with no leak anywhere, humidity control is your fix, not a contractor.
Is a musty basement smell dangerous?
Honestly: it depends on the person, and no federal limit exists to hide behind. The EPA has not set standards or limits for mould in homes, and reactions vary widely — many people notice nothing, while people with mould allergies or asthma can get congestion, coughing, wheezing and eye or skin irritation, and people with weakened immune systems face more serious risks. What the smell guarantees is that mould is growing somewhere and moisture is feeding it, and both of those are worth fixing on the merits. Treat it as a home problem with a health edge: fix it promptly, faster if anyone in the house is in a sensitive group, and don't let a salesperson convert it into panic pricing.
Why is the musty smell worse in summer?
Summer stacks all three moisture routes at once. Warm outdoor air carries far more water vapour than winter air, and when that air reaches your basement it meets walls, floors and water pipes cooled by the soil — so it dumps moisture as condensation on exactly the surfaces mould likes. Groundwater is often higher, and the colonies that idled through winter feed and release more of their gases in the warmth. It's also why opening basement windows on a humid day makes things worse, not better: you're importing the moisture, not airing anything out. Ventilate a basement on dry, cool days; dehumidify it on humid ones.
Should I have the mould tested before doing anything?
Almost always, no — and that's the EPA and CDC position, not a shortcut. Testing can name the species growing in your basement, but it doesn't change the treatment: find the moisture, fix it, remove the growth, keep the area dry. There are no federal exposure limits for a test result to be judged against, and a clean-looking test from one spot says nothing about the colony behind the paneling. Spend the testing money on a hygrometer and the moisture fix instead. The exceptions are legal and medical, not practical: a landlord dispute, an insurance fight, or a doctor who specifically asks.
How much mould can I clean up myself?
The EPA's working line is roughly 10 square feet — about a 3-by-3-foot patch. Below that, on hard surfaces, a homeowner cleanup with detergent and water, gloves, eye protection and a well-fitting respirator is the standard guidance, followed by complete drying. Porous materials that are mouldy through — carpet pad, ceiling tile, the paper face of soaked drywall — usually have to come out and be bagged rather than cleaned, at any size. Above 10 square feet, inside walls, or after sewage-contaminated water, call a remediation professional: the job becomes containment and controlled removal, not scrubbing.
Checked November 16, 2026. This guide is general information, not a substitute for a licensed professional.
Related guides
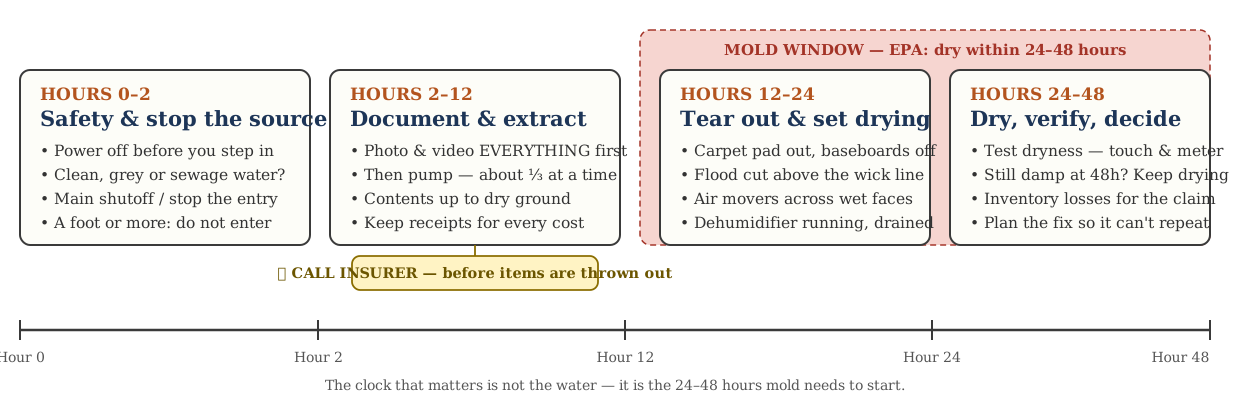
Basement Flooded? The First-48-Hours Playbook: Safety, Pumping, Drying, and Insurance
Standing water in the basement is an order-of-operations problem. The safety rules for hour one, how to document for insurance before you move anything, why you pump in stages, what to tear out, how to dry against the EPA's 24–48-hour mold window, and when the pros are mandatory.
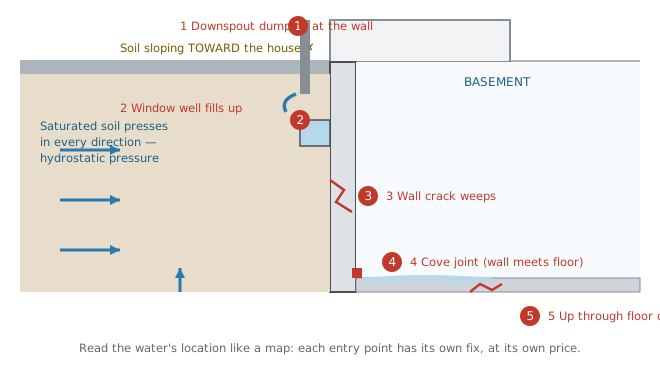
Basement Water After Rain? Read Where It Comes In, Then Fix It in the Right Order
Water at the cove joint, through a crack, up through the floor — each location is a different diagnosis with a different price. The outside-in fix order, hydrostatic pressure explained, sump pumps, and 2026 waterproofing costs.
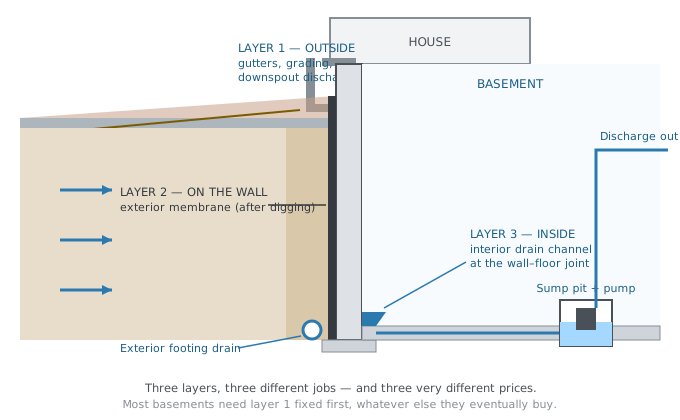
Basement Waterproofing Cost: What Each Method Really Costs
Waterproofing quotes run from $300 to $25,000 because the word covers five different jobs. 2026 costs per method and per linear foot, the order to buy them in, how to read an itemised quote, and what a lifetime warranty actually promises.