 Keep
Find It Before You Need It: Your Main Water Shutoff, Gas Shutoff & Electrical Panel
 Daniel Mercer · Editor & Researcher·
Published November 16, 2026·
Updated November 16, 2026
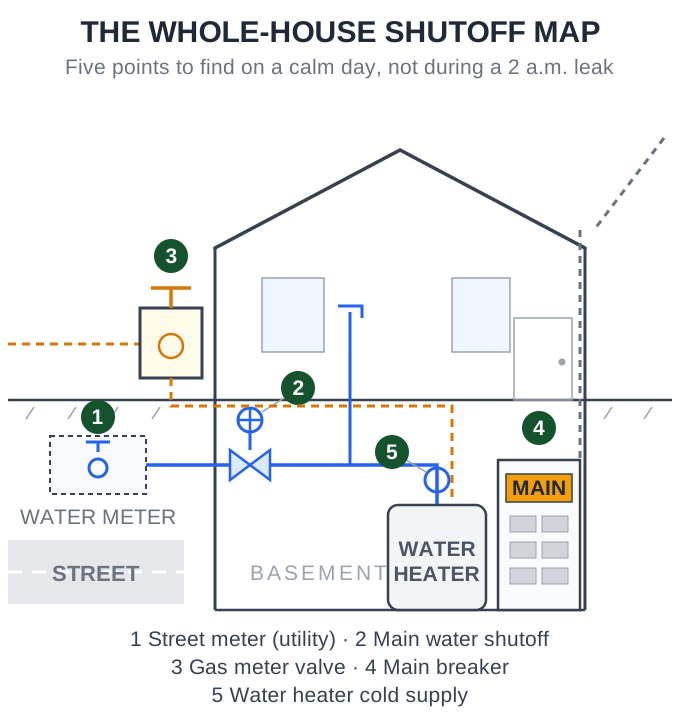
There are two versions of this job. In the first, you spend a quiet hour on a Saturday morning, coffee in hand, wandering your own basement with a roll of tape and a phone. In the second, it is 2 a.m., water is coming through the kitchen ceiling, and you are sprinting between floors shouting "where is it?" at a house that is not answering. Both versions involve exactly the same five shutoffs. The only difference is when you go looking for them.
Nobody walks a first-time buyer through the shutoffs. The seller has moved out, the agent has handed over the keys, and the home inspector, if you had one, spent his two hours on bigger game. So most new owners learn where their main water valve is the way they learn everything else in year one: during the emergency it was meant for. That is backwards, and it is fixable in an hour. If you are working through your first month in the house, this is the single highest-value hour on the list, which is why it sits near the top of our "First-Time Homeowner Maintenance Checklist: The First 30 Days."
By the end of this guide you will have found all five shutoffs, tested the one that matters most, learned the one you are never allowed to reopen, and labelled everything so the rest of your household can do it without you. Let's start with the map.
The five shutoffs, on one map
Every house, whatever its age or layout, has the same five control points. One is the utility's, four are yours.
The numbers on the map match the sections below: 1 is the street meter valve, 2 your interior main water shutoff, 3 the gas meter valve, 4 the main breaker, and 5 the water heater's cold supply valve. Under those five sits a second layer of small fixture stops, covered after the panel, which is where most real leaks actually get stopped. Work through them in order, and keep a phone in your pocket: you will be taking photographs as you go.
1 and 2: your two water mains
Your water supply has two main valves in series, and knowing which one is whose saves a lot of confusion. Point 1 on the map is the valve at the water meter, usually in a pit or box at the street or curb. That valve, and everything on the street side of it, belongs to the water utility. In many towns it takes a long meter key to operate, and some utilities would rather you never touched it at all. Treat it as your backup: good to locate, good to know exists, not your first move.
Point 2 is the one that matters: the interior main shutoff, on your side of the meter, which closes off water to the entire house. Where it hides depends on how your house is built. In a basement house, look on the street-facing basement wall, near where the service line comes through the foundation, often beside the meter if your meter lives indoors. In a crawl-space house, it is usually where the line enters, within reach of the access hatch. Slab houses in warmer regions put it in the garage, a laundry or utility room, the water heater closet, or in a box on an exterior wall. If you are on a well, forget the street entirely: your main is beside the pressure tank, where the line from the well comes in.
You will meet one of two valve types. A gate valve has a round wheel handle. Turning it clockwise, many turns, lowers a gate across the pipe. Gate valves were the standard for decades, and their seals, washers and stems age badly: they seize, they weep around the stem, and worst of all they can feel fully closed while still passing a steady stream. A ball valve has a lever handle. A quarter turn rotates a drilled ball inside; lever along the pipe means open, lever across the pipe means closed. It seals positively and tolerates years of sitting untouched far better than a gate valve. If your main is an old gate valve, file that away: it is living on borrowed time, and any replacement today should be a full-port brass ball valve.
If the hunt comes up empty, work backwards from the water itself. Find where the service line enters the house, through the foundation wall or up through the slab, and follow that pipe with your hand and a flashlight: the main valve is almost always within the first few feet of pipe inside, before the line branches to anything else. Check behind and beside the water heater, inside the panelled box if your plumbing disappears into a finished wall, and in the crawl space directly below where the line enters. Your home inspection report, if you have one, often notes the location in its plumbing section, and the water utility can tell you where your meter is even if they cannot see inside your house. A main that genuinely cannot be found is itself a finding worth a plumber's hour, because he will find it in minutes and you will know it forever.
The test that matters: prove the main actually closes
Finding the valve is half the job. The other half is proving it works, because a shutoff that has sat untouched for fifteen years is a coin toss. Ready.gov's advice for utility shutoffs is simple: locate them, tag them, and make sure they actually operate. Here is the test, done on your schedule instead of the flood's.
- Pick a calm hour and warn the household. For ten minutes, the water will be off. Nobody should be mid-shower or running the washing machine.
- Open a faucet and let it run. A ground-floor or basement tap is ideal. This is your witness: it shows you what the valve is doing.
- Close the main valve fully. Gate valve: clockwise, all the way, firmly but without leaning on it. Ball valve: one quarter turn, until the lever sits across the pipe.
- Watch the faucet. The flow should weaken and stop within about a minute, as the water standing in the pipes drains out. A brief slowing trickle is the pipes emptying, and that is success.
- Check the meter. With every tap in the house off, look at the meter's dial or leak indicator. It should be perfectly still. If it creeps, water is still getting past your valve.
- Reopen the valve fully. If it is a gate valve, open it all the way and then close it back a quarter turn. That small habit keeps the stem from seizing hard in the open position over the coming years.
Now read the results honestly. If the faucet never slowed, or the meter kept turning, your main is not sealing, whatever the handle felt like. A handle that spins freely without resistance is worse: the stem has parted from the gate inside, and the valve is not tired, it is dead. A slow seep around the stem when you operate it means the packing seal is failing, an early warning of the same ending. And if the valve will not move at all, leave it alone. Do not put a wrench on a seized valve and heave: snapping the stem off a live main turns a planned repair into the very emergency you are trying to prevent. A valve that fails this test goes on the fix list in the last section of this guide, and until it is replaced, point 1, the street meter, is your real emergency shutoff, so make sure you know where it is and that a meter key lives with the house keys.
3: the gas shutoff, the one you close but never reopen
Point 3 is the gas meter, usually mounted on an outside wall where the gas service comes in from the street. On the pipe entering the meter you will find a valve with a flat metal tang instead of a handle. It turns a quarter turn, with an adjustable wrench: tang in line with the pipe means gas is on, tang across the pipe means off. When it is off, the holes in the tang line up so the utility can padlock it. Keep a wrench that fits it hanging right there at the meter, or in a known spot on the way to it. In an emergency you do not want to be trying every wrench in a toolbox drawer.
Gas has different rules from water, and they are not optional. Ready.gov states them plainly, and every gas utility repeats them:
- Turn the gas off only for a leak or an emergency. The triggers are specific: you smell the rotten-egg odour the utility adds to gas, you hear hissing near a pipe or appliance, or the meter dial is moving while every gas appliance is off.
- Do not practise closing it. Unlike the water main, there is no test protocol for gas. You locate the valve, confirm the wrench fits, tag it, and leave it alone. Finding it is the rehearsal.
- Never turn it back on yourself. Once that valve is closed, only the gas utility or a licensed professional restores service. They leak-check the system and relight the pilot lights. Relighting everything yourself risks feeding gas into the very leak that made you close the valve.
- If the smell is strong, leave first. Get everyone out, do not flip light switches or use anything electrical on the way, and call 911 or the gas utility from outside the house.
That asymmetry is the whole lesson of this section: water forgives experimentation, gas does not. Your job with the gas shutoff is to know exactly where it is and exactly when to use it, and to have the discipline to stop there.
Two smaller gas points belong in your round. First, each gas appliance, the furnace, the water heater, the stove, usually has its own shutoff valve on the pipe right behind or beside it. Those are yours to use for appliance work and repairs, and they are worth finding and tagging while you are in finding mode; closing one isolates a single appliance without touching the meter. Second, learn to read the meter itself. With every gas appliance off, the smallest dial or the leak indicator on the meter should be completely still. If it creeps, gas is moving somewhere it should not be, and that is a call to the utility from outside the house, not a DIY investigation.
4: the main breaker, your whole-house power switch
Point 4 is the electrical panel, the grey metal box usually found in the garage, the basement, a utility room or, in some regions, on an exterior wall. Inside the door, the rows of switches are branch breakers, each feeding one circuit. The main breaker is the big one: a double-width switch, usually at the very top of the panel (sometimes at the bottom, or in a separate disconnect box beside the meter), often labelled MAIN and stamped with your service size, 100, 150 or 200 amps.
Flip the main breaker off and every branch circuit in the house goes dead: lights, outlets, the furnace, the well pump, everything. That is the switch you use when water is anywhere near electrics, when an appliance is smoking, or before any electrical work beyond changing a bulb. Two limits are worth knowing. First, the main breaker does not make the panel itself safe inside: the heavy cables from the meter up to the main breaker stay live even with the main off, which is why the panel's inner cover is never a homeowner surface. Second, some older split-bus panels have no single main at all; up to six breakers together act as the disconnect. If you open your panel and cannot find one obvious main switch, that is a question for an electrician on a calm day, not a scavenger hunt during a blackout.
While you are standing there, do the labelling. If the circuit directory on the door is blank or fiction, you have found another first-month job, and it pairs naturally with this one. And keep a flashlight on top of the panel or in the same room: panels live in dark places, and the day you need the main breaker in a hurry is rarely a bright one. One safety note that outranks convenience: never reach into a panel with wet hands or while standing in water. If the basement is flooded and the panel is in it, the shutoff can wait for the utility or an electrician; water and panels are a combination to respect, not to improvise around.
Two more panel realities turn up in real houses. Some homes have a separate disconnect switch in its own box on the exterior wall, beside the meter, increasingly common on newer builds and required in many places so firefighters can kill power from outside; if your house has one, it does the same whole-house job as the main breaker and belongs on your map and your walk-through route. And panels attract storage: paint cans, holiday boxes and shelving creep in front of them until the door barely opens. Keep the space in front of the panel clear enough to stand at and work the breakers with both hands. In an emergency, thirty seconds spent moving boxes is thirty seconds too many.
5: the second layer, where most leaks actually stop
The five points on the map are the headline act, but most real household leaks never need them. The common floods, a burst washing-machine hose, a toilet supply line letting go, a faucet cartridge failing, are stopped at the second layer: the small stop valves at each fixture.
Behind every toilet is a stop valve on the wall or floor, feeding the fill valve; a quarter turn (or a few turns on an older multi-turn valve) and the toilet is isolated while the rest of the house keeps its water. Under every sink are two angle stops, hot and cold, doing the same job for that faucet. Some tubs and showers have stops behind an access panel; some, frustratingly, have none, and it is worth knowing which kind yours are before you need to care. In the laundry, the washing machine usually has its own pair of valves, often in a recessed box in the wall behind it, feeding the two hoses. Those hoses are among the most common burst points in any house, they are under full pressure around the clock, and their valves are the ones to close when you go on holiday; if the valves are awkward to reach behind the machine, that is worth solving in calm weather too, because a hose does not wait for a convenient moment.
Point 5 is the biggest of this layer: the cold supply valve on the pipe entering the top of your water heater. Close it and you stop all hot water in the house and isolate the tank itself, which is the move when a tank starts leaking, a hot line bursts, or a hot tap will not stop dripping. If the tank itself is the problem, also turn the heater off, at its control or its breaker, so it is not heating an empty or leaking tank.
Test these valves during your calm-day round too, but gently. An angle stop that has not moved in a decade can start to weep the first time it is disturbed. That is not a reason to skip the test; it is the test working. A stop that seeps in a planned Saturday inspection is a cheap, scheduled fix. The same stop discovered for the first time mid-leak, under a filling cabinet, is a much worse afternoon. The principle is the one running through this whole guide: every valve in the house should be moved by you, on purpose, before an emergency moves it for you.
No gas meter? The propane and oil versions
If your house heats with propane, your gas shutoff is not at a meter but at the tank in the yard: lift the dome lid on top of the tank and you will find the main service valve there. The rules travel with it. Close it for a leak or an emergency; only your propane company restores service afterwards, because they leak-check the system before anything is relit. Many propane homes also have a second shutoff where the line enters the house, which is worth finding and tagging while you are out there.
Oil heat has its own classic: the burner emergency switch, usually at the top of the basement stairs or just outside the boiler room door, often on a red switch plate. It cuts power to the burner only, not to the house, and it is the switch to use if the burner is running rough, rumbling or smoking. There is also a valve at the oil tank itself. If your house is all-electric, you are already done: your second utility shutoff is the main breaker at point 4, and your list is one item shorter than everyone else's.
Tag it, photograph it, teach it: the 20-minute kit
A shutoff that only one person can find is a single point of failure with a work schedule and holidays. The last step of the job is making the knowledge communal, and it takes about twenty minutes.
Tag every point. Hang a proper valve tag or a flag of bright tape on each of the five, and write what it does in plain words: MAIN WATER, WHOLE HOUSE. GAS METER VALVE. MAIN BREAKER. WATER HEATER SUPPLY. The person using the tag may be a housesitter, a teenager or a plumber you have just met; write it for them.
Photograph every point. Take one wide shot showing where in the room it is and one close shot of the valve itself, and send the set to your household group chat or a shared album everyone can reach from their phone. A photo of a valve behind your exact water heater is worth a paragraph of directions at midnight.
Walk the route once, together. Every adult in the house, and any teenager old enough to be home alone, should physically walk it: street meter, interior main, gas meter, panel, water heater. People remember routes they have walked, not lists they have read.
Repeat the water test once a year. Valves stay working by being used. Put the main-valve test on an annual rhythm; a natural pairing is the same weekend you do your seasonal smoke alarm checks, the alarms tested monthly and the whole routine refreshed with the seasons. One hour a year is the entire maintenance cost of this system.
When the test finds a dead valve: the fix, and what it costs
If your main failed its test, here is what happens next, because it is a better job than most people fear. It is also firmly a plumber job: the replacement sits on the pressurised line coming into the house, so the water has to be off at the street before anyone cuts pipe, and a bad joint on that line floods at full pressure.
The plumber books the street shutoff with the utility first; most utilities do this free for a licensed plumber with advance notice, though some towns charge a fee, and your quote should say which. With the house drained down from its lowest tap, the old valve is cut out and a new full-port brass ball valve is fitted in its place. Water goes back on, air is bled from the lines, the new joint is checked dry, and the plumber exercises the valve and shows you the quarter turn. Once the water is off, the work itself typically takes one to two hours.
A written quote for this job should include four things: the valve specified as a full-port brass ball valve (not another gate valve, not a cheaper standard-port fitting), whether the utility shutoff fee and any permit are included or extra, who opens and who patches if the valve sits behind a finished wall, and a warranty on the work. If the valve lives somewhere truly awkward, this is also the cheapest moment you will ever get to move it somewhere reachable or add a second one; ask for it as a separate line item while the water is already off.
The numbers, from the cost table above: the valve itself is a $15 to $50 part. A straightforward swap on accessible pipe commonly lands between $200 and $400, with national averages around $500 once harder access and local labour rates are counted. Behind a finished wall or buried in the yard, expect $500 to $1,000 or more, because you are then paying for excavation or opening and patching, not plumbing. Weigh that against the alternative the valve exists to prevent: an hour of water running uncontrolled into a finished house does damage that starts where this repair bill ends.
DIY or pro? The honest split
Your jobs: finding every shutoff, testing the water main and the fixture stops, tagging, photographing, teaching the household, and repeating the test yearly. None of it needs more than a meter key, a wrench, tape and a phone, and all of it is the part that actually saves the house.
The pro jobs: replacing a main valve that failed its test, anything inside the electrical panel beyond flipping its breakers, and anything to do with gas beyond closing the meter valve in a genuine emergency and walking away. That last boundary is absolute, and it comes straight from Ready.gov: you may close it; the utility or a licensed professional reopens it, leak-checks the system and relights the pilots.
Do the finding this weekend, while it is still the coffee version of the job. An hour, five valves, a handful of tags. Then, the first time something bursts at 2 a.m., and in an old house something eventually does, you will walk straight to the right valve in the dark, turn it once, and go back to bed with a dry floor and a much smaller story to tell.
Cost at a glance
| Item | Typical cost | Notes |
|---|---|---|
| Find, test, tag and photograph all five shutoffs (DIY) | $0 | About an hour with tags, tape and a phone camera |
| Full-port brass ball valve (the part itself) | $15-$50 | The part is cheap; access and labour are the bill |
| Plumber swaps a seized gate valve for a ball valve, accessible pipe | $200-$500 | Straightforward swaps commonly land at $200-$400; the 2026 national average runs around $500 |
| Utility shutoff at the street so the valve can be changed | $0-$150 | Usually free for a licensed plumber with advance notice; some towns charge a fee |
| Main valve replacement behind a finished wall or buried | $500-$1,000+ | Opening the wall or excavating drives the price; buried replacements average around $875 |
Frequently asked questions
Where is the main water shutoff valve in a house?
Start where the water enters. In a house with a basement, look on the street-facing basement wall, close to where the service line comes through the foundation, often near the water meter. In a crawl-space house, look where the line enters, near the access hatch. In slab homes the main is commonly in the garage, a laundry or utility room, the water heater closet, or a box on an exterior wall. On well water, look beside the pressure tank. If you find two valves, the one on the house side of the meter is the one that shuts off your whole house.
How do I shut off the gas at the meter, and when should I?
The shutoff is a valve on the pipe entering the meter, turned a quarter turn with a wrench until it sits across the pipe. But the when matters more than the how: per Ready.gov, turn gas off only for a leak or an emergency, if you smell the rotten-egg odour, hear hissing, or see the meter dial moving with everything off. Do not practise closing it and reopening it. If you smell gas strongly, leave the house first and call 911 or the gas utility from outside.
Which breaker turns off power to the whole house?
The main breaker: a double-width breaker, usually at the very top of the panel (sometimes at the bottom or in a separate disconnect box beside the meter), often labelled MAIN and stamped with the service size, such as 100, 150 or 200 amps. Flipping it kills every branch circuit in the house. Some older split-bus panels have no single main; up to six breakers together act as the disconnect. If you cannot find one main switch, ask an electrician rather than guessing during an emergency.
How do I test whether my main shutoff actually works?
Open a faucet and let it run, then close the main valve fully. The faucet should slow and stop within about a minute as the pipes drain down. Then check the water meter: with every tap in the house off, its dial or leak indicator should be completely still. If the faucet keeps running at strength, or the meter keeps moving, the valve is not sealing, whatever the handle did. Reopen the valve fully when you finish; on a gate valve, back it off a quarter turn so it does not seize in the open position.
Who is allowed to turn the gas back on?
Not you. Once a gas meter valve is closed, only the gas utility or a licensed professional should restore service. They check the system for leaks and relight pilot lights safely; a homeowner relighting everything alone risks feeding gas into a line that was leaking, which may be why it was shut off in the first place. This is Ready.gov's rule and every utility's rule: you may close it in an emergency, they reopen it.
What do I do if my shutoff valve is stuck or leaking?
Do not force it. A wrench on a seized gate valve can snap the stem and turn a planned job into an emergency. Note what it did instead: a handle that spins without resistance means the stem has parted from the gate and the valve is dead; a slow seep at the stem is a failing packing seal. Both mean replacement, which is a plumber job because the water must be shut off at the street meter first. Until it is fixed, learn where that street valve is and keep a meter key with the house keys.
What is the difference between a gate valve and a ball valve, and which do I want?
A gate valve has a round wheel handle and lowers an internal gate across the pipe over many turns; its washer and stem seals age, seize and weep, and an old one may feel closed while still passing water. A ball valve has a lever handle and a drilled ball inside; a quarter turn opens or closes it fully, lever along the pipe means open, across means closed. Ball valves seal better and survive years of neglect far more reliably, which is why any failed main today gets replaced with a full-port brass ball valve.
Checked November 16, 2026. This guide is general information, not a substitute for a licensed professional.
Related guides
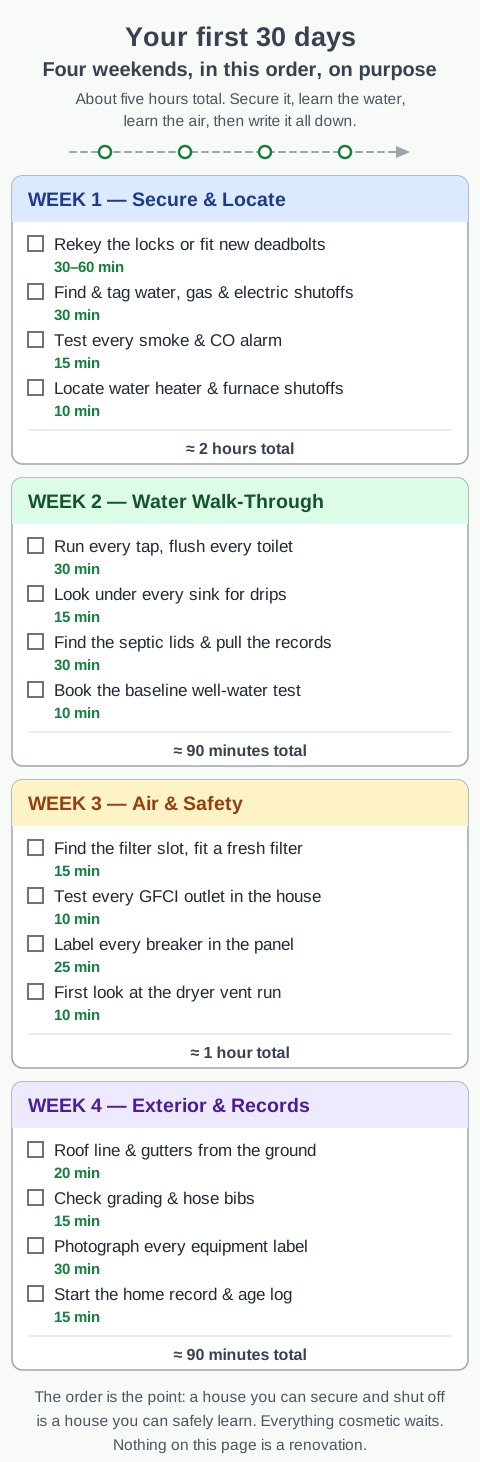
First-Time Homeowner Maintenance Checklist: The First 30 Days
The first 30 days in a new house, in the right order: rekey and locate your shutoffs in week 1, walk the water in week 2, learn the air in week 3, and build your home record in week 4 — with the time and cost of every task, and the list of what can safely wait 90 days.
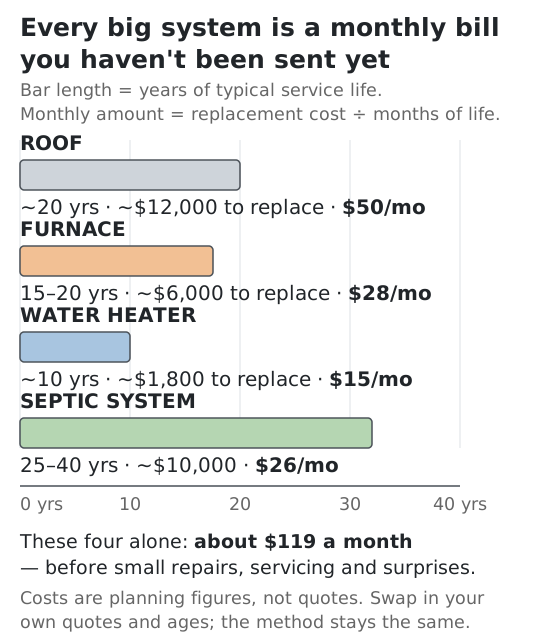
How Much to Budget for Home Maintenance in Year 1: The 1% Rule, Tested
The 1% rule says budget 1% of your home's value a year for maintenance. Here's where it works, where it breaks, what Fannie Mae actually recommends (1–4% by age), and the sinking-fund worksheet that replaces the guess with your own systems' numbers.
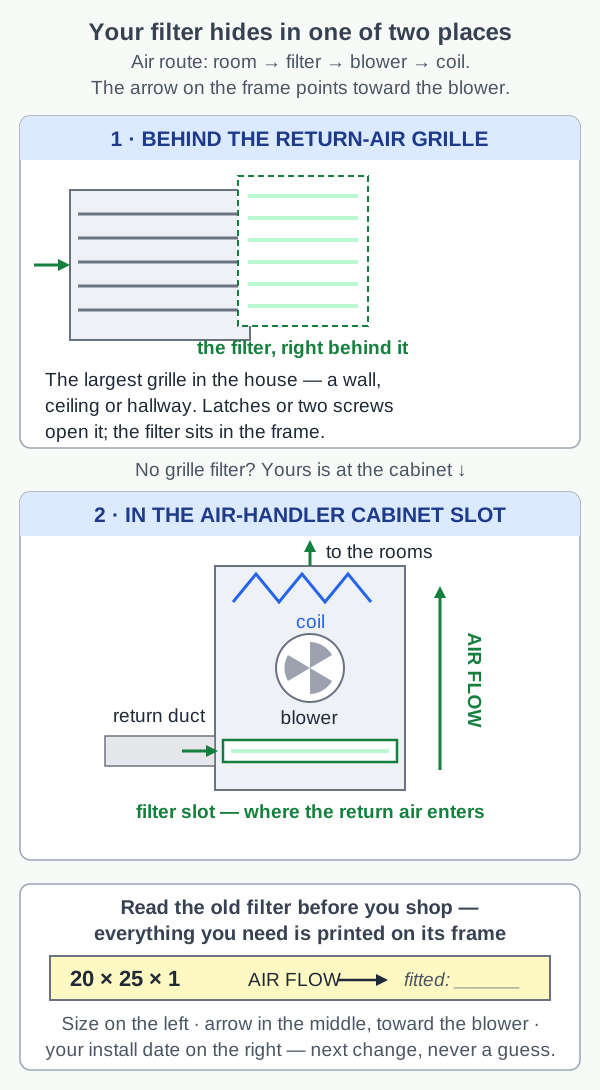
How Often to Change Your HVAC Filter (It Depends on the Filter You Have)
The honest filter schedule: check monthly and change at least every 3 months is only the floor. Fibreglass lasts about 30 days, thin pleated 60–90, deep media 6–12 months — plus how to find the slot, read the size, face the arrow the right way, and why a filter can be too good.