 Keep
Water Heater Leaking From the Bottom? Find the Real Source Before You Replace It
 Daniel Mercer · Editor & Researcher·
Published November 16, 2026·
Updated November 16, 2026
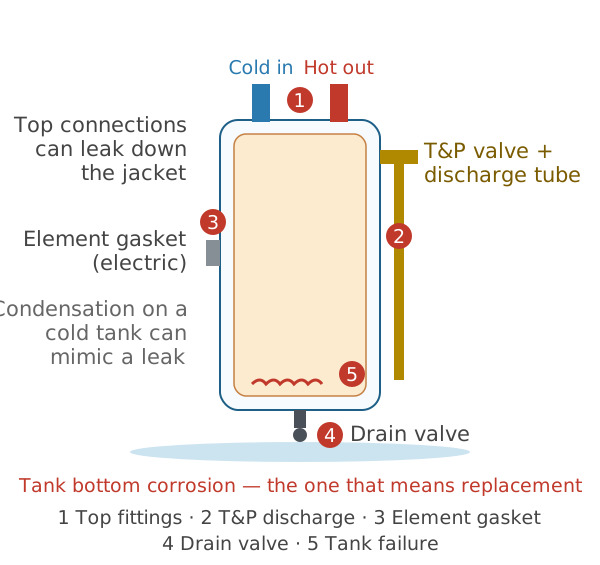
A puddle under the water heater triggers one of two mistakes. The first is panic: the tank is dead, call someone now, agree to whatever a replacement costs. The second is a shrug: it's a drip, put a bucket under it, think about it in spring. The puddle itself doesn't justify either reaction — because "leaking from the bottom" is not a diagnosis. It's a location. Water found at the base of a water heater can come from five different sources, four of which are replaceable parts costing a few hundred dollars, and only one of which means the tank is finished.
Your job in the first twenty minutes is not to fix anything. It's to find out which of the five you're looking at.
First: if the water is moving fast
Diagnosis waits if water is spreading. Close the cold-water supply valve to the heater (on the cold pipe entering the top, usually a gate or ball valve), turn the gas control to Pilot on a gas heater or switch off the breaker on an electric one, and attach a garden hose to the drain valve to empty the tank to a floor drain if it's clearly discharging heavily — a 50-gallon tank takes 30–60 minutes to drain and holds the equivalent of eight large buckets. Then mop, and diagnose in the dry. Everything below assumes a manageable drip or seep, which is what most people find.
Measure the leak: the rate sets your clock
Before you trace anything, quantify it — the rate tells you how much time you have. Set a dry cup under the drip, or tape-mark the puddle's edge, and check again in an hour:
| Rate | What it usually means | Your clock |
|---|---|---|
| A few drips an hour | A weeping valve, gasket or fitting | Diagnose this week |
| A steady drip; a cup an hour or more | A failed valve seat or a seeping tank | Shut off and trace today |
| A stream, or a puddle that keeps spreading | A split fitting, a discharging T&P, a tank letting go | Water off now — the steps above |
A growing rate matters more than the rate itself: a seep that doubles in a day is a tank wall giving way, whatever the cup says now.
The dry-and-trace test (this is the whole method)
Water travels. A leak at a top fitting runs down inside the jacket or along the shell and appears at the floor, announcing itself as a "bottom leak" that isn't. So: dry the tank and the floor completely — towels, then a wipe of the shell from top to bottom — and wait. Check every fifteen minutes. Where the water returns first is the source:
- Wet at a top fitting first, then a trail downward → inlet/outlet connection. Repairable.
- Wet at the end of the discharge tube, the pipe that runs down the side of the tank → the T&P valve has discharged. Read that section carefully.
- Wet at the drain valve, the spigot near the very bottom → drain valve seep. Repairable.
- Wet around a side access panel (electric heaters) → heating-element gasket. Repairable.
- Everything above bone dry, water emerging only at the base seam → the tank itself. Not repairable.
A second test confirms the tank verdict: close the cold supply and open a hot tap somewhere to relieve pressure. A leak fed by a pressurised fitting slows dramatically once pressure is off. A tank-body leak keeps seeping from the stored water in the vessel. If it seeps on, undiminished, with every fitting dry — you've made the diagnosis nobody wants and everybody needs.
When the towels can't settle it: dye and a moisture meter
Sometimes the test comes back ambiguous — the base wets evenly, or two suspects sit inches apart. Two cheap tools sharpen it. Put drops of food colouring (or plumber's fluorescent dye) at one suspect point — the drain valve base, an element panel's edge — and wait: colour in the returning water convicts that point and clears the others. A moisture meter, the pin type sold for wood and drywall, turns "somewhere down there" into a gradient: readings climb as you near the source. They settle the argument when the towel test can't.
Source 1: The drain valve — the most common false alarm
Near the bottom of the tank sits a hose-bib-style valve used for draining and flushing. Inside it is a washer that degrades with age and heat; mineral scale can also lodge in the seat and keep it from closing fully. The result is a slow drip — a drop every few seconds, a small trickle — landing exactly at the base, perfectly impersonating a dying tank. Plumbers estimate this is the culprit in a substantial share of "bottom leak" calls, especially on units three to seven years old; plastic drain valves add cracking and clogging to the failure list as they age.
Test it: make sure the valve is firmly closed, and thread a hose cap (a few dollars, or the cap from a garden hose) onto it. If the floor stays dry for a day, the valve was weeping through its outlet. The permanent fix is a valve replacement — $140–$350 professionally done, which requires draining the tank — and the standing advice is to specify a brass replacement: the plastic original is why you're here.
Source 2: The T&P valve — the leak that is actually a warning
High on the tank, top or upper side, sits the temperature-and-pressure relief valve, with a discharge tube running down to about six inches above the floor. When this valve opens, water arrives at the base through that tube — and it is not a leak in the usual sense. It's a safety device reporting for duty. The T&P opens when pressure passes 150 psi or temperature passes 210°F, because a sealed tank of overheated water is a genuinely dangerous object, and this valve is the only thing standing between that and a rupture.
So a discharging T&P has a cause, and the cause is the diagnosis: house water pressure too high (above ~80 psi at the street — see our low water pressure guide for the gauge test, run in reverse); a failed expansion tank — the small tank that should absorb thermal expansion in a closed system, whose bladder eventually ruptures, leaving every heating cycle to spike pressure until the T&P lifts (tap it: it should sound hollow at the top; a waterlogged one sounds solid throughout and feels heavy); a thermostat set too high or failing; or simply a valve fouled with scale that no longer seals after years of never being tested.
Replacing the valve runs $150–$300; an expansion tank, $250–$450. Both are legitimate repairs on a sound tank. What is never legitimate is the bucket-list fix of capping or plugging the discharge tube to stop the drip. That converts your water heater into a sealed pressure vessel with no release. Don't do it, and don't let anyone do it for you.
Source 3: Top connections and element gaskets
The cold inlet and hot outlet on top of the tank pass through fittings — nipples, unions, flexible connectors — that can weep after years of thermal cycling, and the water runs down the jacket to the floor. On electric heaters, each heating element bolts through the tank wall behind an access panel, sealed by a gasket; when the gasket ages, water seeps at the panel and tracks down. Both are fitting-class repairs: modest parts, an hour or two of labour, no new tank. The dry-and-trace test finds them because the wetness starts high and the trail leads down — the opposite signature of a tank failure.
Source 4: Condensation — the leak that isn't
In a humid basement or garage, especially in summer, a tank full of freshly arrived cold water can drop its shell temperature below the room's dew point. Moisture from the air condenses on the metal, beads, and drips to the base — sometimes impressively. The classic occasions: a brand-new heater's first days, the aftermath of a heavy draw (laundry day, guests, a filled bathtub), and humid climates with the heater in an unconditioned space. The giveaway is distribution and timing: condensation wets the whole lower shell evenly, appears during or after heavy use, and stops when the tank recovers temperature and the air dries. Dry-and-trace still settles it: condensation returns as a general dampness, not a drip from a point. No repair exists because nothing is broken — though a room that's humid enough to sweat a tank all summer has its own moisture story worth addressing.
Source 5: The tank itself — the one verdict with no appeal
Inside every steel tank is a glass lining and a sacrificial anode rod — magnesium or aluminium, designed to corrode instead of the tank. Anodes typically last three to five years. Once the rod is spent, the lining's inevitable micro-cracks expose bare steel, and rust begins its slow work from the inside out. Sediment piled at the bottom insulates and overheats the steel there, which is why the perforation so often arrives low on the shell or at the bottom seam — water seeping from the base with every fitting above it dry, on a heater usually eight years old or more.
There is no repair for this, and it's worth understanding why: the visible pinhole is not the damage, it's the announcement of damage spread across the tank's interior. A patch addresses the hole you can see; the wall around it is the same thickness from the same corrosion. Replacement is the only fix, and it's genuinely time-sensitive — a seeping tank can split, and when it does, it doesn't just empty its 40–50 gallons; it flows at full supply pressure until a person closes a valve.
Replacement, like-for-like, runs $1,200–$2,800 installed nationally for a 40–50 gallon tank (electric toward the lower end, gas higher), including haul-away and usually a permit. Two things move the number: code corrections on an older installation — a proper drain pan, an expansion tank, correct T&P routing, seismic straps where required — can add $300–$1,500; and your warranty. Most tanks carry a six-year tank warranty (some nine or twelve): if yours is inside it, the manufacturer supplies the new tank and you pay labour only. The data plate on the tank carries the model, serial (which encodes the manufacture date) and warranty class — photograph it before you call anyone, and let it, not a salesperson, start the conversation.
One more suspect: the recirculation pump
Some homes — usually larger ones — have a small recirculation pump at the heater, circulating hot water so taps run hot quickly. It adds a leak source the five above don't cover: flange gaskets and return-line connections that sit low and drip straight to the base. During the trace, run a dry finger around the pump body, its flanges and the return-line unions. Wet there, tank shell dry, means a pump or gasket repair of a few hundred dollars — not a new tank. While any bottom leak is active, unplug the pump and close its isolation valves: a running pump keeps the loop pressurised and feeds a seep into a steady flow.
How to shut off and drain the heater, step by step
Whether the tank has failed or you're preparing for a valve replacement, the shutdown sequence is the same, and the order matters:
- Close the cold-water supply to the heater — the valve on the cold line entering the top. This stops new water arriving.
- Kill the heat. Gas: turn the control knob on the front of the heater to Pilot (or Off for a full drain that will sit). Electric: switch off the heater's breaker at the panel. Draining a live heater exposes elements to air, and a powered element in air burns out in seconds.
- Let the water cool if you can — a tank that just fired holds water at 120°F or more. An hour of patience, or run a hot tap until it turns lukewarm, makes everything below safer.
- Attach a garden hose to the drain valve and run it to a floor drain, a sump pit, or downhill outside. The outlet must be below the tank for gravity to work.
- Open the drain valve, then open the T&P lever briefly and a hot tap somewhere in the house. A sealed tank won't drain — it needs air coming in as water goes out, and the hot tap provides it.
- Expect 30–60 minutes for a 50-gallon tank, slower if sediment clogs the valve (common on tanks that have never been flushed — open and close the valve a few times, or accept the slower drain).
If the drain valve is itself the leaking part, or clogged solid, a plumber can pump the tank out through a top fitting — one more reason a failed tank with a dead drain valve is a professional job rather than a Saturday project. With a recirculation pump, unplug it and close its isolation valves before step 1: a live pump fights the drain and keeps any leak fed.
Gas vs electric: two different leak maps
The five sources above cover both fuels, but each has its own accent. On a gas heater, add two checks: water in the burner compartment at the base (visible through the small access opening) means the leak is raining onto the burner assembly — shut the gas control off and treat it as urgent, because a wet burner and flue are a combustion problem, not just a plumbing one; and on a cold morning start, a gas heater can produce flue-gas condensation that drips from the vent area and mimics a leak for the first minutes of a firing cycle after the tank has gone cold. On an electric heater, the element gaskets (Source 3) are the extra suspects, and there's a diagnostic gift: an element gasket leak usually shows first as moisture inside the access panel, sometimes with mineral crust tracing the exact path. Check both panels — upper and lower — before concluding the water came from the base.
The warnings that arrive before the leak
Tank failure is sudden in its announcement but slow in its making, and most dying tanks send signals in the final year or two. Rumbling, popping or kettle-like noises during heating mean a thick sediment layer at the bottom — water trapped beneath it flashes to steam, and that same sediment is overheating the bottom steel where leaks are born. Rusty or tea-coloured hot water (with clear cold water) means corrosion products are coming from the tank itself — the lining and anode are no longer protecting it. Hot water that runs out faster than it used to can mean sediment has displaced gallons of capacity. None of these is a leak, but any of them on a heater past eight years old should move "replace the water heater" from the someday list to this year's budget — a planned replacement on a Tuesday costs notably less than an emergency one on a holiday weekend, and it happens on your schedule, with the model you chose, instead of whichever tank was on the truck.
Reading the data plate before you call anyone
Every figure that decides this repair lives on the tank's data plate — the sticker or stamped plate on the shell — and five minutes with it will save you money and sales pressure. Note the manufacturer and model, the serial number (the manufacture date is encoded in it; the pattern varies by brand, and the manufacturer's website will decode yours — as a rule of thumb, the first digits or letters after the opening characters carry the year and month or week), the capacity and fuel type, and the warranty class if printed. Then do the arithmetic the salesperson hopes you won't: a tank manufactured nine years ago with a six-year warranty is out of coverage and deep into its statistical lifespan, whatever its shiny jacket suggests; a five-year-old tank with a leak is probably in warranty for the vessel itself. When you call, lead with the plate information. Companies quote faster and more honestly to a caller who already knows the tank's age, size and warranty status — and if the tank body has failed inside warranty, the manufacturer supplies the replacement unit, which converts your $1,800 problem into a $400–$700 labour bill.
The same leak means different things at different ages
Age is the multiplier on every diagnosis above. The identical drip is a shrug on a young tank and a verdict on an old one:
| Heater age | A bottom leak most likely is… | Sensible move |
|---|---|---|
| Under 6 years | A part — valve, gasket, fitting. Tank failure is rare | Repair it; check the warranty first |
| 6–10 years | Still usually a part, but the anode rod is spent or nearly | Repair the part; have the anode checked too |
| 10–12 years | A coin toss — parts fail, and tank corrosion is now common | Repair only if the tank traces sound; price replacement too |
| Over 12 years | The tank itself, until proven otherwise | Replace; money spent on parts is rarely recovered |
While you decide: limiting the damage
A confirmed slow leak, awaiting a scheduled replacement, can be managed rather than merely watched. Keep the drain pan (if you have one) draining freely, or set a shallow pan and a battery water alarm — a $15 device that screams at the first quarter-inch — beside the base. Know where the heater's shutoff valve is and confirm it actually turns; a valve that hasn't moved in a decade sometimes doesn't. If you'll travel before the replacement happens, close the supply to the heater before you leave: an empty, depressurised tank can seep, but it cannot flood. And photograph the data plate and the leak for your insurance file — policies typically cover the damage from a sudden failure, not the heater itself, and a documented, promptly handled leak is the version of the story insurers pay.
If this heater lives somewhere a flood would be catastrophic — a finished basement, an upstairs closet, anywhere above living space — the replacement visit is the moment to upgrade the safety net permanently: a drain pan plumbed to a real drain, a water alarm, or at the top end, an automatic shut-off valve that closes the supply when its sensor gets wet (a few hundred dollars installed while the plumber is already there). Owners of second homes and rentals, who can't walk past the heater daily, get the most from these; the alarm you never hear is the point.
If it's the tank: what a proper replacement quote includes
When replacement is the verdict, the quotes you'll get for the "same job" can differ by a thousand dollars, and the difference is rarely the tank — it's everything around it. A complete quote for a like-for-like swap should name: the new unit (brand, capacity, warranty length — a 9- or 12-year warranty model costs a little more and is usually the better buy on a house you plan to keep); labour and haul-away of the old tank; the permit (most municipalities require one for a water heater swap, and an unpermitted install can complicate insurance and resale); and the code corrections the new installation triggers — a drain pan with a routed drain where the location requires one, an expansion tank if your system is closed and lacks a working one, a correctly routed T&P discharge, new shutoff valve if the old one is suspect, and seismic strapping in the West.
Ask each bidder the same three questions and compare the answers rather than the totals: Is the permit included? Which code items are you bringing up to standard, and are they in this number? What warranty — parts, tank, and your labour — am I actually getting? The cheapest quote is often the one quietly skipping the permit and the expansion tank; the most expensive sometimes gold-plates them. The honest middle shows its working. And keep the paperwork — invoice, permit, warranty registration (register it; some manufacturers extend coverage for registration) — in the same file as your data-plate photo. The next owner, or the next you in eleven years, will be grateful.
If it's under warranty: how the claim actually works
Because the warranty question decides so much money, here's the process itself, demystified. Tank warranties (six years standard; nine and twelve on upgraded models) cover the vessel — if the tank body fails inside the term, the manufacturer provides a replacement tank of equivalent size. They do not cover labour, permits, haul-away or code upgrades, which is why a "free" warranty replacement still lands as a $400–$700 job.
The practical sequence: find the manufacture date from the serial number before you call (the manufacturer's support site has a decoder; the pattern varies by brand, and the date — not your installation date — usually starts the clock, though some brands date from installation with proof). Call the manufacturer's warranty line or the installing plumber with the model and serial ready; they'll verify coverage on the spot. Expect to be offered the current equivalent model, delivered through a local distributor or the plumber — you won't get to upgrade sizes on their dime. Keep the old data plate (or a photo of it) until the claim closes; the plate is the proof. Two traps to avoid: authorising a full-price replacement before anyone checks the serial — the check takes ten minutes and can be worth a thousand dollars — and assuming a lapsed parts warranty means a lapsed tank warranty; they're separate clocks, and the tank's is the one that matters here. If the tank failed at year five of six, this section just paid for your reading of the whole article.
Before anything is moved or dried: the insurance checklist
If water reached flooring, walls or belongings, insurers pay the documented version of a leak. Before you mop or move anything, take five minutes with a phone:
- Wide shots of the room and the full spread of the water.
- Close-ups of the leak point itself, and of damaged flooring, baseboards and belongings.
- The data plate: model, serial, manufacture date, plus the valve or part that failed.
- The paper file: install receipt, warranty card or registration, and any service or flush records.
- A dated note of when you found it and what you did — shut-off time, calls made.
Then clean up freely. Photograph first, dry second — that order is most of the difference between a paid claim and a denied one.
The annual flush, step by step (the 20 minutes that prevent Source 5)
Flushing clears the sediment that insulates the bottom steel and starts the corrosion story, and it's the maintenance task this entire guide argues for. Once a year, ideally before the heavy-use season:
- Turn the heat down/off — gas control to Pilot, or breaker off for electric — and let the water cool for an hour if the tank just fired. Scalding water is the only real hazard in this job; respect it.
- Close the cold-water supply to the heater.
- Attach a garden hose to the drain valve, run it to a floor drain or downhill outside, and open a hot tap in the house to let air in.
- Open the drain valve fully and let the tank empty, or flush through: many owners simply open the supply in bursts to stir the sediment and drain until the water runs clear — the goal is the gritty bottom layer, not a perfectly empty tank.
- Watch what comes out. Milky water that clears is ordinary scale. Grit, sand-like sediment and rust flakes in quantity are the tank telling you its age — on an older unit, that's your cue to check the anode rod (or have it checked) rather than just closing the valve and forgetting it for another year.
- Close the drain valve, remove the hose, refill the tank completely — water running steady from the open hot tap means it's full — then restore power/gas. Never energise an empty or partly filled electric tank: the elements burn out in seconds in air, converting a free maintenance task into a repair.
Twenty minutes, once a year, and the bottom of your next tank stays clean steel instead of a sediment kiln. Pair it with an anode check every few years — rod replaced at ~$200–$300 by a plumber, against a tank at $1,800 — and the arithmetic of this whole guide tilts permanently in your favour.
The next tank: making this the last surprise
Everything that killed this tank was visible years in advance. The anode rod that protects it costs little and is replaceable — checked or changed every three to five years, it is the single highest-value maintenance a tank heater has, and almost nobody does it. An annual flush through the drain valve clears the sediment that cooks the bottom steel. A drain pan with a routed drain, or at minimum a water alarm, converts the next failure from a ruined floor into a phone call. And the data plate's manufacture date, noted in your phone the day the new tank goes in, means the next leak — a decade from now, at a valve, at a fitting — gets diagnosed against the tank's real age instead of a guess.
Start with a towel and twenty minutes of watching. The water will tell you where it's from, and where it's from tells you whether you're buying a valve, an expansion tank — or a water heater. Of all the diagnoses in this house, it's the one most worth getting right before you spend anything: the difference between the five sources is the difference between $200 and $2,000.
Cost at a glance
| Item | Typical cost | Notes |
|---|---|---|
| Drain valve replacement | $140–$350 | Ask for brass, not plastic — plastic valves crack and clog with age |
| T&P relief valve replacement | $150–$300 | Must include diagnosing WHY it discharged — pressure or expansion problem |
| Expansion tank replacement | $250–$450 | The hidden cause behind many 'leaking T&P valve' calls |
| New 40–50 gal tank, installed | $1,200–$2,800 | Gas at the higher end; code upgrades (pan, expansion tank, permit) can add $300–$1,500 |
| Tank under warranty (unit free) | Labour only, $400–$700 | Most tanks carry a 6-year (some 9–12) tank warranty — check the data plate before paying for a unit |
Frequently asked questions
Is a water heater leaking from the bottom dangerous?
It depends on the source, which is why tracing it matters. A dripping drain valve is a nuisance. A T&P valve discharging steadily is the tank reporting excess pressure or temperature — a genuine safety signal, and the valve must never be capped to stop it. A corroded tank body is a flood risk: it holds 40–50 gallons under pressure and a seep can become a split. Any leak you cannot source, any continuous T&P discharge, and any fast-spreading water earns a same-day call with the supply shut off.
Can a leaking water heater be repaired, or must it be replaced?
Both — decided entirely by where the water comes from. Every leak that originates in a replaceable part (drain valve, T&P valve, inlet/outlet fittings, heating-element gasket, expansion tank) is repairable, usually for $150–$450. A leak that originates in the tank's own steel — water emerging from the body or base with all fittings dry — cannot be repaired at all: the corrosion is inside, the glass lining has failed, and no patch, sealant or weld restores it. Anyone who offers to 'fix' a leaking tank body is selling you a delay, not a repair.
How long will a leaking water heater last before it bursts?
Nobody can promise a timeline, and that's the honest problem: a corroded tank may seep for months or split this week, and there's no test that tells you which. What raises the stakes is that the failure mode changes without warning — a pinhole becomes a tear, and the tank empties its 40–50 gallons and then keeps flowing at full supply pressure until someone closes a valve. Treat a confirmed tank-body leak as replace-now, keep the floor drain or pan clear, and if you'll be away from home, shut the heater's supply valve before you leave.
Why is there water under my brand-new water heater?
Almost always condensation or a fitting, not a defect. A new tank filled with cold water in a warm, humid room sweats heavily for the first day or two — the cold shell drops below the dew point and water beads and runs to the base, imitating a leak perfectly. New installations can also weep at a fitting that needs a quarter-turn. Dry everything, wait, and watch: condensation stops once the tank reaches temperature and the room dries; a fitting weep returns at the same joint. If water is still appearing on day three, call the installer — that's what the installation warranty is for.
What does the T&P valve do, and why is water coming out of its pipe?
The temperature-and-pressure relief valve is the tank's last safety device: if pressure exceeds 150 psi or temperature exceeds 210°F, it opens and dumps water through its discharge tube, which ends about six inches above the floor — right where 'bottom leaks' are found. Discharge means one of three things: genuinely excessive pressure (house pressure too high, a failed expansion tank letting thermal expansion spike pressure on every heating cycle), an overheating fault, or a valve fouled with scale that no longer seals. The valve is replaceable for $150–$300, but replacing it without finding why it opened just schedules the next discharge. And never cap or plug the tube: a sealed, overheating tank is the one truly dangerous object in this guide.
How old is too old? Should I replace a leaking 10-year-old heater even if it's 'just a valve'?
Run the numbers rather than the hope. Tank heaters typically last 8–12 years. A $250 valve repair on a sound 6-year-old tank is sensible; the same repair on a 12-year-old tank buys a part for a vessel whose anode rod is long spent and whose lining is living on borrowed time — the tank itself often fails within a year or two, and the repair money goes with it. Check the data plate for the manufacture date and warranty status first (the serial number encodes the date; the manufacturer's site decodes it), and if the tank is past its warranty and past ten years, let even a repairable leak start the replacement conversation.
Does homeowners insurance cover water heater leaks?
Usually the damage, not the heater. Most policies cover sudden water damage to floors, walls and belongings from a failed water heater, but not the cost of replacing the worn-out appliance itself — that's maintenance, in the insurer's view. Two practical consequences: a documented, promptly-handled leak protects your claim, while a known leak left to rot can be denied as neglect; and a $15–$25 water alarm or an automatic shut-off valve near the heater is the cheapest claim you'll never have to file. Photograph the data plate and the leak when you find it.
Checked November 16, 2026. This guide is general information, not a substitute for a licensed professional.
Related guides
Why Your Hot Water Runs Out So Fast — and the Bucket Test That Tells You Why
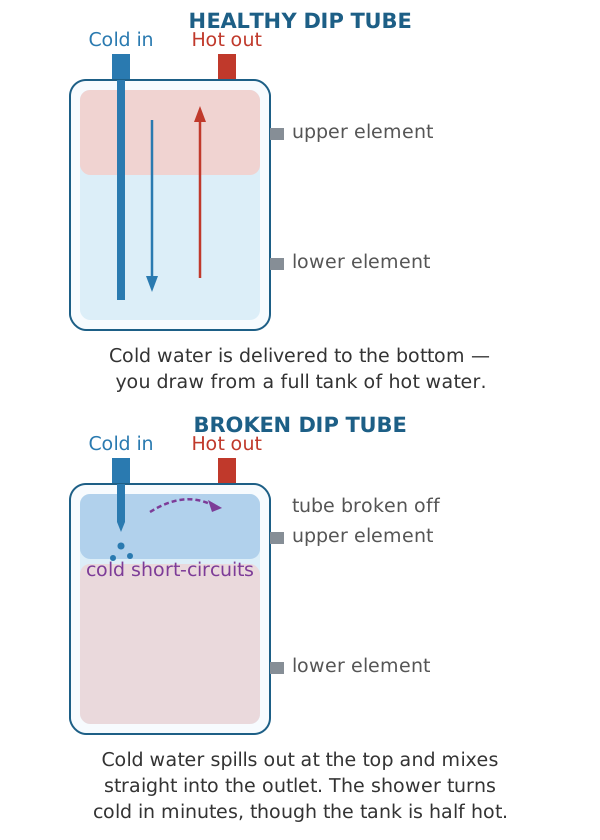
Showers going cold in minutes? The bucket test measures how much hot water your tank actually delivers, then splits the causes: broken dip tube, dead lower element, sediment, thermostat, cross-connection, or a tank that is simply too small now.
Water Heater Not Getting Hot Enough? Measure First — the Temperature Tests That Find the Cause
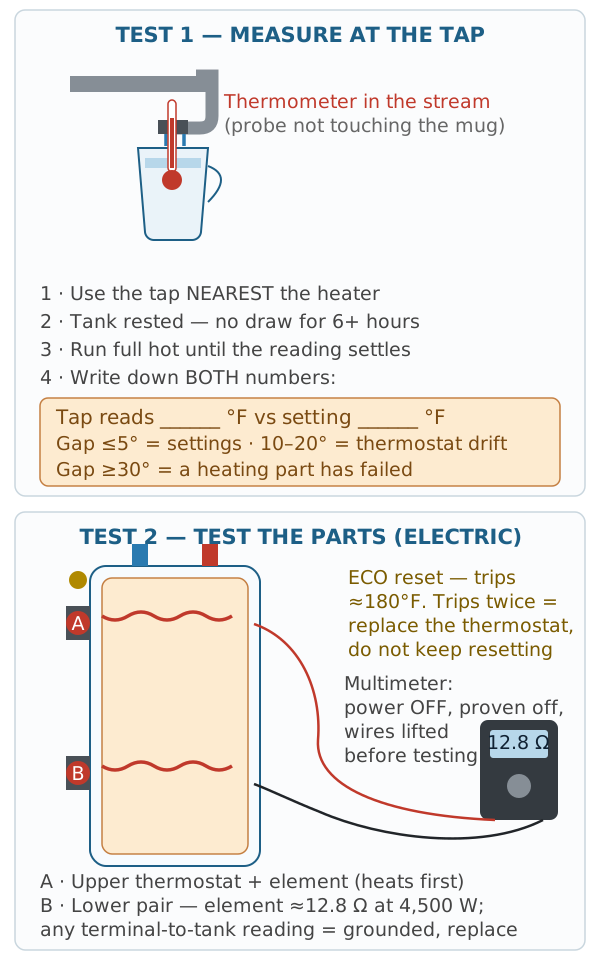
Warm but never hot, even on full hot? Measure at the tap before you touch a dial: the thermometer protocol, the 120-vs-140 setting decision, multimeter values for elements and thermostats, and the fix for every cause.
Pilot Light Won't Stay Lit? The Thermocouple Test Before You Replace Anything
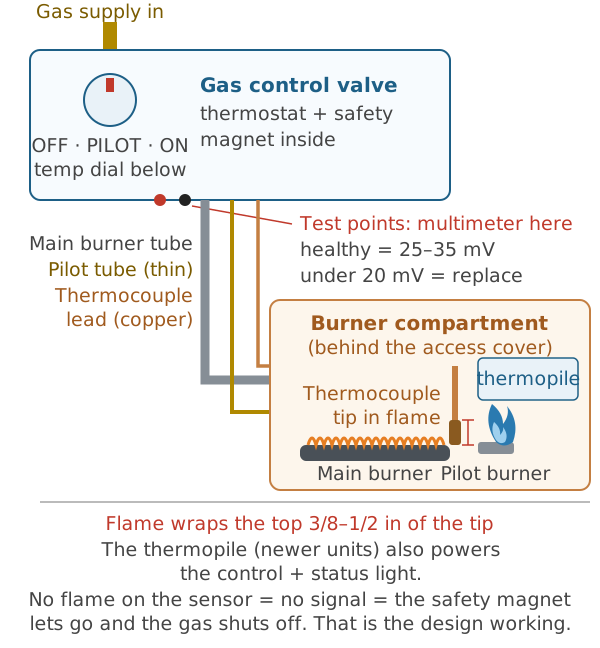
The pilot lights, then dies when you release the knob — or hours later. Work through the timing triage, the correct relight, the millivolt test, and the thermocouple swap, in that order.