 Keep
Pilot Light Won't Stay Lit? The Thermocouple Test Before You Replace Anything
 Daniel Mercer · Editor & Researcher·
Published November 16, 2026·
Updated November 16, 2026
The shower went cold yesterday, you relit the pilot, and it worked — for a while. This morning it's out again. So you kneel in front of the heater, hold the knob down, click the igniter, watch the little blue flame catch… and the second you let go of the knob, it dies. Or it survives the release, runs all evening, and is dead again by morning. Either version leaves you with the same question, and it's the right one: is this a ten-dollar part, a dirty flame, or the beginning of a much bigger bill?
Most of the time, it's the ten-dollar part — or no part at all. But a pilot that won't stay lit is a symptom with several causes that imitate each other, and the order you check them in is the difference between a 30-minute fix and a pile of replaced parts that changed nothing. This guide works in the order a good technician does: safety first, then how the system is supposed to behave, then the relight done properly, then causes ranked by the one clue most people ignore — when it dies.
Safety first: the gas rules before any diagnosis
Everything in this guide happens within arm's reach of a gas appliance, so the rules come before the toolbox.
If you smell gas, stop. Not "finish this step" — stop. Don't relight anything, don't touch light switches or garage door openers, leave the house, and call your gas company's emergency line (and 911) from outside. Gas suppliers add the rotten-egg smell deliberately so a leak announces itself, and no water heater fault is worth investigating through it.
Respect the relight limit. Every relight attempt that doesn't catch pushes a small amount of unburned gas into the burner compartment. That's why the lighting label on your heater specifies a waiting period between attempts — and why the brands differ: Rheem says wait 5 minutes for gas to clear, A.O. Smith and State say 10, Bradford White says 2 after the control is pressurised. Your heater's own label overrides any generic advice, including this guide's. Read it, follow it, and if the pilot won't stay lit after two honest attempts, you're in diagnosis territory, not relight territory.
Never defeat the safety. No tape, clamps, wedges or helpful relatives holding the knob down so the burner "just runs." The mechanism you're fighting is the one that shuts off the gas when there's no flame to burn it. A pilot that keeps dying is that mechanism reporting a fault — treat the report seriously.
Mind the invisible one. A malfunctioning burner can produce carbon monoxide: colourless, odourless, and the reason the CPSC recommends a CO alarm on every level of the home and outside sleeping areas. If your home doesn't have one near the heater and the bedrooms, a pilot problem is a good prompt to fix that this week, whatever the diagnosis turns out to be.
Finally, the boundary line for this whole guide: relighting, cleaning and (on open-burner heaters) sensor replacement are homeowner jobs. Opening gas supply lines, and replacing the gas control valve itself, are not.
How the safety chain works (and why the pilot is the boss of it)
A standing-pilot gas water heater has no plug and no battery. The flame is the power supply, and understanding that one fact explains every symptom in this article.
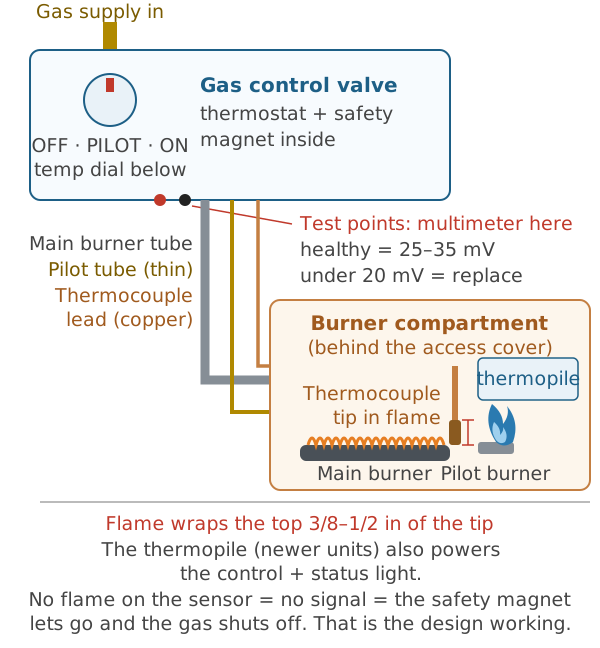
At the pilot burner, a small flame burns continuously. Sitting in that flame is the tip of the thermocouple — a slim metal probe made of two dissimilar metals joined at the end. Heat on that junction generates a tiny electrical current, roughly 25–35 millivolts when healthy. That current travels up the thermocouple's copper lead to the gas control valve, where it energises an electromagnet. The magnet is what holds the safety valve open. As long as the magnet is powered, gas can flow — to the pilot, and to the main burner when the thermostat calls for heat.
Now remove the flame. The thermocouple cools, the millivolts fade, the magnet lets go, and the valve closes. No flame, no gas. That's not a malfunction mode; it's the entire safety design, and it means a pilot that won't stay lit is usually the heater correctly refusing to run because it can't verify there's a flame.
Your thumb is part of this system during lighting. When you hold the control knob down in the PILOT position, you're manually holding that safety valve open against the magnet, buying the thermocouple the 30–60 seconds it needs to heat up and take over the job. Release too early, and the valve closes because the handover never happened — which is why technique matters before parts do.
Newer heaters: the thermopile. Most sealed-compartment heaters built since the mid-2000s replace the single thermocouple with a thermopile — a cluster of thermocouples in one housing that generates several hundred millivolts, enough to run the electronic gas control and its status light as well as hold the safety open. Manufacturers' guidance makes the same point in different words: if you can see the pilot lit but the status light never starts blinking, the pilot may not be heating the thermopile enough, the thermopile may be defective, or a connector may be loose. Same chain, bigger battery. The diagnosis below applies to both, with the differences flagged where they matter.
The correct relight, step by step
A surprising share of "pilot won't stay lit" calls are a relight that never gave the thermocouple its minute. Do it once, exactly by the book, before you suspect anything.
- Turn the control knob to OFF and wait. Five to ten minutes per your heater's label, so any unburned gas clears the compartment. If the heater has been out for hours, this is quick; if you've just made three attempts, it's mandatory.
- Set the temperature dial to its lowest setting if your model separates it from the control knob.
- Remove the outer access cover (and the inner cover on sealed units, following the label) so you can see the pilot through the sight glass or opening.
- Turn the knob to PILOT. Press it fully down and hold it. You should hear a faint hiss of gas to the pilot only.
- Click the piezo igniter repeatedly (or use the label's lighting method) until the pilot flame catches. On thermopile units, watch for the status light beginning to blink — that's the control waking up.
- Keep holding the knob down for a full 30–60 seconds after the flame appears. Count it. This is the step everyone shortens, and it's the step the thermocouple is waiting on.
- Release the knob slowly. The flame should stay. If it dies within seconds, that's data — move to the triage table below rather than repeating the attempt more than once more.
- Turn the knob to ON, set the temperature (120°F is the setting both the DOE and CPSC point to for balancing safety and efficiency), and replace the covers. The main burner should fire within a minute or two as the thermostat calls.
If the pilot now stays lit through a full burner cycle and the next morning, you may simply have had a one-off blowout — a draught, a momentary pressure dip. Note the date. A pilot that goes out once a season is weather; a pilot that goes out weekly is a diagnosis waiting to happen.
First, rule out the one-off: outages and interruptions
Not every dead pilot is a dying part. Gas utilities interrupt supply for line work, meters get changed, a new appliance gets installed and the line fills with air, and a momentary pressure dip on a high-demand evening can snuff a pilot that then has no reason to relight itself — a standing pilot has no automatic re-ignition. If your pilot went out once, on a day when the stove burners also sputtered or the utility was digging up the street, relight it by the book and note the date on a strip of tape on the tank. One outage is an event. The second outage within a few weeks is a pattern, and patterns get the full diagnosis below. Owners waste the most money in the gap between those two — replacing parts after a one-off, or relighting daily through a genuine failure because "it did this once before and was fine."
Read the flame before you read anything else
Thirty seconds of looking at the pilot flame, while it burns, tells you more than an hour of parts-swapping. You are looking for four things. Colour: a healthy pilot flame is predominantly blue with a defined inner cone; yellow tips mean incomplete combustion and a dirty orifice or air starvation, and an all-yellow, candle-like flame is delivering far less heat to the sensor. Shape and stiffness: the flame should stand in a steady shape, like a small blowtorch, not waver, dance or curl away from the thermocouple. Contact: the flame must wrap the top 3/8 to 1/2 inch of the thermocouple tip — check that the probe is actually inside the flame's envelope, not beside it. Behaviour when the main burner fires: the pilot flame should barely flinch when the big burner lights and runs; a pilot that shrinks, lifts or blows sideways when the main burner runs is reporting a gas-pressure, venting or combustion-air problem that no sensor replacement will fix, and that observation alone justifies a professional visit. Note what you see before you touch anything — after cleaning, this is your before-and-after.
The timing triage: when it dies tells you where to look
Before touching a part, answer one question precisely: when does it die? The four timing patterns point at four different neighbourhoods of the system, and this table is the fastest diagnostic in the whole guide.
| When the pilot dies | Most likely causes | First move |
|---|---|---|
| The instant you release the knob | Thermocouple not generating: tip outside the flame, filthy or weak flame, loose connection at the valve, failed thermocouple | Check flame shape and tip position; then the millivolt test |
| 1–10 minutes after lighting | Marginal thermocouple output; flame shrinking as the pilot orifice warms and fouls further; weakening magnet in the gas valve | Clean the pilot assembly; test millivolts warm, not just at light-off |
| Hours later, or overnight | Draughts reaching the burner, vent downdraughts on cold nights, marginal signal dropping as the compartment cools, burner cycles disturbing a weak flame | Observe: note weather and whether the main burner had been running |
| On windy days, or when the furnace/exhaust fan runs | Venting and combustion-air problems: downdraught, blocked or undersized vent, negative house pressure pulling air down the flue | Stop-part territory — venting faults are a carbon monoxide issue, not a parts issue |
Read your pattern off the table, then work the matching cause below. And note the honest limit: patterns overlap, which is why the millivolt test further down exists — it converts "probably the thermocouple" into a number.
The causes, in the order to check them
1. A dirty pilot orifice and a weak, lazy flame
The pilot orifice is a tiny metering hole, and it fouls — with dust, rust flakes, spider webs and the general debris of a utility room. A starved pilot makes a small, soft, yellow-tipped flame that wanders instead of standing stiff and blue. That flame may look lit while delivering half the heat the thermocouple needs. This is the single most common root cause behind "dies on release," and it costs nothing but time to fix, which is why it comes first. The cleaning procedure is in the Solution section below.
2. The flame isn't enveloping the tip
Even a strong flame fails if it's aimed wrong. The thermocouple's tip must sit in the hottest part of the flame, with the flame wrapping the top 3/8 to 1/2 inch of the probe. Tips end up out of position after a previous repair, a knocked bracket, or a thermocouple that was replaced with the wrong length and never seated properly. Sight along the pilot while it burns: if the flame is licking the side of the probe or barely touching its very end, you have found a no-parts fault. Correcting position — reseating the thermocouple in its bracket, or gently realigning the pilot hood per the manufacturer's arrangement — restores the signal without buying anything.
3. A loose, corroded or failed thermocouple
The thermocouple's other end screws into the bottom of the gas control valve with a small nut. That connection carries millivolts — a whisper of current — so finger-loose or corroded threads genuinely matter; snug it with a wrench a careful fraction of a turn (these are soft fittings; do not lean on it). Beyond connections, thermocouples age: years of heat cycles degrade the junction until it can't make its 25 millivolts no matter how good the flame is. That's a wear-out failure, it's expected eventually, and it's what the meter test confirms.
4. Draughts, venting and combustion air
A pilot is a candle-sized flame in a metal box, and the box breathes through the vent. Downdraughts on windy nights, a partially blocked flue, a missing or damaged vent cap, or a powerful bath fan or range hood pulling the house into negative pressure can all snuff or shrink the flame hours after a perfect relight. The giveaway is correlation: it dies on windy days, or when other exhaust appliances run. Treat this category with respect — a vent that can push air down can also fail to carry combustion gases up, and that's a carbon monoxide pathway. Cleaning a pilot is DIY; correcting venting is a professional job.
5. A failed gas control valve
The valve's electromagnet weakens with age, and a valve can also fail internally in ways no sensor swap will cure. The pattern: a verified-good flame, correct tip position, a thermocouple that tests healthy (or a brand-new one) — and the pilot still drops out. On some models the high-limit energy cut-off built into the control is a single-use device: if it has tripped from an overheating event, the manufacturer calls for replacing the control, full stop. This is the expensive cause, it's genuinely the least common of the six, and it's why the cheap tests come first — you want evidence before this bill.
6. On newer sealed units: the thermopile and its connections
Sealed FVIR heaters add their own wrinkles. The thermopile's output must satisfy an electronic control, not just a magnet, so marginal output shows up as a status light that won't blink or blinks a fault pattern — your manual decodes the flashes, and the stored pattern is real diagnostic information, so read it before resetting anything. Connectors on these units can loosen or corrode, and manufacturers list a loose wiring connector alongside a weak pilot and a defective thermopile as the three reasons a lit pilot never wakes the control up. The sealed compartment also means access is through a gasketed door designed to be opened with the right procedure and resealed properly — the point at which many owners reasonably hand over to a technician.
The solution: clean it, test it, then (maybe) swap it
Step one: clean the pilot assembly
Work with the gas control turned to OFF and the compartment cool.
- Remove the access cover(s) and, on open-burner units, slide or lift the burner assembly out as the manual describes — it usually moves as one tray with the pilot and thermocouple mounted on it. Photograph the arrangement first; the photo is your reassembly diagram.
- Find the pilot burner: a small tube ending in a hood or bracket beside the thermocouple tip. The orifice is the tiny opening the gas exits before the flame.
- Blow the orifice and pilot tube clear with compressed air. If you remove the pilot tube to clean it, clear it with air and a soft brush only — never poke the orifice with wire or a pin, which enlarges the metering hole and permanently changes the flame.
- Brush dust and rust from the burner ports and the compartment floor, and vacuum the debris out. On sealed units, clean the flame-arrestor screen underneath or around the base as the manual directs — a clogged arrestor starves the whole burner of air and mimics half the faults in this guide.
- Wipe the thermocouple tip with fine emery cloth or a scouring pad until the metal is bright. Carbon and oxidation on the tip insulate it from the flame.
- Reassemble, relight by the procedure above, and look at the flame: you want a steady blue flame with a defined shape, enveloping the top 3/8–1/2 inch of the tip, not dancing, not yellow, not lifting off.
A large share of pilots that "needed a thermocouple" stay lit from this point on.
Step two: the millivolt test, for owners with a multimeter
If cleaning didn't cure it — or you want the verdict before spending anything — test the thermocouple's output.
- Set the multimeter to DC millivolts (mV).
- Light the pilot and hold the knob down so it stays burning.
- Touch one probe to the thermocouple's copper lead and the other to its threaded connection at the gas valve (the standard open-circuit test: some prefer disconnecting the thermocouple from the valve and testing across the end contact and the lead — either gives you the generated voltage under flame).
- Wait a full minute for the reading to stabilise. Healthy: 25–35 mV. Marginal: 20–25 mV — expect a valve that holds when warm and drops out as things cool. Failed: under 20 mV — replace the thermocouple; no adjustment fixes a junction that can't generate.
- For thermopile systems, test the same way but judge against the manufacturer's specification for your model (typically several hundred millivolts); the manual or the valve maker's sheet gives the number.
The test takes five minutes and converts the most argued-about part in gas water heating into a number you can act on.
Step three: replace the thermocouple
Confirmed low output (or a visibly damaged probe) earns the swap. The part is universal on open-burner heaters — match the length of the old one, commonly 24 or 36 inches.
- Turn the gas control to OFF. Let the burner compartment go fully cool.
- Photograph the routing of the copper lead and the tip's position in the bracket.
- At the gas valve, unscrew the thermocouple's nut with a small wrench and pull the lead free.
- At the pilot bracket, unclip or unscrew the tip end and slide the old thermocouple out.
- Seat the new tip in the bracket so its top 3/8–1/2 inch will sit in the flame, exactly where the old one sat (your photo is the reference).
- Route the lead in a gentle curve — no sharp bends, no contact with the burner — and thread the nut into the valve by hand, then snug it roughly a quarter-turn past finger-tight with the wrench. These fittings seal on soft metal; overtightening damages them.
- Relight by the book, hold the full 60 seconds, release slowly, and watch the flame wrap the new tip. Then run the burner through a full heating cycle and check the pilot again the next morning — the overnight check is the one that counts.
On sealed FVIR and thermopile units, weigh the earlier caution: parts are model-specific, the compartment must reseal correctly, and many manufacturers' own service guidance treats sensor replacement on those designs as technician work. There's no prize for being the exception.
When it is the gas control valve: the pro job, and the maths that decide it
If the flame is right, the position is right, the thermocouple tests healthy or is new — and the pilot still drops — the evidence points at the gas control valve. Replacing it means shutting off and disconnecting the gas supply, draining the tank, unthreading the old control from the tank shell, and recommissioning the new one with leak checks. It is licensed-territory work in most places and professional work in all of them: expect $350–$650 all-in.
Before approving that quote, run the age maths, because a control valve is the repair where owners most often pour money into a dying tank:
- Find the tank's age. The data plate's serial number encodes the manufacture date (each brand's website decodes it). Tank heaters typically live 8–12 years.
- Check the warranty before the wallet. Most tanks carry at least a 6-year parts warranty, some 9 or 12. A failed control valve on a 4-year-old tank may cost you labour only. This check takes ten minutes and is the single most-skipped step in water heater repair — especially in a house you recently bought, where the warranty belongs to the appliance and the paperwork is in a drawer somewhere.
- Apply the fraction test. A $500 valve repair on a 5-year-old tank with warranty-expired-but-healthy steel is defensible. The same $500 on an 11-year-old tank is buying an expensive part for a vessel whose anode rod is spent and whose lining is on borrowed time — against $1,200–$2,800 for a new, warrantied, more efficient heater installed. Past roughly half the cost of replacement, on a tank past its warranty, replacement usually wins.
A technician who finds a valve fault should be able to tell you what the old thermocouple tested at and what the new one's output is. Numbers are how you know the diagnosis was done, not guessed.
What it costs, honestly laid out
The front of this guide gave the short version; here's the reasoning behind the ranges. The thermocouple itself is a $10–$30 part at any hardware store — one of the cheapest components in the house. Professional prices are dominated by the call-out and the first hour, which is why a plumber's thermocouple swap lands at $150–$300 and why it pays to have the pilot assembly cleaned and the flame checked in the same visit rather than paying a second call-out later. A cleaning-and-diagnosis visit on its own runs $120–$250. The gas control valve is the step-change: $350–$650 fitted, which is exactly why the warranty and age checks above come before it, not after.
One cost nobody itemises: the relight loop itself. Every day of kneeling, holding, clicking and hoping is a day the underlying fault — dirty orifice, weakening sensor, tired valve — is still progressing. Faults in this system do not heal. The cheap day to fix them is the first day.
DIY or call: the honest split
Confident DIY: the correct relight; observing and timing the failure pattern; cleaning the pilot assembly and arrestor screen; wiping down the thermocouple tip; snugging its connection at the valve; the millivolt test; and, on an open-burner heater, the thermocouple swap itself.
Call a professional: anything on a sealed FVIR compartment you're not equipped to reseal; thermopile and electronic-control faults beyond a loose connector; every venting or combustion-air correction; the gas control valve, always; and any situation involving a gas smell, at which point the call is to the gas company, not a plumber.
Call regardless of skill: if the pilot problem arrives with company — a T&P valve weeping, rust streaks on the tank, rumbling from sediment, water in the drain pan. Multiple symptoms on one ageing heater are the tank giving a status report, and the right response is a whole-appliance decision, not three separate repairs.
Keeping it lit: the five-minute annual habit
Pilot systems fail slowly and announce it early, which makes them ideal candidates for one short annual habit — ideally on the same visit as the tank's annual sediment flush. Look at the flame and judge it against the four checks above. Brush and vacuum the compartment and the arrestor screen before dust becomes a clog. Wipe the thermocouple tip bright. Confirm the tip is seated in the flame and its nut at the valve is snug. Check that nothing stored in the utility room is crowding the heater's air supply, and that the vent cap outside is intact. Owners who do this almost never meet the failure modes in this guide one at a time on a cold morning; owners who don't, meet them all at once. If your heater is new to you — it came with the house — do this round once at move-in regardless of season, because you inherited the previous owner's maintenance history, or the lack of it, along with the tank.
Urgency, in one paragraph
A dead pilot means cold showers and no hot water for dishes — miserable, not dangerous, provided the safety chain is doing what it's doing now: refusing to run unverified. Live with it for the day or two a part or a technician takes. What you should not live with is the workaround life: relighting every morning, holding the knob a little longer each time, assuming it'll settle. It won't, and the trend line of a failing safety sensor only goes one direction. Diagnose it once, with the timing table and the meter, and close the file — that's the whole job.
Cost at a glance
| Item | Typical cost | Notes |
|---|---|---|
| Thermocouple, part only (DIY) | $10–$30 | Universal thermocouples fit most heaters; match the length (24–36 in) to the old one |
| Thermocouple replaced by a plumber | $150–$300 | Mostly labour and the call-out; ask them to clean the pilot assembly while it's open |
| Pilot cleaning / service call | $120–$250 | The right first spend when the flame is small, yellow or lifting off the tip |
| Gas control valve replacement | $350–$650 | Only worth it on a young tank — see the age maths in this guide before approving |
| New 40–50 gal tank, installed | $1,200–$2,800 | The comparison number when the control valve fails on a tank past its warranty |
Frequently asked questions
Why does my pilot light go out as soon as I release the button?
Because the thermocouple never got hot enough — or is no longer able — to hold the safety valve open. While you hold the knob down you're forcing the valve open by hand. The pilot flame is supposed to heat the thermocouple until it generates roughly 25–35 millivolts, and that tiny current is what keeps the valve open after you let go. A weak or dirty pilot flame, a tip sitting outside the flame, a loose connection at the valve, or a worn-out thermocouple all break that handover, and the valve snaps shut within 30–60 seconds of release. Work through the flame and position checks before buying anything: the part is cheap, but a third of the time it isn't the part.
How do I test a thermocouple with a multimeter?
Set the meter to millivolts (mV) DC. With the pilot lit and the knob held down, touch one probe to the copper lead of the thermocouple and the other to its connection point at the gas control valve (or disconnect the thermocouple and test across its tip-end contact and the lead). A healthy thermocouple under flame reads about 25–35 mV. Readings of 20–25 mV are marginal — the valve may hold when warm and drop out later. Under 20 mV, replace it: no cleaning or repositioning restores a thermocouple that can't make voltage. Test with the flame actually on the tip, and give it a full minute to stabilise before reading.
Can I replace a thermocouple myself?
On a traditional open-burner heater, yes — it's one of the classic homeowner repairs: shut the gas control to OFF, let everything cool, unscrew the thermocouple nut at the valve, unclip the tip end at the pilot bracket, and reverse the process with the new one, positioning the tip so the flame wraps its top 3/8–1/2 inch. Hand tools only, about 30–45 minutes. The exceptions matter: sealed FVIR burner compartments (most heaters built since the mid-2000s) and thermopile systems are less forgiving, parts are model-specific, and a mistake changes how the heater burns gas — many owners reasonably hand those to a technician. Never force fittings, and if anything smells of gas at any point, stop and call.
Why does the pilot stay lit for hours, then go out overnight?
A pilot that holds for hours but dies later is usually marginal, not dead. The thermocouple may be producing just enough voltage when everything is warm, then dropping below the valve's holding threshold as the compartment cools, a draught reaches the flame, or the main burner cycles and disturbs it. Other overnight causes: a weak flame from a partially clogged pilot orifice that shrinks as it heats, condensation or downdraughts in the vent on cold nights, and a gas control valve whose magnet is weakening. The timing is the clue — instant death points at the thermocouple circuit; delayed death points at flame quality, draughts or the valve. The triage table in this guide maps each timing pattern to its likely cause.
Is it dangerous to keep relighting a pilot that won't stay lit?
Relighting once or twice, following the label instructions exactly and waiting the full stated interval between attempts (manufacturers specify anywhere from 2 to 10 minutes to let unburned gas clear), is what the procedure is for. What is not safe is making relighting a daily routine: a pilot that keeps dying is a safety device reporting a fault, and repeatedly overriding it trains you to ignore the one signal that matters. Never relight if you smell gas — leave, and call the gas company from outside. Never hold the knob down with tape, a clamp or a wedge to 'keep it running': that defeats the exact mechanism that stops gas flowing to an unlit burner.
What's the difference between a thermocouple and a thermopile?
Both are flame sensors that turn heat into a small electrical signal, but they do different amounts of work. A thermocouple, found on older and simpler heaters, produces just enough power (around 25–35 millivolts) to hold the safety magnet inside the gas valve open. A thermopile is a bundle of thermocouples in one housing that produces several hundred millivolts — enough to power the heater's electronic control as well, which is why newer sealed-compartment heaters with status lights and electronic gas valves use one. The symptoms overlap (weak signal, pilot drops out), but the parts are not interchangeable and thermopile output is tested against the manufacturer's own specification rather than a universal number.
My water heater is only a few years old. Shouldn't this be under warranty?
Quite possibly, yes — and it's the check almost nobody makes before paying. Most tank water heaters carry at least a 6-year parts warranty (some 9 or 12), and sensors, pilot assemblies and even gas control valves are parts. Find the data plate on the tank, note the model and serial number (the serial encodes the manufacture date), and check the manufacturer's warranty lookup or phone line before authorising any repair. Warranty typically covers the part, not the labour, and a failed control valve on a 4-year-old tank is a very different decision from the same failure on a 12-year-old tank that's out of warranty and living on borrowed time.
Checked November 16, 2026. This guide is general information, not a substitute for a licensed professional.
Related guides
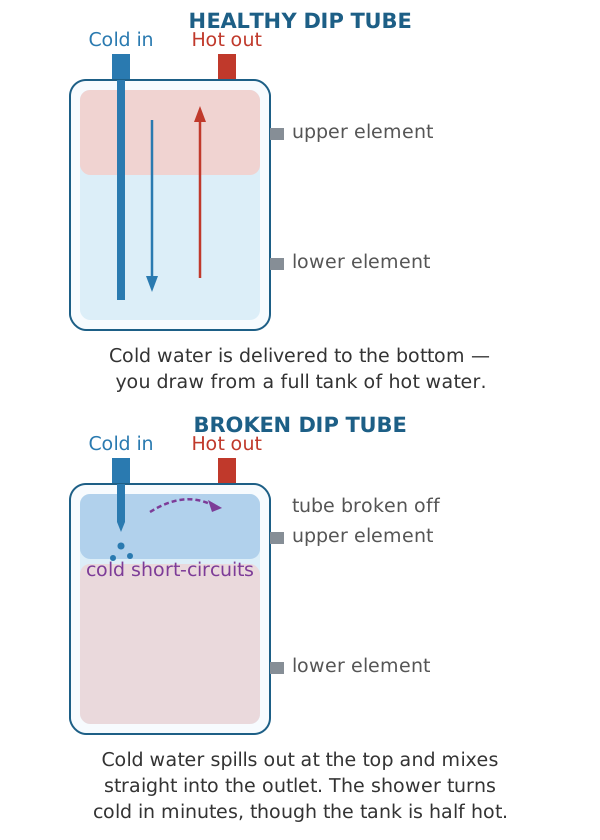
Why Your Hot Water Runs Out So Fast — and the Bucket Test That Tells You Why
Showers going cold in minutes? The bucket test measures how much hot water your tank actually delivers, then splits the causes: broken dip tube, dead lower element, sediment, thermostat, cross-connection, or a tank that is simply too small now.
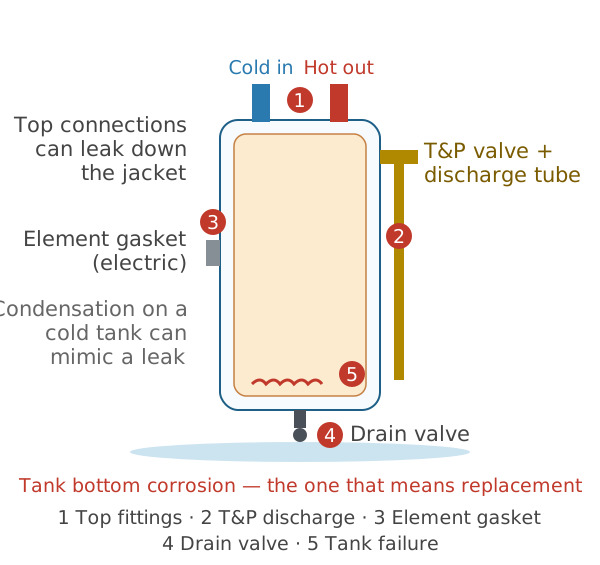
Water Heater Leaking From the Bottom? Find the Real Source Before You Replace It
Water at the base of a water heater has five possible sources — and only one of them means a new tank. The dry-and-trace test, the T&P warning, shut-off steps, and 2026 costs.
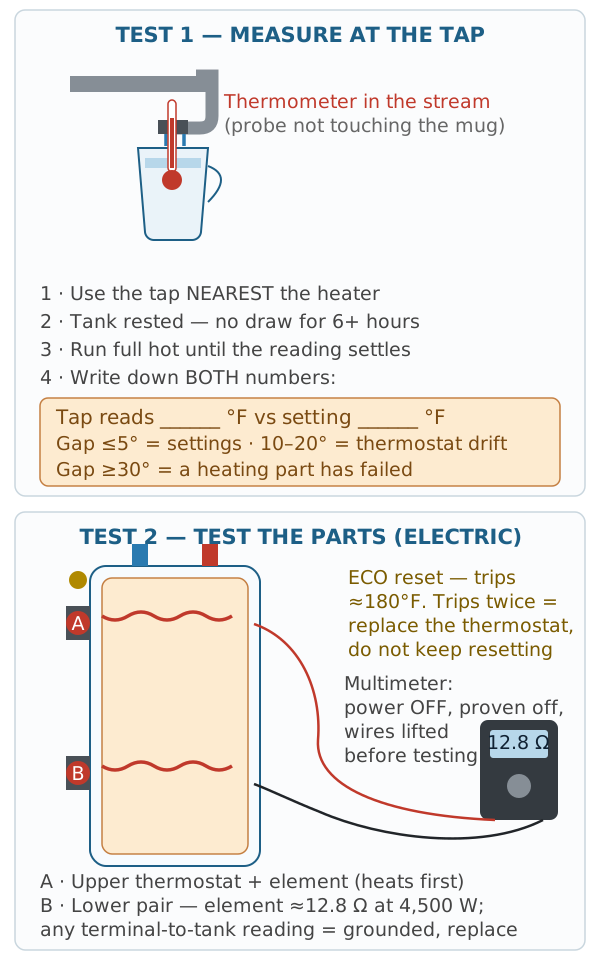
Water Heater Not Getting Hot Enough? Measure First — the Temperature Tests That Find the Cause
Warm but never hot, even on full hot? Measure at the tap before you touch a dial: the thermometer protocol, the 120-vs-140 setting decision, multimeter values for elements and thermostats, and the fix for every cause.