 Keep
How to Fix Sagging Gutters: Replace Spikes With Screws, Add Hangers, and Reset the Slope
 Daniel Mercer · Editor & Researcher·
Published November 16, 2026·
Updated November 16, 2026
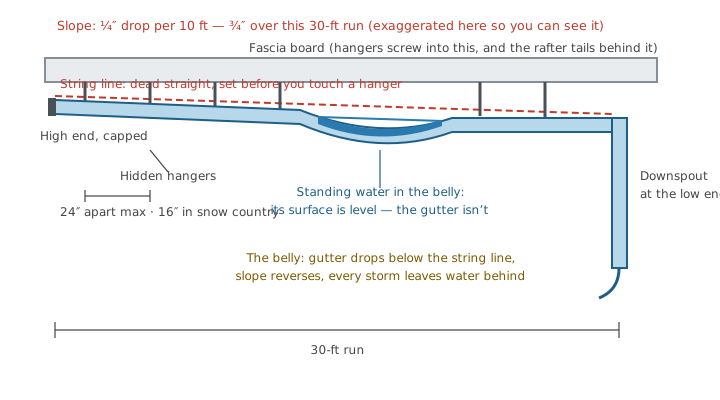
You notice it during a storm, because that's the only time gutters perform in public. One section of the run along the front of the house isn't draining like the rest. Water stands in it after the rain stops, and in a hard rain it spills over the front edge in one spot, halfway along the run, nowhere near the downspout. Or you see it from the driveway on a dry day: the clean straight line of the gutter dips, just slightly, like a clothesline with something heavy hung in the middle.
That dip is the whole problem, and it's worth understanding before you touch a ladder, because a sagging gutter is not one fault. It's a symptom with four possible causes — failed fasteners, rotten wood behind the gutter, an overloaded run, or hangers spaced too far apart the day it was installed — and each cause has a different fix, a different cost, and a different point at which you stop and call someone. This guide works through all of it in order: how to measure what's actually wrong, the spike-to-screw conversion that permanently fixes the most common cause, how to add hangers and reset a whole run's slope, and what to do when the wood behind the gutter is gone.
The signs, and what the standing water is quietly doing
A gutter has one job: be a tilted channel. The signs, from the ground:
- Standing water in the channel hours after rain. The definitive sign. A correctly pitched gutter is dry within an hour or two of the rain stopping; a belly holds its puddle until evaporation takes it, which can be days.
- Overflow at one point mid-run, rather than at the downspout end — water ponding behind a low spot and spilling at the pond's edge.
- A visible dip in the line when you sight along the run from one end; the top edge should read as one straight, gently falling line.
- Spike heads standing proud of the gutter face, or spikes you can wiggle by hand — on spike-hung gutters, the cause showing itself.
- A gap opening between the back of the gutter and the fascia, with a drip line behind the gutter after rain.
The standing water is not idle while you decide. A belly that never drains keeps the channel's seams and back edge permanently wet, and water sitting against the back edge works behind the gutter and into the fascia board — which, as the next section covers, may already be the cause and now becomes the effect as well. The pond collects every leaf and granule washing down the roof, so a sagging section clogs at several times the rate of a draining one, and the extra weight deepens the sag: slope loss creates load, load creates more slope loss. In freeze country the pond becomes an ice lens that prises seams and hangers apart as it expands. None of this is an emergency; all of it puts the job on this season's list.
Why gutters sag: four causes, in the order you'll find them
1. The spikes are letting go
Most gutters on houses built before roughly the 2000s, and plenty installed since, hang on spike and ferrule: a spike about seven inches long passes through the front face of the gutter, through a tube called a ferrule that holds the channel's shape, and into the fascia and rafter tail behind it. It was the standard for decades, and it has a built-in expiry date. The spike is smooth; it holds by friction alone. And the aluminium gutter it pins moves — expanding and contracting with temperature, cycling every day, working against that smooth shank like a very slow crowbar. Water gets into the hole, freeze-thaw works it wider in cold climates, the wood fibres around the shank soften, and one year the spike stands a quarter inch proud and the gutter hangs off the remaining ones.
The tell is in the pattern: spikes letting go produce a sag that worsens gradually, often worst mid-run where the load is shared by the fewest remaining fasteners, and several spikes along the run will be loose, not just one. The good news: this cause has the cleanest fix in this guide — hangers and screws hold by thread, not friction, and they install without taking the gutter down.
2. The fascia behind the gutter is rotting
Sometimes the fasteners are fine and the wood isn't. The fascia board the gutter hangs on lives in the wettest seat in the house: everything the gutter mishandles — overflow, back-edge seepage, ice melt — lands on it. Once the paint film fails, the board rots from the top edge and from the fastener holes outward, and a spike or screw driven into rotten fascia is driven into wet sponge. It holds until load arrives, then pulls through.
Rot produces a different sag signature: the gutter pulls away from the house as well as down, the gap at the back is the giveaway, and fasteners in the affected stretch come out with dark, soft wood on them or spin without biting. This cause changes the job completely — new hangers into rotten fascia are money into a hole. The sequence has to be wood first, gutter second; the repair section below covers where that job sits between your scope and a carpenter's.
3. The run was loaded past what it could carry
Water is heavy in a way that surprises people the first time they do the arithmetic. A brim-full ten-foot section of standard five-inch gutter holds roughly fifty pounds of water. Add the wet leaf mat that collects in a low spot — sodden debris weighs more than the water it displaces — and then, in a northern winter, let the standing water freeze and add a roof's worth of sliding snow catching the front lip, and a single hanger can be asked to hold several times its design load. Hangers don't usually snap; they bend, or their fasteners lever out of the wood a fraction at a time, and the gutter takes a permanent set — aluminium bent down under load does not spring back when the load melts. Load damage shows as one defined belly where the water collected, and the channel itself may be deformed — front lip rolled, bottom bellied — which matters later: rehanging a bent gutter restores the fasteners, not the shape, and a bellied bottom holds water even at correct slope.
4. The hangers were too far apart from day one
The last cause is an installation debt coming due. Hidden hangers and spikes both have a maximum working spacing — twenty-four inches for hangers in mild climates, sixteen to eighteen where snow and ice load the eaves — and every gutter hung by the cheapest bidder is a candidate for thirty-six- or forty-eight-inch spacing instead. Wide spacing doesn't fail immediately. It fails the first time the run fills with water and debris and each fastener is carrying double its design load, and then it fails progressively.
Measure your spacing before you assume anything else: it's the fastest check on the ladder, and if you find three- and four-foot gaps, you may not have a slope problem or a fastener problem at all. You have a count problem — and adding hangers at correct spacing, its own procedure below, is the entire repair.
One more possibility to rule out, because it mimics all four: the run may never have been pitched correctly — dead level, or sloping toward the wrong end. The string line catches that too: a level run reads as one long, shallow pond rather than a local belly.
Before you climb: which version of this job is yours?
The procedures in this guide are written for the version of the job that is genuinely owner-sized. Part of doing it well is recognising when your house presents a different version — sort it before you buy anything:
Yours, comfortably: a one-storey run, fascia that passes the awl test below, a sag caused by loose spikes or wide spacing, and a helper available for the slope reset. Parts cost under a hundred dollars, the work is methodical rather than skilled, and the main risk is the ladder, managed by the safety section below. A full slope reset on a long run, a short fascia patch, and tight snow-country spacing are the same job with more time — and a second pair of hands that stops being optional.
Stop and hire it: anything at two storeys where the ground slopes away or the ladder footing is poor; fascia rot running more than a few feet, or rot that has reached the rafter tails or soffit; a seamless run that is kinked or twisted; any run where you cannot identify sound wood to fasten into. These aren't judgements about your competence — they're the points where the job changes trade (carpentry, two-person ladder work at height) or where a mistake costs more than the professional's invoice.
Tools and materials
Nothing exotic:
- Hidden hangers with screws, sized to your gutter (5-inch for the near-universal 5-inch K-style; 6-inch for the larger profile). Hex-head screws roughly 2 to 2½ inches long, enough to pass through the fascia and bite at least an inch into the rafter tail. About $1.50 to $3 per hanger; buy a fifth more than your count.
- A drill/driver with a hex bit and a spare battery — you'll drive dozens of fasteners overhead.
- A claw hammer and flat pry bar for drawing old spikes, plus a scrap wood block to pry against so you don't dent the gutter face.
- Mason's string line, a torpedo level, and a tape measure for the slope work.
- An awl or stout flat screwdriver for the fascia test.
- Gutter sealant (tripolymer or polyurethane, not bathroom silicone) for old spike holes and disturbed seams.
- A hose with a spray nozzle, a scoop and bucket, gloves, and eye protection.
- The ladder, and a stabiliser (stand-off) bar if you have one — the safety section explains why it earns its cost here.
Measure first: the slope standard and the string-line test
Every version of this repair starts with measurement, because "it sags in the middle" is not a diagnosis. Ten minutes with a string line tells you which cause you're fixing, how much of the run is involved, and whether the slope itself needs resetting or just the fasteners do.
The standard you're measuring against: a gutter should drop a quarter inch for every ten feet of run toward its downspout — three quarters of an inch over 30 feet, an inch over 40. On runs over about forty feet, good installers either accept the larger drop or pitch from a high point in the middle toward downspouts at both ends, which is why long runs so often have two downspouts. Correct slope is nearly invisible: if you can clearly see a gutter's tilt from the ground, it's probably over-pitched. The failures in this guide are mostly runs that are level, bellied, or tilted the wrong way.
The string-line method:
- Pick a dry day and clean the run first — scoop the debris, flush the fines. You can't measure a gutter carrying twenty pounds of wet leaves.
- At the high end of the run (the end away from the downspout), drive a nail or screw into the fascia just above the gutter's top back edge. At the downspout end, do the same at the height of the gutter's top edge there.
- Stretch the line taut along the front top edge of the gutter, end to end. You now have a straight reference connecting the two ends — and a healthy run's top edge hugs it along the whole length, because the line and the correct slope are the same straight fall.
- Walk the run and read the gap between line and gutter edge. Where the gutter drops away below the line, you have a belly, and the depth of the gap is the depth of the sag. Where the gutter pushes above the line, something is jacked up — usually a hanger driven into a swollen board or a section forced over a high spot.
- Mark each belly's start, end and lowest point on the fascia in pencil, and measure the sag depth. A quarter inch of belly is a pond; half an inch is a pond that overflows; an inch is a gutter that has structurally let go.
- Then check the ends against the standard: measure the vertical drop from the high end's top edge to the low end's. If the run drops less than a quarter inch per ten feet — or drops the wrong way, with the downspout at the high side, which happens — the slope itself needs resetting, not just the bellies.
- While you're there, note the hanger or spike spacing along the run, and mark the rafter-tail positions if you can find them (the fascia nail pattern, or a check from the attic). Screws landing in rafter tails hold several times better than screws in fascia alone, and your new hanger layout should use them where spacing allows.
The fascia test: an awl, two minutes, no optimism
Before any fastener work, test the wood the fasteners will hold in. Press an awl (or the corner of a flat screwdriver) into the fascia just above and below the gutter line at each belly and each end of the run, and behind any loose spike.
Sound fascia resists: the point bites a sixteenth of an inch and stops. Rotten fascia lets it sink with hand pressure, sometimes to the hilt, and comes out with dark, crumbly fibres on it. Test every few feet along a suspect stretch, because rot travels along the board from its starting leak, and the transition from sponge to sound wood is where your repair boundary sits.
- Sound everywhere → proceed to the fastener fixes. You're in the cheap, satisfying version.
- One short rotten stretch (a foot or two, typically under an old leak point) → the fascia patch in the repair section below, then hangers.
- Rot in long runs, or soft rafter tails → stop. That's the carpenter-scope version, priced in the costs section, and hanging new hardware first only wastes the hardware.
Fix 1: Replace the spikes with hidden hangers and screws
This is the core repair, and if your diagnosis was loose spikes over sound fascia, it may be the only one you need. A hidden hanger clips inside the gutter channel, hooks under the front lip, and is fastened by a long screw driven through the back of the gutter into the fascia and rafter tail. It carries more load than a spike and holds with a thread instead of friction. Work the run one fastener at a time — the gutter is never unsupported, which is what makes this a ladder job rather than a scaffolding job.
- Start at one end of the run and clean as you go. Scoop debris out of the section you're working on so you can see the channel floor and the old fasteners.
- Draw the first spike. Grip the spike head with the claw of your hammer or a pry bar, prying against a scrap wood block on the gutter face so the force doesn't dent the aluminium. Work it out gradually, rocking rather than ripping — a spike torn out sideways enlarges the hole in the fascia. If a spike spins or pulls free by hand, that spot's wood needs the awl test before anything new goes in near it.
- Remove the ferrule (the tube the spike passed through) and set both aside. The channel is now clear at that station.
- Clip the hidden hanger into the gutter. The front hook engages under the gutter's front lip; the body lies across the channel with its back plate against the gutter's back wall, at the height of the old spike line. It should sit square, front hook fully engaged — a hanger clipped at an angle will work loose.
- Drive the screw through the hanger's back plate, the gutter's back, and the fascia, into the rafter tail. Aim slightly upward, as the old spike holes were angled, and — this matters — offset the screw from the old spike hole by at least an inch along the board if that hole is wallowed out: a screw in an enlarged hole has little more grip than the spike did. Where you can, land the screw in the rafter tail — you marked their positions during measuring.
- Snug, don't crush. Drive until the hanger is firm and the gutter's back is drawn to the fascia, then stop. Overdriving dimples the gutter back, distorts the channel, and can strip the wood fibres doing the holding.
- Move to the next spike and repeat, checking the string line as you pass each marked belly — you'll watch the gap close as the stations between the belly's ends come back up to their screws. Where the gutter has taken a set and won't rise willingly to the line, don't force it with screw tension alone; that section needs an added hanger (Fix 2) or the slope reset (Fix 3).
- Seal the evidence. When the run is fully converted, dab gutter sealant into every old spike hole in the gutter face that isn't covered by a hanger, and smooth it flush. Unsealed holes weep in every rain and streak the face below them.
Fix 2: Add hangers where the spacing is wrong
If measuring showed three- and four-foot gaps between fasteners, the repair is arithmetic: more hangers, at the right spacing, into sound wood. The work is the same clip-and-screw routine as Fix 1, minus the spike removal, with two layout rules:
- Spacing: 24 inches maximum in mild climates; 16 to 18 inches in snow and ice country. Some northern installers go to 12 inches under eaves that catch sliding snow — and on a run that has already sagged once under load, treat the tighter number as yours regardless of climate. The wood and the channel have both declared what the local loads are.
- Concentrate at the load points. A hanger within about six inches of each end of the run, either side of the downspout outlet, and flanking every corner mitre and seam — the points where water weight and ice gather and the channel is weakest. And as in Fix 1, land screws in rafter tails wherever your layout marks allow.
Work belly-first: put the first added hanger at the belly's lowest point, lifting the gutter to the string line as you drive it (a helper watching the line from below makes this a two-hand job instead of a wrestling match). Then add the stations outward from the belly toward the ends at your chosen spacing, checking against the line at each one. A belly lifted at one point with wide spacing either side will simply re-form as two smaller bellies flanking the new hanger — the spacing is the fix, not the single heroic hanger.
On spike-hung runs you're keeping (sound, but wide-spaced), hidden hangers can be added between tight spikes — the systems coexist — but if several spikes are already loose, convert as you go per Fix 1 rather than mixing a repair you'll revisit.
Fix 3: Reset the slope of the whole run
When the string line says the run itself is wrong — dead level, back-pitched, or bellied in so many places that station-by-station lifting is chasing your tail — reset the slope end to end. This is the full procedure the pros run, minus their ladders. It needs a helper, and it goes in lengths.
- Establish the two end points first. The high end goes as high as the roof edge allows: the gutter's back top edge tucked just under the drip edge or shingle overhang, so water leaving the roof lands in the channel, not behind it. The low (downspout) end sits lower by the standard — a quarter inch per ten feet of run: thirty feet, three quarters of an inch; forty feet, one inch. Mark both heights on the fascia in pencil.
- Run the string line between the two end marks, taut, along where the gutter's top back edge will sit — the law for every hanger on the run.
- Free the run in one ten-foot length at a time. Back out the fasteners along the first length only, supporting the gutter so it doesn't fold at the seam or kink — aluminium remembers a kink permanently. On sectional gutters, the factory ten-foot pieces and their seams are your natural work boundaries. On a seamless run, work the same ten-foot discipline without seams: free a length, set it, re-fasten it, move on. Never free the whole run at once; a thirty-foot gutter held at two points is a sail with ambitions.
- Set the length against the line. Raise or lower the freed length until its top back edge meets the string along its whole span, then drive the hangers at your corrected spacing, screws into sound wood and rafter tails where available. A helper sighting along the line from the end of the run calls the last few millimetres better than you can from beside the work.
- Deal with seams as you reach them. On sectional gutters, a slope reset disturbs every seam in the length: scrape out the old sealant, dry the joint, and re-bed it with gutter sealant as the sections go back together. A reset that skips this leaves you with perfect slope and three dripping joints.
- Repeat length by length to the downspout end, then check the outlet: the downspout hole should sit at the true low point, with the channel floor falling toward it along the last length. If the outlet was placed for the old, wrong slope, you may inherit a shallow pond at the far end — the honest cure is moving the outlet, a cutting job; the acceptable cure on a small pond is noting it and cleaning that spot more often.
- Reattach the downspout and confirm the elbow at the top hasn't been twisted by the run's new height — the low end moved by up to an inch, and the downspout has to absorb that without pulling the outlet open.
When the fascia is gone: what you can patch and what a carpenter should
If the awl test found rot, the gutter work waits. Fasteners hold in wood, not in the memory of wood.
Owner scope — the short, shallow patch. A rotten stretch of a foot or two, with sound wood firmly on both sides and solid rafter tails behind: a fair DIY repair. Take the gutter down along the affected length (support it, don't drop it). Cut the fascia back to sound wood with square cuts — rot extends a few inches past where the surface looks bad, so cut until the saw meets wood that smells and feels like wood. Splice in a matching length of board (primed pine, or PVC fascia board, which never rots but expands more with temperature and wants slotted fastener holes per the maker's instructions), screwed to the rafter tails and neighbouring board ends, primed and painted on all faces before the gutter goes back — the back face is the one that rots, and it's only reachable now. Then hang the gutter on the new wood, screws landing in the splice and the rafter tails.
For very shallow surface softness — the awl sinks an eighth of an inch and then meets resistance — epoxy wood consolidant and filler systems can harden the softened fibres into something a screw will bite. Treat them as a short-term repair on a load path, not a restoration: a hanger is a loaded structural fastener, and filler is not structure. If the soft spot is where a hanger needs to live, patch with real wood instead.
Carpenter scope — length, depth, and company. Hand it over when: the rot runs more than a few feet; the rafter tails themselves are soft (the awl finds no firm backing, or the tails are visibly punky from below); the soffit is involved; or the rot is at two storeys. Rafter-tail repair means sistering new timber alongside the old tails or rebuilding the eave — roof-edge carpentry with gutter, fascia and sometimes the roof edge itself all in play. Professional fascia replacement runs roughly $15 to $35 per linear foot, and on a whole-elevation job it combines naturally with new gutters: wood first, then a fresh run hung on it, one mobilisation. If a quote for gutter work on rotten fascia doesn't mention the fascia, the quote is for a job that will fail — ask what the hangers will be screwed into, and watch the answer.
One diagnostic caution: fascia rot at the gutter line sometimes starts above — a missing or damaged drip edge letting roof water run down behind the gutter for years. If the roof edge has no drip edge, fix that detail too, or the new fascia will rot on the same schedule as the old.
Sectional vs seamless: what changes about this repair
Sectional gutters — ten-foot lengths from the home centre, joined with slip connectors or lap seams — are the forgiving version. You can drop one length entirely, repair its fascia, reseal its seams on the ground, and rehang it without disturbing the rest of the run. The seams are also the weakness: each is a future drip, a slope reset disturbs all of them, and a length bellied between its seams can sometimes be replaced outright for less than the labour of straightening it — a new ten-foot aluminium length costs little, and matching profile matters more than matching colour, which paint handles.
Seamless gutters — formed on site from a coil into one continuous run, sometimes forty feet or more — have no mid-run seams to reseal, which is their virtue, and no mid-run joints to separate, which is their repair constraint. You cannot remove the middle of a seamless run; you work on it in place, in the ten-foot lengths of Fix 3, supporting it continuously because a long unsupported span of thin aluminium will kink — and a kink is permanent, holding water at that crease forever. Two people are close to mandatory on a long seamless reset. Seamless is the better system, which is why replacements are quoted seamless — but a sagging seamless run rewards the methodical in-place approach and punishes improvisation.
Vinyl sectional gutters sag for an additional reason: the material creeps and softens in heat, so wide-spaced vinyl in a hot climate can belly between sound fasteners. Tighten the spacing; a badly bellied vinyl length is a replacement, not a repair.
Ladder safety, and working in lengths
- Set the ladder right: base out roughly a foot for every four feet of height, rails extending about three feet above the gutter line, on firm level ground — leg levellers or dig the high foot in on a slope, never a brick under one foot.
- Use a stabiliser (stand-off) bar if you have one. It braces the ladder against the wall and holds you off the gutter itself — leaning a ladder on a gutter crushes the front lip and has started many falls.
- Move the ladder; never lean out. The next spike is always right there, and every overreach moves your centre of gravity outside the rails. On this job you will move the ladder forty times. That is the job.
- Three points of contact while climbing; tools in a belt or bucket on a rope. Nothing in your hands on the rungs.
- The helper is safety equipment. They foot the ladder, pass hangers, and watch the string line. Solo two-storey work is outside this guide's scope entirely.
- Weather discipline: no wet rungs, no wind that moves the ladder top, no frost. And know where the electrical service drop enters before the ladder goes up — an aluminium ladder meeting that cable is a fatal combination.
Working in lengths is the technique rule that ties the procedures together: free, lift, and refasten no more than about ten feet of run at a time, keep the rest fully fastened, and never leave a freed section hanging overnight or in a rising wind. It keeps the gutter supported, keeps your working span inside one ladder set-up's honest reach, and means an interruption never leaves a run dangling by its downspout.
The hose test: proving it, not believing it
Finish with evidence. With the run converted, added to, or reset, run a hose to the high end and flow water at about the rate of a moderate rain — not a blast, which overwhelms any gutter and proves nothing.
- Water should travel the full length of the run and exit at the downspout in a continuous flow, with no point where the stream visibly slows into a widening pond.
- Shut the hose off and wait two minutes. Climb and look: the channel should be empty except for a damp sheen. Any remaining puddle is a belly you missed or made — check the nearest hangers against the string line and correct it now, while the ladders are out.
- Watch the downspout from the ground: a strong, steady discharge. A gulping, intermittent flow suggests the outlet is partially blocked or an elbow is holding debris the reset shook loose — clear it while you're equipped.
What the pros charge, and what a quote should say
Professional pricing for this work, from published 2026 cost data, in the shape you'll actually meet it:
- A single sagging area, repaired: $80 to $600 covers most jobs, with straightforward hanger work landing in the lower half — but expect a $125 to $250 minimum service charge underneath any small call, which is why one sagging corner costs what it costs. Hanger replacement is sometimes priced by the piece at $2 to $3 per hanger plus labour at $50 to $150 an hour.
- A whole run rehung and repitched: roughly $6 to $12 per linear foot with new hidden hangers — $300 to $600 for a typical forty- to sixty-foot side of a house. A pure spike-to-hanger conversion, no repitching, is quoted by some installers at $3 to $6 per foot.
- Fascia replacement: $15 to $35 per linear foot, and it reprices the whole conversation when it's extensive.
- Full seamless replacement: $8 to $16 per linear foot installed, roughly $1,600 to $2,400 for a typical home.
The quote itself should itemise, in writing: the linear feet being rehung; whether hangers are being added, converted, or both, and at what spacing; whether slope reset is included or the run is being rehung at its existing (wrong) pitch — a real distinction, and the cheapest quote is often cheap because it quietly omits the repitch; the fascia allowance, as a per-foot rate for whatever rot is found rather than a vague contingency; seam resealing on sectional runs; and disposal. A quote that says "fix gutters — $450" with none of that is a number, not a scope, and it grows on the ladder. Get two quotes for anything over a single run, and ask each contractor the spacing question from the FAQ — the answer (24 inches, tighter in snow country, screws into structure) is a reliable test of whether they do this properly.
Time expectations: a pro crew converts or rehangs a typical run in two to six hours; add the better part of a day when fascia replacement enters the scope.
Rehang or replace? The decision in numbers
When the gutter metal itself is tired, at some point you're maintaining a memory. The decision, stated as rules you can apply on the ladder:
Rehang (repair) when: the channel is straight and sound — no kinks, no pinhole corrosion, no split seams beyond one or two resealable joints; the sag traces to fasteners, spacing, or slope on one or two runs; the fascia is sound or patchable in short stretches; and the system is under roughly fifteen years old. This is the common case: a few hundred dollars of hangers restores a system with a decade of life in it.
Replace when: several runs sag for different reasons (the system is failing as a system); the aluminium is kinked, twisted, or corroded through in places; seams leak along a sectional run faster than you reseal them; the gutters are twenty-plus years old and every repair exposes the next failure; or the honest rehang quote — with fascia work included — climbs past about half the cost of new seamless. At that point the new system's warranty, correct spacing from day one, and absence of seams are worth more than the difference.
Sequence rule, whichever you choose: if fascia work is needed, it happens first or together, never after. New gutters on rotten fascia is the most expensive way to buy this lesson, and it is sold every week. If the budget forces a choice this year, do the fascia and a repair-level rehang now, and let replacement wait — the wood is the asset; the gutter is the accessory.
A worked example: a thirty-foot front run, spikes loose, fascia sound, channel straight. DIY conversion: under $70 in parts and a morning. Pro conversion with repitch: roughly $250 to $400. Replacement of just that run, seamless: $240 to $480 at per-foot rates — but minimum charges usually push a single-run replacement toward the repair price anyway, which is why repair wins this case clearly. Now the same run with eight feet of rotten fascia: add $120 to $280 of carpentry to any option — and if the other three runs are the same age with the same story, the whole-house conversation (new wood where needed, new seamless everywhere, correct spacing throughout) starts beating four separate repairs on price and sanity alike.
Keeping the slope you just set
A reset gutter stays reset if you remove the loads that bent the last one:
- Clean on the schedule the trees dictate — the companion guide on this site covers frequency in detail, but the structural point is simple: debris weight is a load your hangers were never sized for, and a clean gutter is a light gutter. A sag-prone run gets its low spot checked every clean, because that's where the mat forms.
- Watch the snow line. If roof snow slides and catches the gutter lip (a rolled front lip, or a run pulled after a slide), the lasting fix is snow retention on the roof or a run rehung slightly lower at tighter spacing — a roofer conversation, but it starts with noticing the pattern rather than re-fixing the same sag every spring.
- An annual five-minute check: sight along each run from the end, look for spike heads standing proud on any runs still spiked, check no hanger screw has backed out, and hose-test the run you repaired. Catching the first quarter inch of slope loss is a one-hanger job; catching the third is this whole guide again.
DIY or pro: the honest split
Confidently DIY: the string-line diagnosis and awl test (do these even if you hire everything else — they're how you read a quote); the spike-to-hanger conversion on one-storey runs with sound fascia; adding hangers at corrected spacing; a slope reset on a one-storey sectional run with a helper; the short fascia patch; the hose test.
Hire it: two-storey runs without ideal ladder footing; seamless runs over about thirty feet (the two-person handling, not the fastening, is the issue); fascia rot beyond a few feet or into the rafter tails; any run where the wood test fails in places you can't see a way to patch; and any job where the honest reason you're hesitating is the ladder. Professional sag repair at $80 to $600 is cheap measured against a fall.
How urgent is it, really?
Not tonight, and not never. A sagging gutter damages the house at a slow rate — fascia rot advancing, seams sitting in water, overflow trenching the foundation line, ice loading in winter — and every month of delay adds a little to the eventual bill rather than risking sudden failure. The exceptions that move it to this week: water visibly running behind the gutter or into the soffit; a run pulling away far enough to threaten detachment in a storm; and, in freeze country, a belly full of water in late autumn, which should be emptied before it becomes ice. Otherwise: pick the next dry weekend, measure on Saturday morning, and let the string line tell you which fix in this guide is yours. For most houses it's the satisfying one — a bag of hangers, a box of screws, and a gutter line that reads straight again by lunch.
Cost at a glance
| Item | Typical cost | Notes |
|---|---|---|
| DIY: convert one 30-ft run from spikes to hidden hangers (parts only) | $30–$70 | Hidden hangers with screws run about $1.50–$3 each; a 30-ft run needs 15–16 at 24-inch spacing, plus a tube of gutter sealant |
| DIY: full slope reset on one run (hangers, screws, line, sealant) | $40–$90 | Same hardware, more of it — budget hangers at the tighter spacing if you're resetting anyway, and a spare section of gutter for the piece you'll inevitably bend |
| Professional sagging-gutter repair (typical single problem area) | $80–$600 | Angi cost data; most jobs are hanger work. Expect a $125–$250 minimum service charge inside that range on small calls |
| Professional rehang and repitch, per linear foot | $6–$12 per ft | A 40–60 ft run rehung with new hidden hangers typically invoices $300–$600; spike-to-hanger conversion alone is quoted at $3–$6 per ft by some installers |
| Full replacement, seamless aluminium, per linear foot installed | $8–$16 per ft | Roughly $1,600–$2,400 for a typical home — the benchmark the rehang-or-replace decision below is measured against |
Frequently asked questions
How much slope should a gutter have?
The standard is a quarter inch of drop for every 10 feet of run toward the downspout: three quarters of an inch over a 30-foot run, an inch and a quarter over 50 feet. It is deliberately subtle — set correctly, you cannot see it from the ground. On runs longer than about 40 feet, installers either accept the larger total drop or put the high point in the middle and pitch both halves toward downspouts at each end. More slope than the standard is rarely better: past about half an inch per 10 feet the gutter starts to look visibly tilted against the fascia line and gains almost nothing in drainage.
Can I fix a sagging gutter without taking it down?
Usually, yes. The spike-to-hidden-hanger conversion is designed to be done in place: you work along the run one fastener at a time, pulling each loose spike and driving a screw-in hanger at or near the same spot, so the gutter is never unsupported along its length. A full slope reset also stays on the house — you free one section at a time, adjust its hangers against a string line, and move on. The gutter only has to come down when the fascia behind it needs repair, when a seamless run is kinked or twisted, or when so many fasteners have failed that there's nothing sound left to stage the work from.
How far apart should gutter hangers be?
Twenty-four inches is the maximum spacing in mild climates, and it's a maximum, not a target to stretch. In snow and ice country, tighten it to 16 to 18 inches — some northern installers go to 12 inches on eaves that catch sliding snow. Whatever spacing you choose, put a hanger within about six inches of each end of the run, near corners and mitres, and on both sides of a downspout outlet, because those are the points carrying concentrated load. If your sagging run turns out to be hung at three- or four-foot spacing, that spacing is very likely the whole cause, and adding hangers is the whole fix.
Why do gutter spikes keep working their way out?
A gutter spike is a smooth seven-inch nail driven through a tube (the ferrule) into the fascia and rafter tail. Nothing about it resists backing out — no thread, no barb — and the aluminium gutter it pins expands and contracts with temperature every single day, working the spike a fraction at a time. Freeze-thaw cycles in a wet hole speed it up, and each season the hole is slightly larger and the grip slightly worse. That's why re-driving loose spikes buys a year at most. A screw converts the same hole's job to a threaded fastener with several times the withdrawal resistance, which is why the conversion is the standard permanent repair.
How much does it cost to have sagging gutters fixed professionally?
Published 2026 ranges put a typical sagging-gutter repair at $80 to $600, with most straightforward hanger jobs landing in the lower half once the minimum service charge is covered. Rehanging and repitching a whole run runs about $6 to $12 per linear foot — $300 to $600 for a typical 40- to 60-foot side of a house. Fascia replacement, if the wood behind the gutter is gone, adds roughly $15 to $35 per linear foot. Full seamless replacement for comparison is $8 to $16 per foot installed, around $1,600 to $2,400 for a typical home. Get the quote itemised by the foot and by the task; a single lump sum hides the fascia line, which is where quotes grow.
Can a sagging gutter damage the house, or is it just cosmetic?
It damages the house, slowly and then expensively. A belly in the run holds water permanently, and standing water finds the seams and the back edge of the gutter: it seeps behind the gutter and rots the fascia and the edge of the roof deck, drips down the siding, and overflows at the low spot in every storm, dumping roof water at the foundation line — the exact outcome the gutter exists to prevent. In winter the trapped water freezes, and the ice load pulls the sagging run further down and can split seams. The gutter itself also dies faster: a channel that never dries corrodes and collects debris at several times the normal rate.
Should I repair sagging gutters or just replace them?
Repair when the gutter channel itself is sound — no kinks, pinholes, split seams or heavy corrosion — and the problem is fasteners, spacing or slope on one or two runs. That's a hanger job, and it's cheap. Replace when several runs are sagging for different reasons, when the metal is kinked or corroded through, when the system is twenty-plus years old and every repair reveals another one, or when a rehang quote climbs past roughly half the cost of new seamless gutters. And if the fascia is rotted along whole runs, sequence it as one project: fascia first, then new gutters hung on sound wood — never new hangers into rotten boards.
Checked November 16, 2026. This guide is general information, not a substitute for a licensed professional.
Related guides
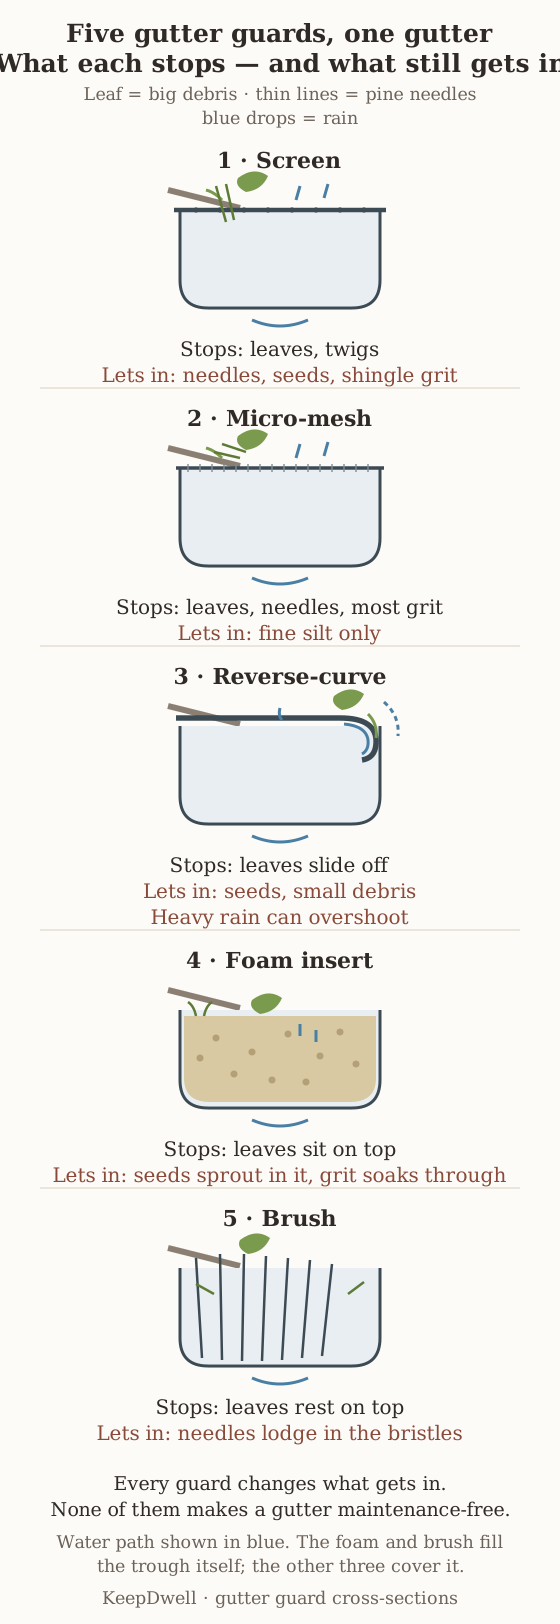
Are Gutter Guards Worth It? Costs by Type, Break-Even Math, and the Homes That Should Skip Them
Gutter guards cost $6–$13 a foot installed, premium systems ten times the DIY price. The honest break-even math by tree cover, what each type really stops, and the homes that should skip them entirely.
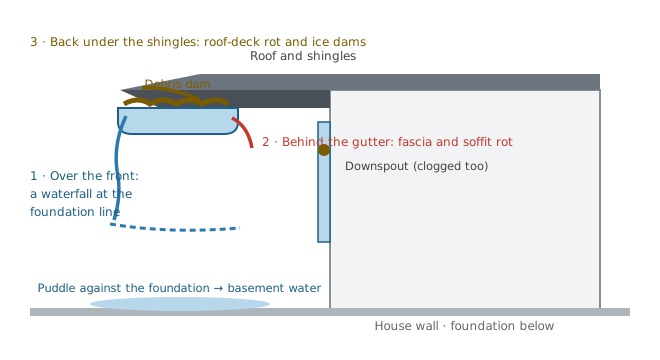
How Often Should You Clean Your Gutters? The Schedule, the Signs You're Late, and What It Costs
Twice a year is the baseline — but your trees decide the real number. The damage chain a clogged gutter sets off, how to clean safely, honest 2026 costs, and whether gutter guards are worth it.
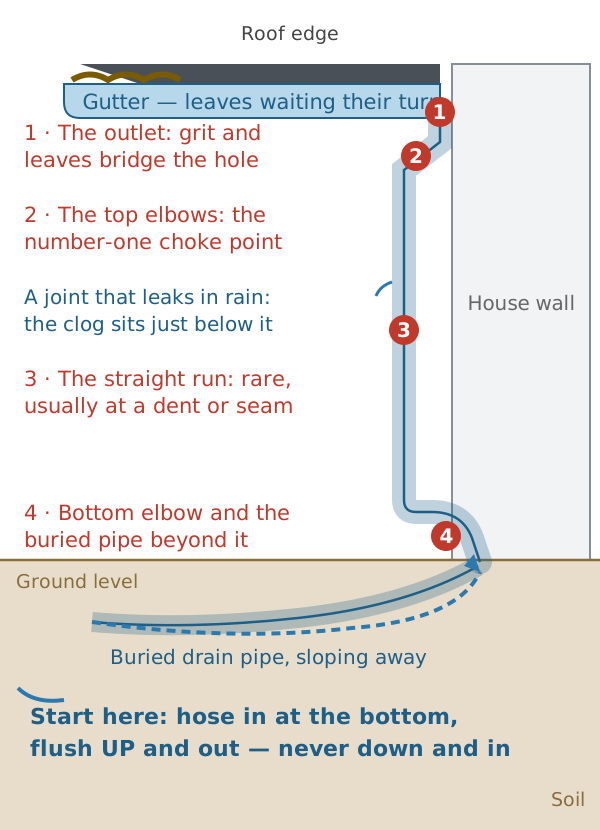
Downspout Clogged? How to Find the Blockage From the Ground and Clear It Without Packing It Tighter
The gutter looks clean but one corner pours over in every rain. Locate the clog from the ground with the tap test, clear it in the right direction (bottom up, never blasted deeper), take elbows apart when you must, and tell when the blockage is in the buried drain.