 Keep
Downspout Clogged? How to Find the Blockage From the Ground and Clear It Without Packing It Tighter
 Daniel Mercer · Editor & Researcher·
Published November 16, 2026·
Updated November 16, 2026
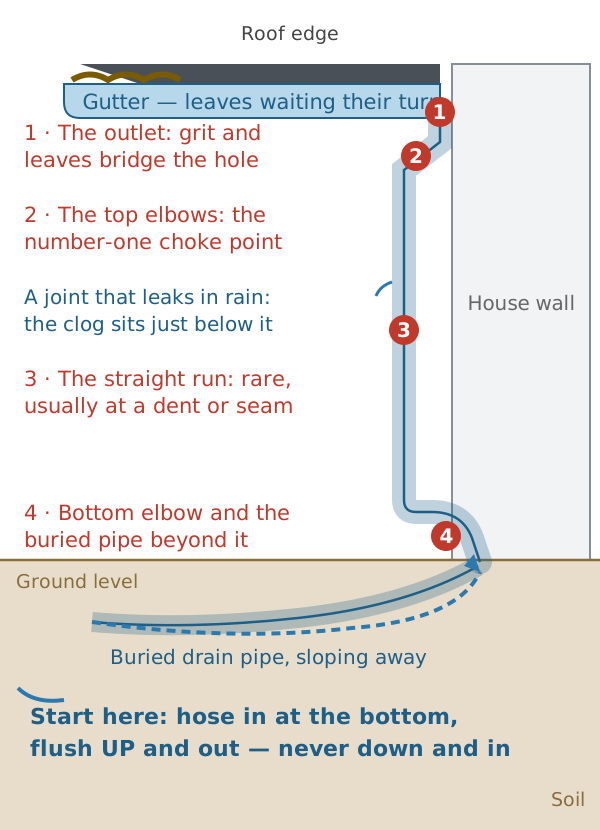
It usually announces itself politely, once, and then keeps its promise every storm after. The rain starts, you glance out of the window, and one corner of the house has a waterfall: water sheeting over the edge of the gutter in a clean curtain, digging a little trench in the mulch below, splashing up against the siding. The strange part, when you get the ladder out on the next dry day, is that the gutter up there looks almost innocent. A few leaves, some grit, nothing that explains a waterfall. That combination — a fairly clean trough and a corner that overflows — is the signature of a clogged downspout, and it fools a lot of first-time owners into cleaning the gutter twice while the real blockage sits untouched inside the pipe.
Here is the mental model that makes everything else in this guide fall into place. A gutter is just a sloped open channel; almost nothing can block it that you cannot see from the ladder. A downspout is a closed pipe with bends in it, and bends are where moving water drops what it is carrying. Your roof might shed several hundred gallons in a single storm, and all of it is supposed to exit through two or three downspouts, each barely bigger than a deck of cards in cross-section. Everything the roof collected — leaves, maple keys, pine needles, shingle grit — gets funnelled toward that small opening. The water makes the turns. A good share of the debris does not.
The good news is that this is one of the most fixable problems on a house, and most of the diagnosis happens with your feet flat on the ground. The one warning that matters comes before any method: direction is everything. A downspout clog cleared the wrong way gets worse, not better, and the most common way owners make this job harder is blasting water or air down from the top, which packs the clog into the nearest elbow like soil rammed into a form. Worked in the right order — locate it from the ground, attack it from below or from the nearest opening, take it apart only if you have to — a clogged downspout is usually a twenty-to-forty-minute job with tools you probably already own.
What a downspout is actually made of (and why the elbows are the story)
Before the tests, thirty seconds of anatomy, because every clog location and every clearing method maps to a part. At the top of the run, the gutter has a hole in its floor called the outlet, sometimes fitted with a short tube (an outlet insert) that pokes down into the pipe. Below that, the downspout does something awkward: it has to get from the gutter, which hangs at the roof edge, back to the wall of the house, which sits a foot or more behind that edge. It makes that journey with two elbows in quick succession — one turning down from the outlet, a short diagonal piece, then a second elbow turning vertical again. This eave offset is the number-one clog location on the entire system, because debris travelling happily downward suddenly has to make two turns in about a foot of pipe.
Below the offset, the straight run is exactly what it sounds like: a vertical pipe, held to the wall with straps, typically in sections joined by crimped ends that telescope into each other, always with the upper section fitting inside the lower one so water running down the inside cannot leak out at the seams. Remember that overlap direction. It decides how you take the pipe apart and, just as importantly, how it must go back together.
At the bottom, one more elbow turns the water away from the wall. From there it either lands on a splash block, connects to an extension pipe that carries it across the surface, or — on a great many houses built in the last few decades — disappears into a buried drain pipe that runs underground to daylight, a dry well, or the street. That buried section is invisible, undiggable without a shovel, and the source of the most misdiagnosed "downspout clogs" of all, because the downspout itself is perfectly clear and the blockage is ten feet away under the lawn.
Two sizes cover nearly every house: 2x3-inch downspouts on older and smaller systems, 3x4-inch on newer and larger ones. The size matters when you buy a replacement elbow (bring the old one; profiles vary) and for diagnosis too: a 2x3 downspout draining a big roof section clogs its elbows faster, because the same debris arrives with less room to spare.
Step zero: prove it is the downspout, and find the clog from the ground
Do not start by climbing, and do not start by forcing anything through the pipe. Start by answering two questions from the ground: is the blockage really in the downspout, and if so, roughly how far down? Ten minutes of testing here regularly saves an hour of dismantling the wrong section.
The rain observation, if you catch it live. During the next decent rain, walk the house. A healthy downspout ends in a strong, steady stream — for a typical roof section, think garden-hose volume. A downspout that trickles, drips, or runs dry while its gutter overflows is blocked somewhere. Now look up: if water is spilling from a joint partway down the pipe, that is the pipe telling you where. Water stacks up above a clog and escapes at the first seam it finds, so a leaking joint means the blockage is just below that joint. That one rule — leak marks the spot, clog sits below it — is worth more than any tool in this article.
The tap test, on a dry day. Take a screwdriver or a wrench and tap the downspout firmly, starting at the bottom and working up, a tap every few inches. An empty aluminium pipe rings: a light, hollow note. A pipe packed with wet debris thuds: dull, dead, no ring at all. Where the sound changes from ring to thud, you have found the top of the clog. Tap slowly around the top elbows and the outlet, because that is where the change usually happens. The test works on the straight run and the bottom elbow just as well. It cannot see inside the buried pipe, but it covers everything above ground, which is where most clogs live.
The hose test, to confirm and to measure. Put a garden hose in the gutter at the end farthest from the downspout, and run the water at a moderate flow while a helper watches the bottom. Three outcomes, three verdicts. Water arrives below within a few seconds in a strong stream: the downspout is clear, and your overflow problem lives in the gutter itself — its slope, its capacity, or debris you have not yet spotted. Water arrives slowly, discoloured, carrying grit and leaf fragments, while the gutter slowly fills: a partial clog, restricting flow; it will finish closing, usually during the worst storm of the season. Water barely arrives at all, and instead backs up — spilling from the gutter, or forcing its way out of a joint: a full clog, and the joint it escapes from is your height marker, cross-checked against the tap test.
The disconnect test, when a buried drain is involved. If the downspout empties into an underground pipe, separate the two suspects before treating either. Most bottom elbows are held by one or two screws, or simply slip over the drain adapter. Pull the elbow free of the buried pipe's inlet, run the hose test again, and watch the downspout's own outlet. If it now pours freely, the downspout was never clogged; the problem is underground, and you can skip ahead to the buried-drain section with a clear conscience. If it still dribbles, the clog is in the pipe in your hands. This five-minute separation of suspects is the step most often skipped, and skipping it is how owners end up snaking a clean downspout while a root-filled buried pipe laughs at them from under the lawn.
One more ground-level check, because it changes the repair: look at the pipe itself. A downspout dented by a ladder, crushed by a mower, or creased where a strap was overtightened has a built-in clog starter at the dent — debris catches on the inward fold the way it catches on an elbow. If your tap test finds the thud exactly at a visible dent, clearing will work, but the permanent fix is replacing that section, which the disassembly section below covers.
The golden rule: out the way it came in, or up from below — never rammed deeper
Everything about clearing a downspout follows from one fact of physics: a clog in a pipe with bends behaves like a wedge. Push it from behind and it does not slide politely around the elbow; it compresses, spreads, and grips the walls harder. Wet leaf matter is the worst offender — it felts together under pressure into something closer to cardboard than to leaves. This is why the internet's favourite suggestion, putting a pressure washer or a hose nozzle at the top and letting rip, so often converts a soft partial clog into a solid plug that laughs at every tool except a screwdriver and disassembly. The debris arrived from the top, drifting in gently on rainwater. It will leave most easily the same way it arrived, or by being drawn and flushed out of the bottom — the short way, downhill, with the turns behind it rather than ahead of it.
So the working order in this guide is deliberate. Flush from the bottom up, so loosened debris floats and falls out of the nearest opening instead of travelling. Snake from whichever end is closer to the clog, top or bottom, and pull debris back toward you rather than pushing it onward. Take sections apart at the elbows when the clog will not move, because an elbow in your hands can be emptied with a stick. And reserve top-down water for one job only: the final rinse, after the pipe is already clear, to wash out the grit. Keep that order and you will almost never make the problem worse. Break it, and the disassembly section stops being optional.
A second, quieter rule: know where the water is going while you work. Flushing from the bottom means water and debris erupt from joints and the outlet. That is the method working, not failing — but dress for it, and keep your face out of the line of the bottom opening.
Tools, and the ladder rules that come before any of them
The full kit for everything in this guide costs less than a single professional visit: a garden hose with a basic adjustable nozzle, a 25-foot hand-crank drum auger (the plumber's snake sold for drains, around $25 to $50, and the single most useful purchase in this article), a nut driver for the small hex screws that hold sections together, a bucket, gloves, and a gutter scoop. Useful if you own one: a wet/dry vacuum, which clears outlets and loose clogs from the top without water or mess. You do not need a pressure washer, and you never need a chemical drain opener — chemicals do nothing to leaves, sit trapped in the pipe, and greet you in the face when you take the elbow apart. Keep them out of this job entirely.
Now the ladder, because more people are hurt doing this job than by any clog. Gutter work puts you on a ladder, leaning, with both hands busy, which is the classic setup for a fall, and the reason the safety rules here are the same ones OSHA writes for professionals. Set the ladder on firm, level ground — never on a splash block, a mulch bed, or blocks to gain height. Angle it at roughly four-to-one: for every four feet of height, the base sits one foot out from the wall. If you will work at the gutter line, the ladder rails should extend about three feet above the gutter, so you have a handhold at the top rather than a scramble; that three-foot extension is the specific figure in OSHA's ladder standard, and it is good practice on a house even though the rulebook was written for job sites. Move the ladder as you work instead of leaning sideways — the belt-buckle rule: if your belt buckle passes the ladder's rails, you are reaching too far. Carry tools up in a bucket on a rope or in a belt rather than in your hands, and have a helper foot the ladder if one is available. Do not do any of this in wind, on wet or frosty rungs, or on ground soft enough for a ladder foot to sink mid-job. And the honest boundary that runs through this whole guide: on a two-storey house, the top elbow is fifteen to twenty feet up, and a professional with the right ladders charges a modest sum to stand there instead of you. Nothing in a downspout is worth a fall. If the clog is up high and the ladder situation is anything less than completely comfortable, the DIY part of this job is the ground-level testing, and the pro part is the elbow.
Fix 1: the outlet and strainer, cleared from the ladder
Start where the debris starts. With the ladder set at the downspout's corner, look into the gutter at the outlet. If a matted bridge of leaves and grit covers the hole, scoop it out by hand and with the gutter scoop, working a few feet in each direction, because that mat is being fed by everything upstream. Check the outlet insert if one is fitted: the short tube below the gutter floor is a favourite place for a plug to form, a dense little cork of grit and seed pods. Poke it clear from above with a gloved finger or a stick, and let the debris fall down the pipe; a pipe you are about to flush anyway can take it.
If an outlet strainer is fitted — the wire cage or bulb that sits in the outlet — lift it out and clean it, and while it is out, decide whether it stays. Strainers genuinely prevent elbow clogs; they are also, in effect, a device for moving the clog from inside the pipe to inside the gutter, where it dams the channel and causes the very overflow you are trying to stop, only sooner. Under a tree that drops small, elbow-sized debris — seed pods, pine needles, blossom parts — the trade can be worth it, because a gutter-level pile is easier to scoop than an elbow is to dismantle. Under big-leaf trees, the strainer mostly adds a chore. The prevention section returns to this; for now, note what your trees are dropping.
Finish this fix with water: hose in the gutter, moderate flow, and watch the bottom. If the downspout now pours, the clog was at the top and you are done — this is the outcome in a satisfying share of cases, because the "downspout clog" was really an outlet cork. If it still dribbles, the plug is below you, and it is time to work from the ground.
Fix 2: the hose flush from the bottom up, with a rag seal
This is the workhorse method, and it feels backwards the first time you do it, which is exactly why it works. Go to the bottom of the downspout. If there is an extension pipe or a splash arrangement, move it aside. If the bottom elbow slips off or unscrews easily, you can remove it for a straighter shot — note how it was fitted before you move it. Push the hose nozzle up into the bottom opening as far as it comfortably goes, a foot or two, and pack a wet rag around the hose where it enters the pipe. The rag is not a detail; it is the method. Sealed in, the water has only two places to go: up the pipe, where it meets the clog from underneath, lifts it, breaks its grip on the walls, and floats the loosened debris up and out of the joints and the gutter — or back out around the hose, which the rag mostly prevents.
Have a helper turn the water on, or turn it on yourself before sealing, starting at half pressure. You will hear the pipe fill. Watch the top: within a minute or two, in most cases, dirty water begins to spill from the gutter or bubble from the outlet, carrying the debris out with it, and then the flow suddenly runs clear and strong as the plug lets go. Let it run a full minute after it clears; the grit that lined the pipe needs the ride. If nothing happens at the top after a couple of minutes, pulse the water — on, off, on — because the hammering of pressure changes works a plug loose better than steady pressure does, the same reason you jiggle a stuck drawer rather than leaning on it.
Two honest limits. First, a hose will not move a clog that has compacted for years into a solid mass, and it will not move anything around the top elbows if the plug sits above them and the water simply spills from a lower joint instead — water takes the easiest exit, and a weeping seam below the clog steals your pressure. That is information, not failure: it tells you the clog is above that seam and stubborn, and the auger is next. Second, if the downspout connects directly into a buried drain with no accessible bottom opening, you cannot do this fix as described; your entry points are the top, after disassembly, or the buried pipe's far end, which the underground section covers.
When it works, and it works more often than any other single method, finish by running the hose from the top down for a final rinse, checking that the stream at the bottom is full and immediate. Then stand back during the next rain and enjoy the least glamorous satisfying sight in home ownership: a downspout pouring like a tap.
Fix 3: the plumber's snake, worked from the nearer end
When water alone will not move the plug, you need a tool that physically engages it, and that tool is a hand drum auger — the same inexpensive snake sold for sinks, with 15 to 25 feet of flexible cable and a crank handle. It is close to perfect for downspouts: long enough for any run on a house, flexible enough to negotiate elbows with patience, and stiff enough to chew into a leaf plug and drag it back out.
Choose your end by the tap test, not by habit. If the clog is in the top elbows or the upper run, work from the top: from the gutter, feed the cable down through the outlet (removing a strainer first) and into the pipe. If the clog is low — bottom elbow, lower run — work from the bottom, feeding up. Either way, the technique is the same. Feed the cable in slowly, cranking gently, until it meets resistance. That resistance is either an elbow's turn or the clog itself, and you tell them apart by feel: an elbow is a firm stop at a predictable distance, roughly where the anatomy says a bend should be; a clog is a soft, springy resistance that gives a little and pushes back. At an elbow, ease off, rotate the cable while nudging forward, and let the tip find its way around the bend — forcing it is how cables kink inside pipes, which converts your afternoon entirely. At a clog, work the cable in short strokes, in and out, cranking as you go, so the corkscrew tip bores into the plug and tears it into pieces small enough to fall or be flushed.
Then the part most guides skip: withdraw and retrieve, do not push through and declare victory. A snake punched through a leaf plug leaves a tunnel through a plug that is still there, and the tunnel closes in the next storm. Instead, once you have bored into the clog, draw the cable back slowly while cranking, and let the tip drag a wad of debris out with it. Repeat — bore, drag, dump the wad in the bucket — until the cable comes back nearly clean. Follow with the hose, from whichever end is open, to flush the fragments and grit the snake loosened. Snake first, water second is the professional sequence for a reason: the snake breaks, the water carries.
A few tool truths. The flat steel tape snakes sold cheaply are adequate for a single elbow but frustrating in longer runs; the round-cable drum auger is worth the small difference. A drill-powered auger speeds the cranking but also speeds up mistakes, and inside thin aluminium it can grab and twist a section if it binds — keep the speed low and your touch light. Never use a powered sewer machine, the heavy rental kind, in a downspout: it is built for iron and clay pipe underground, and it will shred a thin-walled aluminium downspout in seconds. And if the cable meets a resistance that feels like metal — hard, ringing, immovable — stop. You may have found a screw that a previous installer drove clean through the pipe (it happens, and it catches debris like a rake), or a crushed section. That is a disassembly case, and it is next.
Fix 4: taking the downspout apart at the elbows
Some clogs do not negotiate, and some pipes hide hardware problems no snake can fix. The good news is that a downspout is one of the few plumbing-adjacent systems on a house that is genuinely designed to come apart with a nut driver and ten minutes of patience. Sections are joined with small self-tapping hex screws, usually two per joint, sometimes with a crimped slip fit and no screws at all on the straight runs. Elbows are short, cheap, and replaceable. Nothing is soldered, glued, or threaded.
Work from the ground up and keep every screw in the bucket. Start at the bottom: remove the bottom elbow, and you will often find the clog's lower end right there, a grey-brown plug you can pull out with a gloved hand or a stick. If the clog is at the top, the sequence is: ladder up, screws out at the joint below the bottom of the two top elbows, and slide the offset assembly — elbow, diagonal, elbow — down and out as one piece. Carry it down the ladder rather than dropping it; aluminium dents if you look at it firmly, and a dented elbow is a future clog with an appointment. On the ground, the clog is no longer a mystery inside a pipe; it is a wad in a short fitting that you can push out with a broom handle, shake out, and rinse clean in under a minute. While the piece is in your hands, look inside every section you removed: you are checking for the through-screw, the inward dent, the seam folded the wrong way — the hardware fault that explains a repeat clog at that exact spot, and that no amount of flushing would ever have fixed.
Reassembly has one rule and one habit. The rule is overlap direction: every upper section fits inside the section below it, so water travelling down the inside meets no lip and no seam opening. Reverse a single joint and you have built a leak that drips in every rain and a lip that catches debris forever after. Elbows follow the same logic — the crimped, narrower end always points downstream. The habit is screws: replace them in their holes, snug, not gorilla-tight, because overdriving strips the thin aluminium and the joint works loose in wind. If an old screw hole is stripped, move a quarter inch and make a new one. If a section or elbow is dented or corroded through, replace it now while the pipe is open: elbows and short sections are a few dollars each at any hardware store, in both standard sizes, and swapping a part in your hands on the ground is the cheapest repair in this article. Match the size (2x3 or 3x4) and profile; colours weather, so a new elbow may be a shade brighter than its neighbours for a season. Most owners decide they can live with that.
Two-storey honesty applies here in full: taking apart the top offset of a two-storey downspout means ladder work at height with both hands occupied and a section of pipe to carry. That is precisely the job professionals price modestly because they do it from the right ladders without thinking about it. The ground-level half of this fix — the bottom elbow and the first section — is within any owner's reach. Know which half your clog lives in.
Fix 5: when the blockage is underground
Sooner or later the tests deliver a verdict nobody wants: the downspout itself is clear, the bottom elbow is clear, and the water still has nowhere to go, because the buried drain pipe it feeds is blocked, crushed, or full of roots. This is the section the short guides skip, and it is the one that saves first-time owners the most money, because underground drain work is where the prices change by an order of magnitude and where an uninformed owner can pay for the wrong job twice.
Recognise the picture first. The disconnect test already gave you the core evidence — downspout disconnected, water pours freely; reconnected, it backs up. Supporting signs: water bubbling or seeping up around the base of the downspout or at the drain inlet during rain, a strip of lawn over the pipe's route that stays soggy long after the rest dries, a sinkhole or soft spot developing along that line, and, at the pipe's far end where it daylights, a weak or absent flow during rain that used to be strong. Any two of those, and you are no longer unclogging a downspout; you are diagnosing a buried pipe.
What you can still do yourself is limited but real. If the buried pipe daylights somewhere — a hillside, a curb cut, a pop-up emitter in the lawn — that end is an entry point: hose and auger from there, working back toward the house, clears loose silt and leaf mush. A pop-up emitter itself clogs with mulch and grass and is worth simply lifting and cleaning before anything else; many "underground clogs" are a lid glued shut by thatch. Beyond that, you cannot see, and underground, seeing is the whole game, because the four likely causes need four different responses. Silt and debris: jetting clears it completely. Tree roots at a joint: jetting with a root-cutting head clears it, temporarily, and it will return on the roots' schedule. A crushed or collapsed section, common where a vehicle crossed a shallow pipe: no cleaning tool fixes it; that section gets dug up and replaced. A pipe laid nearly flat or bellied — settled into a sag that holds water and grit — cleans fine and re-silts on a schedule, and the honest options are periodic jetting or re-laying the line with proper slope.
That is why the professional sequence is camera first, jetting second, and why you should be politely immovable about it when taking quotes. A camera inspection for a residential drain line runs roughly $125 to $500 in 2026 figures, and it converts your problem from a mystery into a photograph: silt, roots, collapse, or belly, at a measured distance from the inlet, which also tells the digger exactly where to dig if digging is needed. Hydro jetting — a high-pressure water head that scours the pipe walls as it is drawn back through the line — runs roughly $350 to $600 for a typical residential line, more for long or root-heavy runs, and it is genuinely excellent at the two causes it suits: silt and soft roots in a sound pipe. Paid for blind, on a collapsed pipe, it is $500 spent to learn what a $250 camera would have told you first. When you hire this work, you are hiring a drain contractor or a plumber with drain equipment, not a gutter company; ask for the camera footage, the measured location of any fault, and a written distinction between "we cleared it" and "the pipe is sound," because those are very different purchases.
And the exit ramp, because there is one and it is underused: if the buried line is failed, the run is long, and the excavation quote makes you sit down, you are allowed to fire the underground pipe. Disconnect the downspout at the bottom elbow, fit a surface extension — rigid pipe, not the flimsy corrugated kind that clogs on its own ridges — and carry the water to a discharge point at least four to six feet from the foundation, farther if your grade allows, where it can spread and soak in without crossing a walkway it would ice in winter. Plenty of older houses have drained exactly this way for a century. It is not the prettiest solution, and on a tight lot draining toward a neighbour it may not be available, but as a permanent answer to a dead buried line it beats a four-figure excavation on many properties — and it beats a downspout that backs up and overflows at the foundation every storm, which is the option you choose by default if you do nothing.
The tool shelf, honestly compared
Since every hardware store and video thumbnail pushes a different weapon, here is the whole armoury judged on the same standard: does it clear the clog without making it worse?
The garden hose, used from the bottom up with a rag seal, is the best first tool: free if you own one, gentle on the pipe, and effective on the majority of clogs, which are young, wet, and not yet compacted. The hand drum auger is the best second tool and the best purchase: it engages what water cannot move, retrieves debris instead of relocating it, and works in both directions. The wet/dry vacuum deserves its growing reputation: sealed over the bottom outlet on suction, or fitted to the top with the gutter end open, it pulls loose and medium clogs out whole, dry, and visible in the canister, which is oddly satisfying and genuinely diagnostic — you see exactly what your trees are feeding the pipe. A drain-cleaning bladder or small jetter nozzle on the hose concentrates the bottom-up flush for stubborn cases; use the smallest size, keep pressure moderate, and remember the rag-seal principle, because an unsealed jet just makes a fountain.
The leaf blower is the myth to handle carefully. Its reputation comes from videos of dry autumn clogs — a loose plug of crisp leaves near the top that a blast of air genuinely can evict, in a shower of debris that makes great footage. The clog in a real downspout in the rainy season is wet, matted, and seated in an elbow, and air at blower pressures mostly leaks around it, dries its surface, and occasionally drives it further in. If the tap test says your clog is high, dry-season, and recent, a blower attempt costs you four minutes and might work. Treat it as a lottery ticket, not a method, and never follow a failed blower attempt with a pressure washer, which is the same idea with the volume turned up past the point where the pipe can forgive you. Pressure washers have exactly one legitimate role here: a low-pressure rinse of an already-clear pipe, which a hose does just as well.
What the pros charge, and what you are actually buying
Professional prices split cleanly along the same line as this guide: above ground and underground are different trades at different prices. A gutter company clearing a downspout as part of a cleaning visit typically adds $25 to $75 per downspout, and a full cleaning visit — troughs cleaned, downspouts flow-checked — runs about $119 to $235 nationally in 2026, with Angi's data putting the average job near $168 and standalone downspout unclogging quoted anywhere from $25 for an easy ground-level elbow to $300 for a stubborn two-storey dismantling. When you book, ask the specific question "does the price include making every downspout run clear, and what does it cost if one needs to come apart?" because that sentence is the difference between a cleaning and a cleaning plus a surprise.
Underground, you are in drain-contractor pricing: roughly $125 to $500 for the camera inspection, $350 to $600 and up for hydro jetting, and excavation-and-replacement priced by the dig, from several hundred dollars for a short, shallow section to several thousand for a long line under landscaping or a driveway. The numbers argue for the diagnostic order given above: camera, verdict, then the one correct spend. They also argue for one habit when any pro works on this system: get the finding in writing, with distances. "Clog at 18 feet, roots at a joint, rest of line sound" is a sentence you will use for years; "we cleared it" is not.
Prevention: keep the elbows empty
A downspout you have cleared once has told you its clogging rate, and prevention is mostly scheduling around that honesty. The base routine is the gutter cleaning itself — twice a year for most houses, more under heavy tree cover, on the schedule covered in our gutter cleaning guide — with one addition that costs ninety seconds: every cleaning ends with a flow check, hose in the gutter, eyes on the bottom of each downspout, because a downspout caught at the dribble stage is a hose flush, and the same downspout caught at the waterfall stage is a dismantling.
Strainers and guards, judged plainly. The outlet strainer prevents elbow clogs by relocating debris to the gutter, where it dams sooner: a fair trade under seed- and needle-dropping trees if you accept the more frequent scooping, a poor one under big leaves. Gutter guards reduce the volume of debris reaching the outlet but pass the fine fraction — shingle grit and silt — which settles in the bottom elbow and the buried line over years, so guarded houses clog less often and more sneakily; the flow check matters more for them, not less. At the bottom, keep the exit honest: extensions and splash blocks in place and actually carrying water away from the foundation, pop-up emitters lifted and cleared each spring, and the ground at the outlet kept free of the mulch that buries bottom elbows and hides their leaks. Finally, if one downspout serves a very long gutter run or a very large roof plane and clogs out of proportion to its neighbours, the structural fix is a second downspout or a size up at the next gutter replacement; no cleaning schedule fully compensates for a pipe that was undersized the day it was installed.
DIY or pro: the honest split
Do it yourself, gladly, when the house is one storey, the tap test puts the clog in the bottom elbow, the outlet, or within ladder-comfortable reach of the top, and the ground under your ladder is firm and level. That covers most clogs on most ranch houses, with the hose and auger, in under an hour. Share the job — DIY the testing, hire the height — when the clog sits in the top elbows of a two-storey house. Hand it over entirely when the evidence points underground (camera and jetter are not rentable in any practical homeowner sense, and the diagnosis is the product), when a section needs replacing above your safe reach, when the pipe is part of a historic or copper system you do not want to learn on, or when the downspout drains somewhere you cannot identify — a pipe that vanishes into a wall or a slab is a plumber's puzzle, not a starter project. None of those handoffs are defeats. The tap test and the disconnect test you ran are the same tests the pro runs first, and arriving at the phone call already knowing where the clog is, and where it is not, is how you buy exactly one job instead of two.
Why this cannot wait for a nicer weekend
The urgency here is not the downspout; it is the address of the overflow. A clogged system does not merely fail to move water — it concentrates the entire roof's runoff at one corner of the foundation, storm after storm, in a trench it digs for itself. A 1,000-square-foot roof sheds roughly 600 gallons in a one-inch rain, and your clogged corner delivers its share of that to the worst possible place: the soil against the footing, where it saturates the ground, raises the pressure that pushes water through basement walls and floor joints, erodes the grade that should shed surface water away, and in freeze-thaw country works into foundation cracks and widens them a season at a time. The fascia and roof edge above are not spared either, since a downspout clog backs water up the gutter until it finds the path behind the metal and into the wood. Set against that, an hour with a hose is extremely cheap insurance, and a clogged downspout in October, in a wet climate, is a winter problem being scheduled.
If it clogs again within the year
Treat a repeat clog as a diagnosis, not a nuisance, because downspouts clog again for findable reasons. Same elbow, same season: the tree above that corner drops debris sized for that elbow, and the answer is the cleaning schedule or the strainer trade, decided with open eyes. Same spot, any season, cleared easily each time and back within weeks: suspect hardware — take that elbow off once and look for the through-screw, the dent, the reversed seam; repeat clogs at a hardware fault never stop until the fault does. Bottom of the system, slow rather than stopped, gritty discharge: the buried line is silting, and one camera inspection now replaces a rhythm of pointless clearings. And if every downspout seems to clog faster than the neighbours', look up before you look down: a roof shedding heavy grit is a roof at the end of its surface life, and the downspouts are simply reporting it. A downspout, in the end, is an honest pipe. It clogs where the bends are, it leaks just above where it is blocked, and it tells you, with a tap and a hose, nearly everything you need to know — from the ground, before you climb, before you pay anyone, and before the next rain makes the decision for you.
Cost at a glance
| Item | Typical cost | Notes |
|---|---|---|
| DIY tools: hose nozzle + 25-ft hand drum auger | $35–$80 one-time | The auger is the tool that earns its keep; it will outlast the house. A wet/dry vacuum, if you own one, replaces half the other tricks |
| Replacement elbow or short downspout section | $5–$20 per part | Standard 2x3 and 3x4 elbows are shelf items at any hardware store; bring the old one to match profile and colour |
| Pro downspout clearing, added to a cleaning visit | $25–$75 per downspout | Often free or nominal if you ask when booking the cleaning; a blocked downspout left out of a cleaning quote is the classic upsell, so ask first |
| Pro gutter and downspout cleaning visit | $119–$235 typical | Angi 2026 data: national average around $168. Standalone downspout unclogging is quoted by Angi as a $25–$300 job depending on access and severity |
| Buried drain line: camera inspection, then jetting | Camera $125–$500; jetting $350–$600+ | HomeGuide and Thumbtack 2026 figures for residential drain lines. The camera comes first: jetting a collapsed or root-filled pipe wastes the jetting fee |
Frequently asked questions
How do I know the clog is in the downspout and not the gutter?
The trough itself looks reasonably clear, yet water sheets over the edge near one corner during rain, or that downspout produces a trickle, or nothing, while its neighbours pour. On a dry day, run a hose into the gutter at the end farthest from the downspout and watch the bottom of the pipe: a healthy downspout delivers a strong stream within seconds. A slow, tea-coloured dribble, or water backing up and spilling from a joint partway down, means the pipe itself is blocked, most often in the elbow just below the outlet.
Where do downspouts usually clog?
In four places, in this order of likelihood. First, the top elbows directly under the gutter outlet, where the pipe changes direction twice in a few inches and leaves, twigs and seed pods jam at the turns. Second, the outlet hole itself, bridged over by a mat of debris. Third, the bottom elbow where the pipe meets the ground or enters a buried drain, where grit settles. Fourth and rarest, the straight vertical run, usually at a dent, a crushed section or a seam. A joint that drips or spurts during rain is telling you the clog is just below it, because water is stacking up above the blockage and escaping at the nearest seam.
Can I clear a downspout with a leaf blower or pressure washer?
A leaf blower sometimes works on a fresh, loose, dry clog near the top, and does nothing for the wet, compacted plug that most clogged downspouts actually contain; it can also blow debris deeper and scatter it into the buried drain. A pressure washer from the top is the one method to avoid outright: it drives the clog into the elbow and compacts it, converting a twenty-minute job into a dismantling job. From the bottom, a garden hose with an ordinary nozzle gives you the same water in the right direction, and a drain-cleaning bladder or jetter attachment on low pressure is the strongest version of that idea that is still safe for thin aluminium pipe.
Why does my downspout keep clogging in the same place?
Because the cause is still there. Repeat clogs at the top elbow usually mean the gutter above it collects debris faster than it is cleaned, or a nearby tree drops seeds and pods that are exactly elbow-sized. Repeat clogs at the bottom often mean the buried drain is partially blocked or has lost its slope, so grit settles instead of washing through. A downspout that is one size too small for its roof area, or a long gutter run draining to a single downspout, also refills elbows faster. Fix the pattern, not just the plug: clean the gutter on the schedule your trees dictate, consider an outlet strainer knowing its trade-offs, and if the bottom keeps silting up, have the buried line camera-checked once rather than cleared five times.
How much does it cost to have a downspout unclogged professionally?
As an add-on to a gutter cleaning visit, typically $25 to $75 per downspout, and sometimes included if you ask when booking; a full cleaning visit runs about $119 to $235 nationally in 2026. A standalone visit just for one clogged downspout is quoted in the $25 to $300 range depending on height and severity. The price jumps when the blockage is underground: a camera inspection of a buried drain runs roughly $125 to $500, and hydro jetting $350 to $600 or more. Get the underground diagnosis before paying for repeated clearing, because jetting a pipe that has collapsed or filled with roots buys you nothing.
What if the clog is in the underground drain pipe?
Tell-tale signs: the downspout itself runs clear when disconnected or tested, water backs up out of the bottom elbow or bubbles at the ground joint during rain, and the area over the buried line stays soggy. You can try a hose or a long auger from the pipe's daylight end if it has one, and that clears loose silt. Beyond that it is pro work: a camera inspection to see whether you have silt, roots, a crushed section or a pipe that has simply lost its slope, then jetting if the pipe is sound. If the buried line is failed and the digging quote is ugly, disconnecting the downspout and extending it above ground, discharging well away from the foundation, is a legitimate permanent alternative on many lots.
Are downspout strainers and gutter guards worth it for stopping clogs?
Outlet strainers (the wire cage or bulb that sits in the gutter outlet) do stop elbow clogs, by moving the clog: debris piles up around the strainer in the gutter instead, where it is easier to reach but dams the gutter sooner, so the gutter needs attention more often, not less. They are a reasonable trade under seed- and pod-dropping trees. Gutter guards reduce what reaches the downspout but do not end downspout clogs, because fine grit and shingle sediment wash through most screens and settle in the bottom elbow over time. Neither replaces the flow check: twice a year, run water through and confirm every downspout pours.
Checked November 16, 2026. This guide is general information, not a substitute for a licensed professional.
Related guides
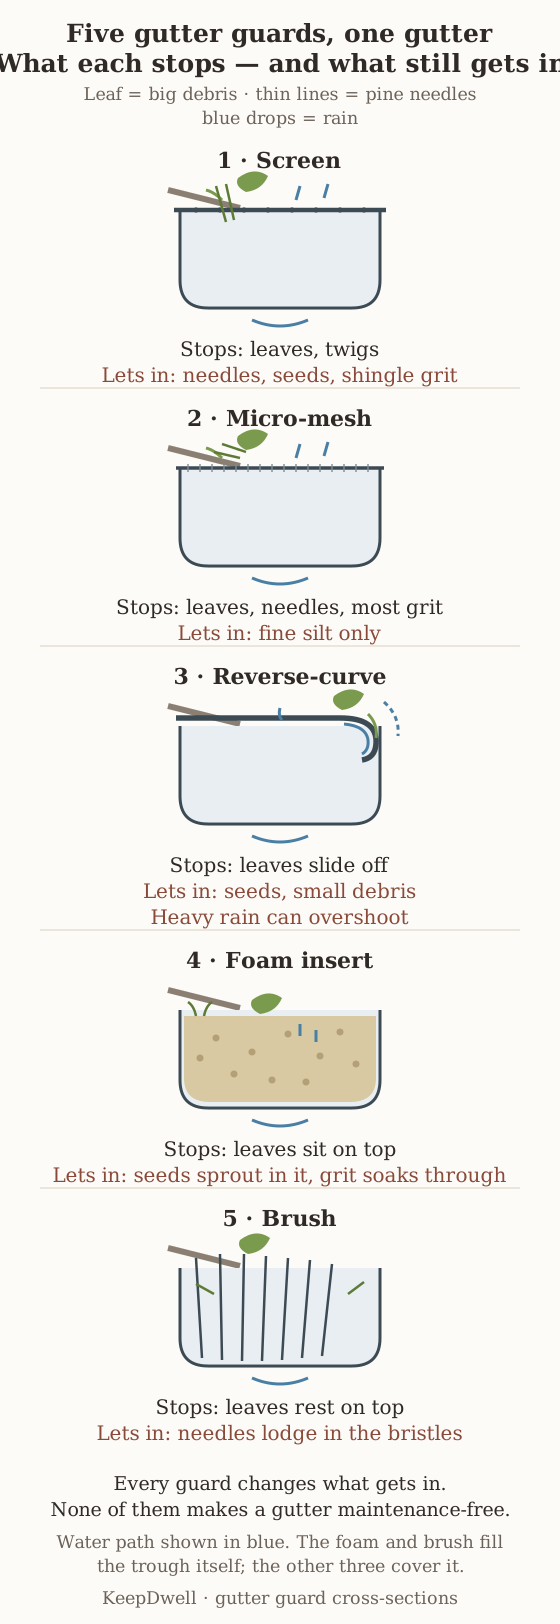
Are Gutter Guards Worth It? Costs by Type, Break-Even Math, and the Homes That Should Skip Them
Gutter guards cost $6–$13 a foot installed, premium systems ten times the DIY price. The honest break-even math by tree cover, what each type really stops, and the homes that should skip them entirely.
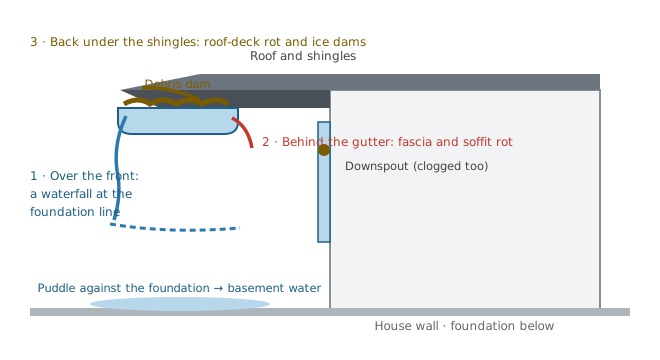
How Often Should You Clean Your Gutters? The Schedule, the Signs You're Late, and What It Costs
Twice a year is the baseline — but your trees decide the real number. The damage chain a clogged gutter sets off, how to clean safely, honest 2026 costs, and whether gutter guards are worth it.
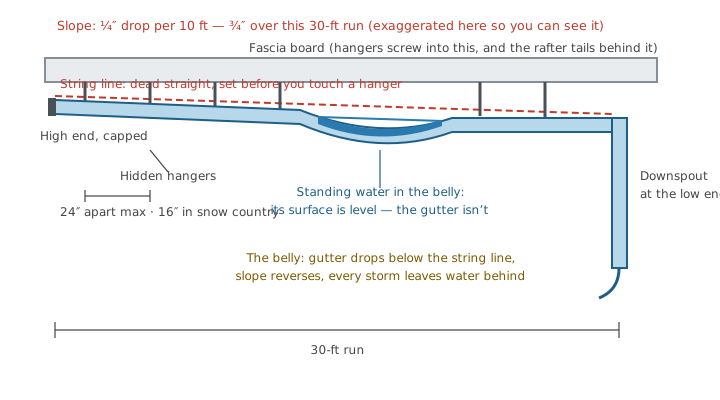
How to Fix Sagging Gutters: Replace Spikes With Screws, Add Hangers, and Reset the Slope
A sagging gutter is a slope problem, a fastener problem, or a rotten-fascia problem — and each has a different fix. The string-line test, the spike-to-hanger conversion, full slope reset, real 2026 costs, and the rehang-or-replace decision.