 Keep
Low Water Pressure in the House: How to Find the Cause (and Fix It)
 Daniel Mercer · Editor & Researcher·
Published November 16, 2026·
Updated November 16, 2026
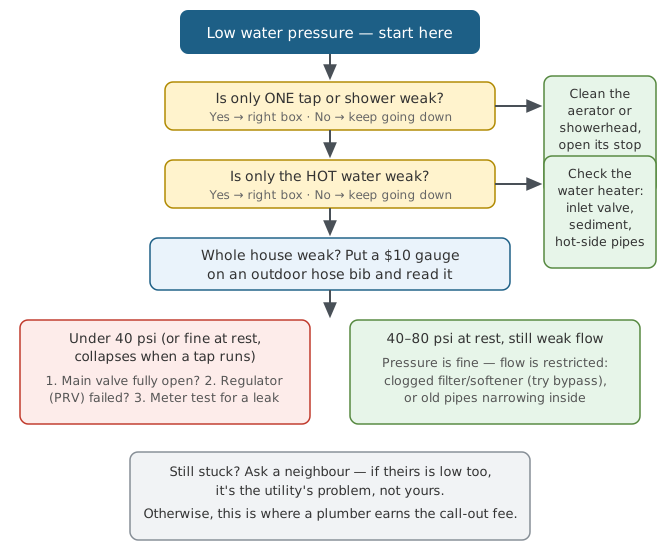
Low water pressure announces itself in small humiliations: a shower that rinses shampoo on the third attempt, a washing machine that takes forever to fill, a garden hose that can't push a sprinkler. Most homeowners respond by living with it for a year and then paying a plumber to find out. You can usually find out yourself in about half an hour, because low pressure is one of the most diagnosable problems in a house — if you ask the questions in the right order.
That order matters more than any single fix. The internet's standard advice is a flat list of nine causes, which leaves you staring at nine possibilities. Instead, this guide sorts by symptom first. Three questions cut the suspect list down to one or two names, and a $10 gauge confirms which one is guilty.
Question one: is it one fixture, or every fixture?
Run two or three taps in different rooms. If only one is weak, stop worrying about your water supply — the problem lives within a few feet of that fixture, and it's almost always one of these:
A clogged aerator or showerhead. The aerator is the little mesh screen where the water exits a faucet. It catches sediment, sand and mineral flakes, and it clogs gradually enough that you adapt without noticing. Unscrew it (wrap the pliers jaws in a cloth so you don't scar the finish), rinse the debris out backwards under a tap, and soak it in white vinegar for half an hour if there's crusty scale. Showerheads clog the same way; unscrew the head and soak it, or fill a plastic bag with vinegar, rubber-band it over the head in place, and leave it overnight. This ten-minute job is the fix for a surprising share of all "low pressure" complaints.
A partly closed stop valve. Every fixture has (or should have) its own shut-off valves — under the sink, behind the toilet, in the access panel behind the tub. Valves get bumped during other repairs, closed by a previous owner chasing a drip, or simply never fully reopened. Turn them fully counterclockwise and test again.
A kinked or failing supply line or cartridge. If the valves are open and the aerator is clean, the flexible supply line or the faucet cartridge itself is restricted. That's a fixture repair, not a house problem.
Question two: is it only the hot water?
If cold runs strong everywhere but hot trickles, the trail leads to one appliance: the water heater.
Check the shut-off valve on the cold inlet to the heater first — it should be fully open, and it's another valve that gets left half-closed after service. Next suspect is sediment: tank water heaters accumulate it at the bottom over the years, and heavy sediment plus scale on the inlet and outlet nipples can throttle hot water flow to the whole house. If your heater has never been flushed and the hot side has faded slowly, that's the likely story (our water heater guides cover flushing step by step). Corroded hot-side piping — especially where steel nipples meet copper — can narrow the line the same way. And if the hot weakness began right after heater work, suspect a valve or a heat-trap nipple installed backwards before you suspect the tank.
Question three: sudden, or gradual?
Whole-house weakness on both hot and cold is a supply problem, and its timeline splits the diagnosis cleanly:
It dropped suddenly → something changed: a valve, a failed part, a leak, or the utility. It faded over years → something is narrowing: almost always the inside of your own pipes.
Keep both branches in mind as we go through the whole-house checks, because the gauge test below means something slightly different in each case.
The $10 test that ends the guessing: measure the pressure
Everything so far has been sorting. This is measuring. Buy a water pressure gauge that threads onto a hose bib — $10–$20 at any hardware store — and do two readings:
- Static pressure. Turn off every tap and appliance in the house (no dishwasher, no washing machine, no toilet refilling). Screw the gauge onto the outdoor spigot nearest where the water line enters the house — or the laundry tap — open it fully, and read the needle. This is the pressure your supply delivers at rest.
- Dynamic pressure. Leave the gauge on and have someone open a bathtub tap fully. Watch the needle while water runs.
Now interpret:
- 40–80 psi static is the normal band. Most homes are happiest at 50–60. If your static reading sits in this range and holds up reasonably under flow, your supply pressure is not your problem — you have a flow restriction somewhere (skip to the filter and pipe sections).
- Under 40 psi static means the house genuinely isn't being fed enough pressure: valve, regulator, leak, or the utility — in that order of checking.
- Healthy static, collapses under flow (say 60 psi at rest, 25 with the tub running) is the signature of a restriction: something between the street and your fixtures is acting like a kink in a hose. A failing regulator, a clogged whole-house filter, or narrowed pipes are the usual three.
- Over 80 psi is not your complaint today, but write it down: code requires pressure to be regulated to 80 or below, because sustained high pressure eats toilet fill valves, bursts washing-machine hoses and makes water heaters weep from their relief valves. A regulator that has failed open gives you high pressure now and a leak later.
Two readings, ten minutes, and you've replaced a list of nine guesses with a direction.
Two gauges, two points: isolating house side from street side
One gauge gives one point's pressure; two points tell you where the problem lives. Borrow a second gauge, or move one and repeat the pair at each point. Point A: the hose bib nearest the entry. Point B: the far end of the plumbing — an upstairs tap, a back laundry faucet.
- Low at A and B, static included → the shortage is before Point A: meter valve, service line, or street (below).
- A healthy, B collapses under flow → an in-house restriction between entry and B: a narrowed or partly closed run.
- Static fine at both, dynamic collapses at both → the choke is at the entry itself: regulator, whole-house filter, or main valve.
- One far tap weak, another fine → that tap's branch line, not the house.
Four numbers, dated and written down — the evidence that decides who pays.
Whole-house cause 1: a valve that isn't fully open
It sounds too simple to be worth ink, which is exactly why it's missed. Houses have several valves in series on the incoming line — the utility's meter valve, your main shut-off, sometimes a second shut-off after the regulator — and any of them left partly closed throttles the whole house. The classic story: plumbing work, a meter swap, a frozen-pipe scare, someone closes a valve and reopens it "most of the way," and the house lives at half pressure for a year.
Find your main shut-off (typically where the line enters the basement, crawlspace or garage, on the street-facing wall). A lever-handled ball valve is open when the lever runs parallel to the pipe. A round-handled gate valve should be turned fully counterclockwise — then back a quarter-turn so it doesn't seize in place. Check the valves at the meter too, if they're on your side and accessible. Gate valves have a second failure mode worth knowing: their internal gate can corrode and drop even when the handle turns freely, so a gate valve that "feels open" isn't proof. If everything else checks out and an old gate valve is in the line, it stays on the suspect list.
Whole-house cause 2: the pressure regulator (PRV) is failing
If your home is on city water, look where the main line enters for a bell-shaped brass fitting with an adjusting bolt on top. That's the pressure-reducing valve. Street pressure commonly runs 80–150 psi — too much for household plumbing — and the regulator's spring and diaphragm squeeze it down to the 50–60 psi your house wants.
Regulators are wear parts. Manufacturers suggest replacement roughly every 5–10 years; in practice many last 10–15. When they fail, they fail in both directions, but the failure that brings you here is failing closed: the valve restricts more and more, and the whole house sags. The tell-tale pattern is a sudden or stepwise drop that stays dropped, with a gauge reading that's low at the hose bib even though your neighbours are fine.
A regulator can sometimes be adjusted rather than replaced: loosen the locknut on top, turn the adjusting bolt clockwise to raise pressure (counterclockwise to lower), with your gauge attached, a quarter-turn at a time, and never bottom the bolt out. If adjustment restores 50–60 psi and it holds for a week, you may have bought some time. If the reading won't move, or creeps back down, the valve is done. Replacement by a plumber typically runs $300–$650 all-in; the valve itself is $40–$250 depending on size, and the job takes an hour or two. Confident DIYers with threaded union fittings can do it for the cost of parts — with the water off at the meter, and the new valve's arrow pointing the right way.
One more regulator trick for the diagnosis: test pressure at a hose bib that sits before the regulator, if your layout has one (many outdoor spigots are plumbed off the main ahead of the PRV). Street-side pressure healthy, house-side pressure low — the regulator just confessed.
Whole-house cause 3: a hidden leak (the meter test)
A leak steals pressure the honest way: water meant for your fixtures is leaving through a hole instead. The leak that matters here is usually in the buried service line between the meter and the house, because it can run for months without surfacing — though a running toilet or a pinhole leak in a crawlspace can do it too.
The test costs nothing. Turn off every tap and water-using appliance. Find your water meter and look at its flow indicator — a small spinning triangle or dial on most meters, or a digital readout that shows flow. If it's moving with everything off, water is going somewhere it shouldn't. For a slower leak, write down the meter reading, don't use any water for an hour (overnight is even better), and read it again. Any change is a leak, full stop.
What next depends on where. Shut off the house at your main valve and watch the meter again: still moving means the leak is between the meter and the house (the service line — a pro job, and worth several quotes); stopped means it's inside, and you can hunt fixture by fixture, starting with toilets, the champions of silent leaking. A service-line leak is the one cause in this guide that gets worse and more expensive by the month — it erodes soil as it goes — so it jumps the queue ahead of every other fix.
The repairs, priced. An accessible indoor leak is cut-out-and-replace — a few hundred dollars, an hour or two. A buried service line is bigger work: the pro pinpoints it first (acoustic leak detection, $150–$400, often credited toward the repair), then spot-repairs the failed joint or replaces the line, trenched or pulled trenchlessly. Expect several thousand for a full replacement, and a quote itemising locating, excavation, line and backfill — one round number earns a second quote.
Whole-house cause 4: pipes narrowing from the inside
Now the gradual branch. If your house was built before the 1970s and still has galvanized steel supply pipes, those pipes have been rusting from the inside out for fifty years. The rust doesn't just flake — it builds up in rough layers that shrink the pipe's bore, so a 3/4-inch line may pass water like a 3/8-inch one. The symptoms are textbook: pressure that was fine in 2005 and sad now, worse on the hot side and on upper floors, rusty-tinged water after the house sits empty for a weekend, and a static gauge reading that's perfectly normal — because pressure isn't the problem. Flow is. Denver Water, which fields this call constantly in older neighbourhoods, puts it plainly: many "low pressure" complaints are really low flow from narrowed pipe.
There's no cleaning cure that lasts; descaling products and pipe "rejuvenation" are temporary at best. The real fix is repiping — new copper or PEX runs to the fixtures — and it's the most expensive answer in this guide, starting around $10,000 for a two-bathroom home and rising with size and access. That's precisely why the diagnosis matters: you want to be sure it's the pipes (gauge healthy, valves open, regulator proven good, no leak, filters bypassed) before you entertain a five-figure fix. And note that repiping can be staged — the worst runs first — which a good plumber will discuss honestly.
What the job looks like: a crew runs new PEX alongside the old lines through small wall patches, connects each fixture and pressure-tests — one to two days for a two-bathroom home. Staging saves real money: replacing only the worst runs (the hot side, the upstairs feeds) can restore most of the pressure for a few thousand dollars, the rest left for later. Get the quote priced per run.
Copper and PEX houses aren't immune to narrowing, but their version is usually localised: a clogged section after a repair, debris in one run. Whole-house gradual fade in a post-1980 house should make you look harder at the next cause first.
Whole-house cause 5: a clogged filter or softener
If the weakness arrived within weeks of installing (or neglecting) a whole-house filter, sediment cartridge or water softener, you've probably already met the culprit. These devices sit in the main line, and a loaded cartridge or a fouled softener bed is a restriction like any other. The test takes one minute: switch the unit to bypass and run a tap. Pressure back? Service or replace the media/cartridge and put "change the filter" on the same calendar as your other annual chores. This is the most satisfying diagnosis in the whole guide — a real fix for the price of a cartridge.
The fix, step by step for a cartridge filter: close the valves flanking the housing, open a tap to relieve pressure, press the housing's relief button if fitted, and unscrew the sump — bucket underneath, it's full. Seat the new cartridge, check the O-ring, hand-tighten plus a quarter-turn, reopen slowly, flush two minutes, and date the housing. For a softener, run a manual regeneration; if bypass still beats service mode, the resin bed is fouled — resin cleaner rescues mild cases; a spent bed means new media, a few hundred dollars and a pro visit.
The street side: your pipes vs the utility's
The dividing line in most US systems: the utility owns the water main and usually the meter; you own the service line from the meter to your house and everything after it. (In some cities the utility owns to the curb stop; one call settles your address.)
Most states set a minimum pressure at the meter — a floor around 20–25 psi is common, 40 or better typical. Below its floor, fixing their side (a failing main, a street valve, the meter) is the utility's work at the utility's cost.
Request a pressure and flow test at the meter — a routine, normally free service. Give them your numbers: "52 psi static, 24 with a tap open, neighbours fine" beats "pressure seems low." If their side is healthy, it's yours. If it's low, get the finding in writing, dated: it turns a follow-up into scheduled work and evidences a state commission complaint if the utility shrugs. No booster pump before this test.
The bucket test: measuring flow when pressure looks fine
The gauge measures pressure. Your shower complains about flow — gallons per minute — and the two are related but not identical. A house can show a healthy 60 psi at rest and still deliver a miserable shower if something restricts the volume of water that can move. That's why there's a second test, and it needs a bucket and a phone timer instead of a gauge.
Use the bathtub spigot (it has no aerator and no flow restrictor) or the hose bib. Time how long it takes to fill a container of known size — a one-gallon jug for a rough number, a five-gallon bucket for a better one. A healthy unrestricted spigot fills a gallon in roughly 10–15 seconds, around 4–6 gallons per minute. For comparison, modern showerheads are rated at 1.8–2.5 gpm, so the supply should be able to deliver well beyond what one shower asks for.
Now the diagnostic part: run the same test while a second fixture runs — flush a toilet or open another tap mid-fill. If the flow falls off a cliff, your system can't keep up with two demands at once, which points back to a restriction (regulator, filter, narrowed main) rather than the supply. If flow is poor even solo at the tub but the hose bib near the entry point runs strong, the restriction is inside the house's own piping, somewhere between the two. The bucket test plus the gauge test together can locate a problem to within a few pipe-fittings, for about ten dollars total.
Do both tests on the day you move in, or the day you read this — whichever comes first — and write the two numbers on the inside of the cabinet door nearest the main valve, or in the same house folder as your septic and well records: static psi, dynamic psi, and gallons per minute at the tub. Those three numbers are your house's baseline. Every future pressure complaint gets compared against them, and the comparison usually names the culprit before you've spent a cent: pressure down means supply or regulator; pressure steady but flow down means restriction. Diagnosis stops being a debate and becomes arithmetic.
Why the upstairs shower is always the first to suffer
Water loses pressure as it climbs: about 0.43 psi for every foot of height. A second-floor showerhead sits roughly 18–20 feet above where the main enters the basement, so it starts life about 8–9 psi poorer than the kitchen tap. In a house sitting at 55 psi, nobody notices. In a house sagging at 42 psi, the upstairs shower is effectively running at 33 — and it's the upstairs shower that generates the complaint, months before the downstairs taps feel weak.
Long pipe runs do the same job horizontally. Every foot of pipe and every elbow adds friction, and older homes often feed a far bathroom through a long, undersized branch line. This is why "low pressure in one bathroom" in a newer house is usually that bathroom's valves and fixtures, while the same complaint in an older house deserves the whole-house checks too — the far bathroom is simply where a house-wide problem shows first.
What about a booster pump?
If your street pressure is genuinely low — the gauge proves it, the neighbours confirm it, and the utility says that's what your street gets — a booster pump is the legitimate fix: it raises incoming pressure to a set level for the whole house. Installed systems typically run from several hundred to over fifteen hundred dollars, and some utilities and local codes have rules about them (a few require a small storage tank so the pump doesn't pull directly on the main).
But be honest about what a booster pump can't do. It raises pressure; it does not remove restrictions. Bolting one onto a house whose real problem is a clogged filter or corroded pipe is like pressing the accelerator with the handbrake on — you'll get noise, wear and a bigger bill, and the shower will still disappoint. Booster pumps are the answer to exactly one diagnosis: proven low supply pressure. Everything else in this guide is cheaper.
On a well? Your suspects are different
Everything above assumes city water. If your house is on a private well, whole-house low pressure points at the well system instead: the pressure tank (a waterlogged tank with a failed bladder makes the pump cycle constantly and pressure seesaw), the pressure switch settings (typically 40/60 or 30/50 psi — the low number is what you feel), a tired pump, or a falling water level in the well itself. The gauge on the tank tee is your starting point, and our well water guides cover that system in depth. The one-fixture and hot-only branches of the flowchart still apply exactly the same.
If a well system is steady but set low, the switch can be reset — 30/50 up to 40/60 is the common move. Breaker off, tank drained to zero, cover off, turn the tall spring's nut clockwise: roughly 2–3 psi per full turn, raising cut-in and cut-out together. Reset the tank's air charge to 2 psi below the new cut-in — 38 psi for 40/60 — restore power and watch a full cycle. Never set cut-out above the tank's rating; if the pump can't reach it, put it back.
Pressure that swings instead of settling (well systems)
If you're on a well and the pressure doesn't just sit low but oscillates — strong, weak, strong again, with the pump clicking on and off every few seconds while a tap runs — suspect the pressure tank before anything else. The tank holds a cushion of air that the pump compresses; that cushion is what delivers steady pressure between pump cycles. When the tank's bladder fails or the air charge leaks away, the tank "waterlogs": nearly all water, no cushion. The pump then short-cycles violently — on, off, on, off — which both swings your pressure and burns out the pump motor, the expensive part, to protect a tank that costs a few hundred.
The check takes five minutes and a tyre-pressure gauge. Turn the pump off at the breaker, open a tap until water stops, then read the air valve on top of the tank: it should read about 2 psi below the pump's cut-in pressure (on a common 30/50 switch, that's ~28 psi). Zero or near-zero means the charge is gone; water sloshing when you rock the tank gently confirms waterlogging. A tank that just needs air can sometimes be recharged; a failed bladder means a new tank — a plumber job of a few hundred dollars that saves a pump costing several times more.
When to stop diagnosing and call
Call a plumber when: the meter test proves a leak you can't locate; the service line is implicated; a regulator replacement involves soldered fittings you're not set up for; or the diagnosis lands on repiping and you need quotes. Call the utility, not a plumber, when your neighbours share the problem, when pressure dropped suddenly across the street, or when low pressure arrives with cloudy or discoloured water — and check for a boil-water notice before drinking, since main breaks can let contaminants in.
And keep the gauge. A ten-dollar tool that lives in the kitchen drawer turns next year's "the shower feels weak again" into a two-minute check against the numbers you wrote down today. That's the real fix for low water pressure: not any single valve or part, but knowing your house's normal — and noticing the week it changes.
Cost at a glance
| Item | Typical cost | Notes |
|---|---|---|
| Water pressure gauge (hose-bib type) | $10–$20 | The single most useful diagnostic tool for this problem |
| Pressure regulator (PRV) replacement — pro | $300–$650 | Parts are $40–$250 of that; the rest is 1–2 hours of labour |
| PRV replacement — DIY parts | $65–$180 | Valve plus fittings, if your existing setup uses threaded unions |
| Repiping a two-bathroom home | $10,000+ | The last-resort fix for corroded galvanized pipe; get several quotes |
Frequently asked questions
What is normal water pressure for a house?
Between 40 and 80 psi. Most homes feel best around 50–60 psi: strong showers, fast-filling tubs, no strain on the plumbing. Below 40 psi you'll notice weak fixtures everywhere. Above 80 psi is the opposite problem — plumbing code requires a regulator at that point because high pressure wears out valves, supply lines and appliances, and it can cause water hammer and pinhole leaks.
Why did my water pressure drop all of a sudden?
Sudden drops have short suspect lists. Work through them in order: utility work or a main break in your street (ask a neighbour — if theirs dropped too, it's not your plumbing); a main shut-off or meter valve left partly closed after recent work; a pressure regulator that has failed; or a leak that has opened up, including in the buried service line. A $10 gauge and the meter test in this guide will separate those in under half an hour.
Why is my water pressure low only in the shower?
Almost always the showerhead itself: mineral scale and sediment clog the spray holes, especially on well water or hard city water. Unscrew it and soak it overnight in white vinegar, or tie a vinegar-filled bag over it in place. While it's off, run the water briefly — if it blasts out of the bare pipe, the head was the problem. If the whole bathroom is weak, check the stop valves behind the access panel or under the sink next.
Can low water pressure damage anything?
Low pressure itself mostly damages your patience. What causes it can be another matter: a hidden leak can rot framing and grow mould for months, and corroding pipes eventually leak inside walls. Treat low pressure as a symptom worth diagnosing promptly rather than an emergency — except the leak case, which deserves same-week action.
Will a new pressure regulator fix low pressure?
Only if the old regulator is the cause — which the gauge test tells you before you spend anything. If street pressure at the hose bib reads low with the regulator in the line and your neighbours are fine, the regulator is the prime suspect. If the reading is healthy (40–80 psi) but fixtures still run weak, your problem is flow restriction — clogged filters or narrowing pipes — and a new regulator will change nothing.
My pressure is fine in the morning but weak in the evening. Why?
That's usually demand, not damage. Whole neighbourhoods draw water at the same hours, and street pressure sags a little at peak times; a house with marginally sized or partly restricted pipes feels it first. It can also be your own house: pressure that collapses only when two or three fixtures run together points to a restriction (regulator, filter, or narrowed pipe) rather than the supply. The gauge test — once at rest, once with a tub filling — shows the difference clearly.
How much does a plumber charge to fix low water pressure?
It depends entirely on the cause, which is why diagnosis comes first. A regulator replacement typically runs $300–$650 fitted. Leak repair varies from a few hundred dollars for an accessible pipe to several thousand for a buried service line. Full repiping of an older two-bathroom home starts around $10,000. A homeowner who has already done the gauge and meter tests can describe the problem precisely — and is far less likely to pay for parts that were never the issue.
Checked November 16, 2026. This guide is general information, not a substitute for a licensed professional.
Related guides
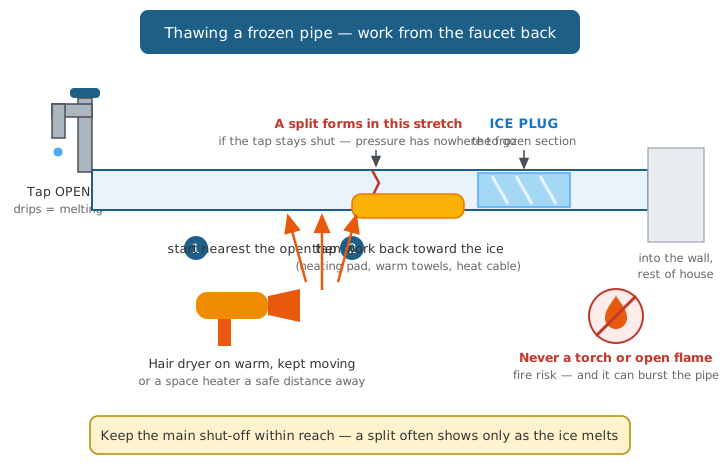
Frozen Pipes? Thaw Them Safely — and Catch the Split Before It Floods the House
No water from one tap on a freezing morning? Find the frozen section, thaw it safely with the faucet open, spot the split as the ice melts, and prevent the next freeze — with real costs.
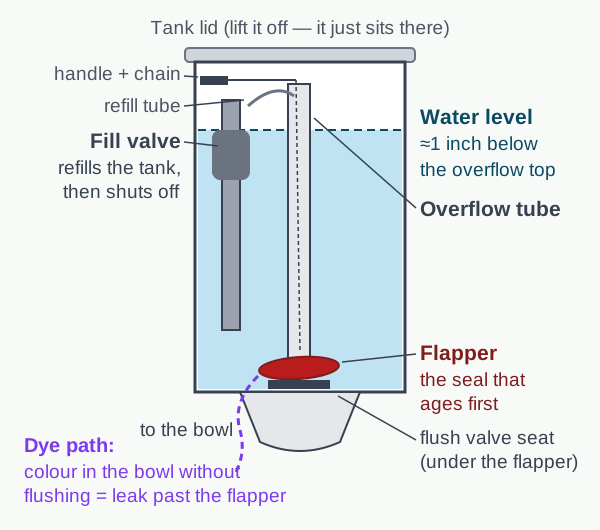
Toilet Keeps Running? The Dye Test Finds the Guilty Part in 15 Minutes
A toilet that refills by itself is leaking from tank to bowl, and one part is almost always to blame. Run the dye test, find it in 15 minutes, and fix it for the price of a coffee.
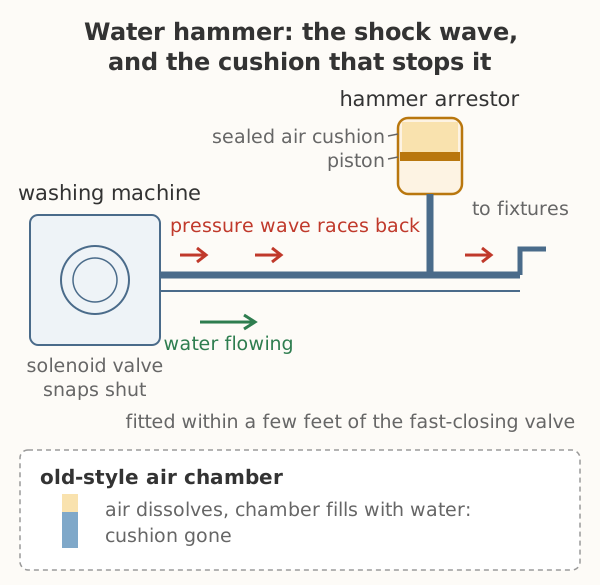
Pipes Bang When the Water Shuts Off? Water Hammer, Fixed in Order of Cost
A loud bang every time the washer, dishwasher or toilet stops filling is water hammer — a pressure spike, not just a noise. How to find the trigger fixture, then the fixes in order of cost, from a free drain-down to a $20 arrestor.